Introduction
Angular Forms is commonly used in real world applications. It provides developers simple yet comprehensive ways to validate users’ inputs before submitting them to the Backend. In this tutorial, we will cover how you may write unit tests for Angular Form.
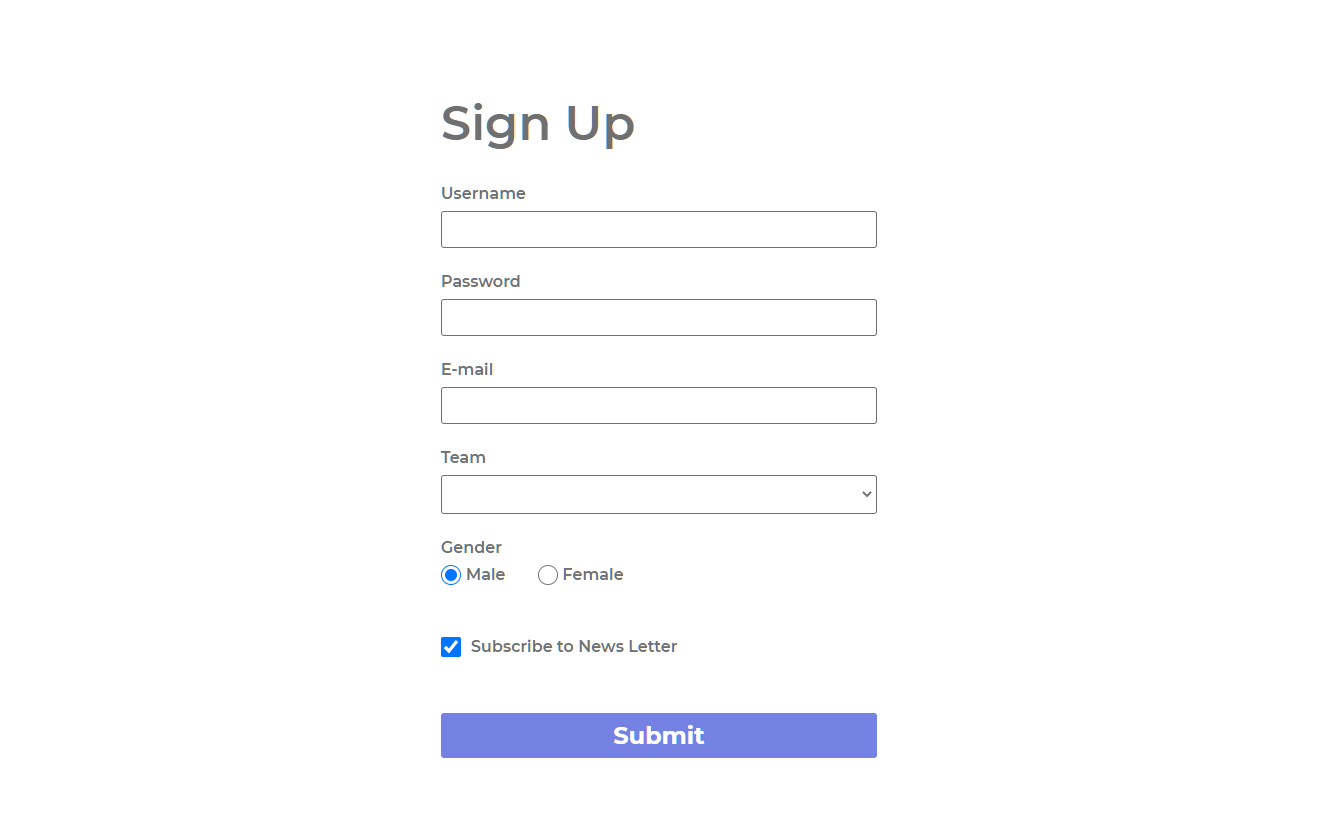
Angular Form testing can be roughly splitted into three categories: HTML structure test, FormControl binding test, and FormControl validation test. Therefore, for this tutorial, we have prepared a simple sign up form that consists of some commonly used HTML input elements. We will go over them one by one to demonstrate how you may interact with them in the Angular test environment.
TestBed Initialization
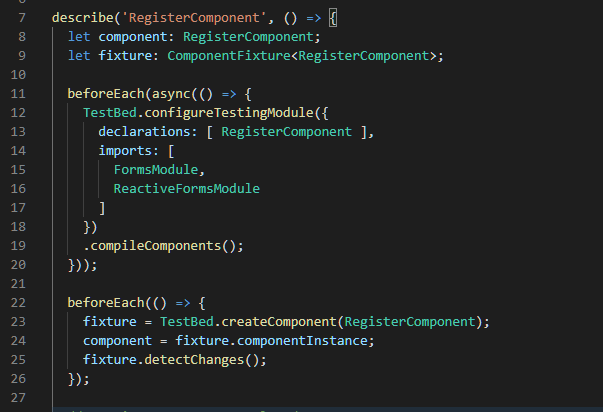
In order to work with Angular Form in the test environment, we must import the FormsModule into the TestBed. In the demo application, we are using the Reactive Form approach, so we need to import both the FormsModule and the ReactiveFormsModule.
Demo Application Introduction
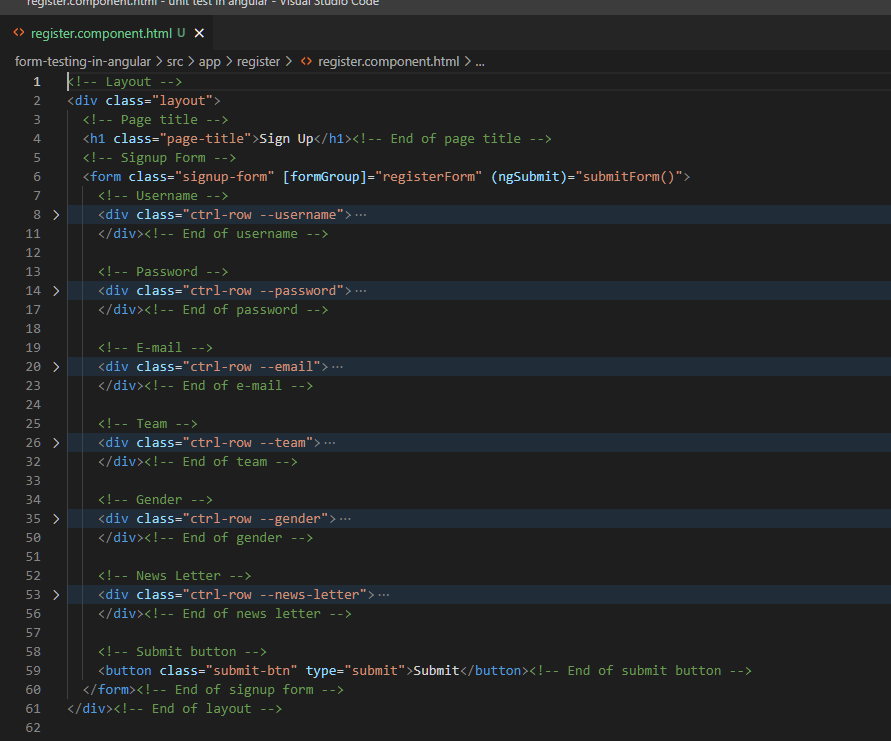
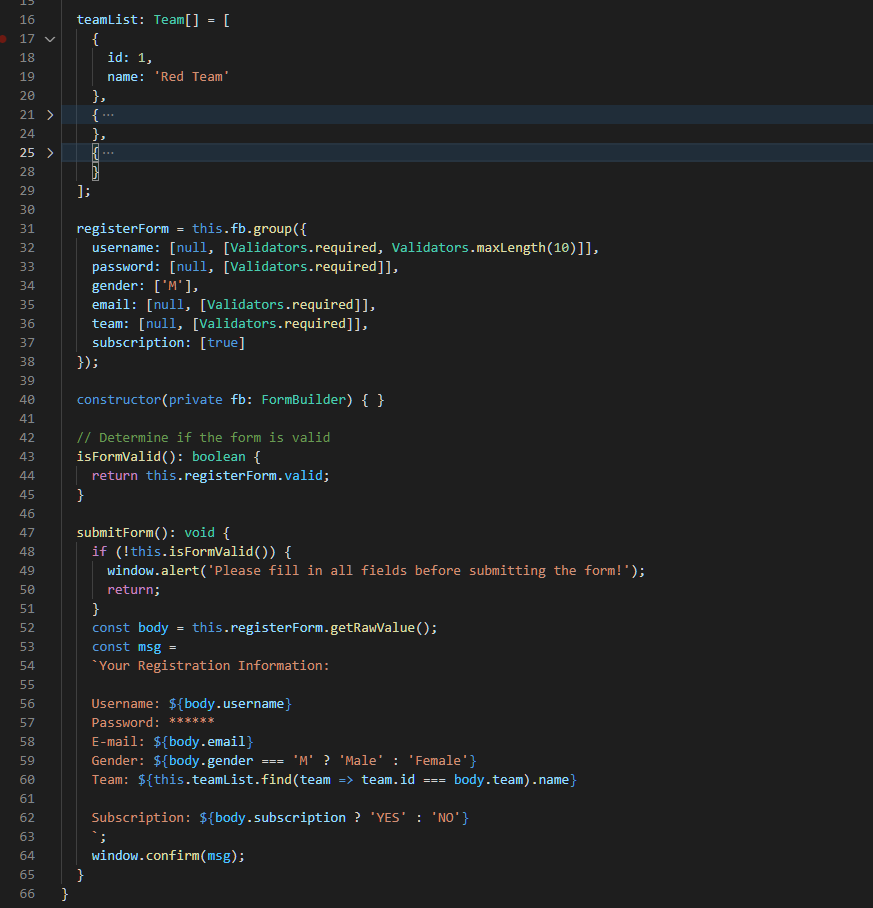
The sign up form contains a h1 element and a form element from the top level. Inside the form, there are six FormControls and one submit button.
On the other hand, in the TypeScript file, there are only two functions. isFormValid and submitForm. In real world cases, we will send API to the Backend in the submitForm function, however, for demo purposes, we will simply display the registration information to the user by calling the window.confirm method.
Input Element Testing
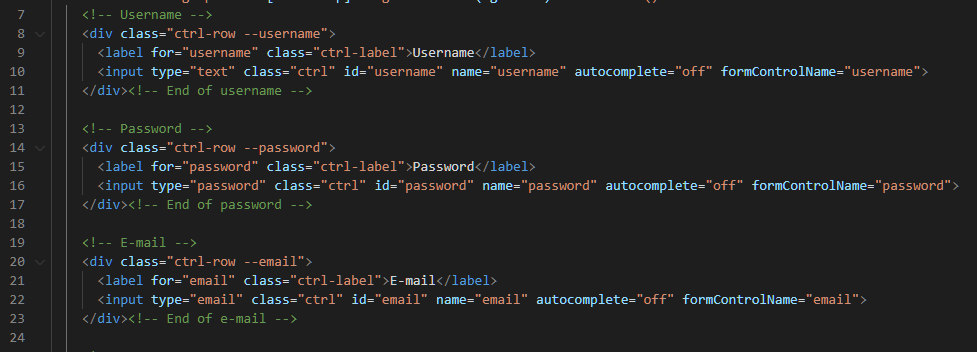
For this sign up form, there are three input controls: Username, Password, and E-mail, so let’s take a look at them together.
HTML Validation
Like all other component testing, we can validate the HTML structure as we did in the previous tutorial. Specifically, you want to verify that input elements have all the proper attributes set in the HTML.
For instance, for Input elements, some common attributes that’s worth including in your tests include: type, name, maxlength, minlength, autocomplete, etc…
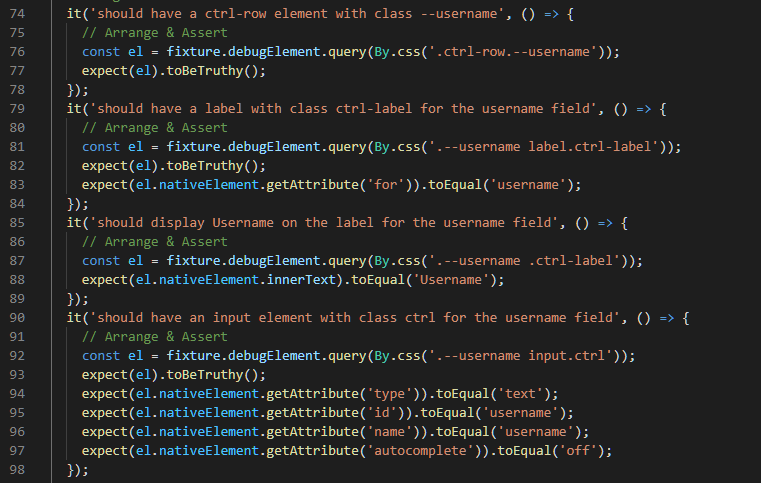
Like other HTML elements, we can access their attributes by calling the getAttribute function from the nativeElement.
Form Binding
For the form binding test, we could easily test it by updating the value in the FormControl then test if the value of the FormControl is reflected on the bound input element.

To access the value on the HTML input element, we can directly read it from the value property of its nativeElement object. If you want to be precise, you could also first convert the nativeElement to the HTMLInputElement type before reading the value, but the result should be the same.
Validation
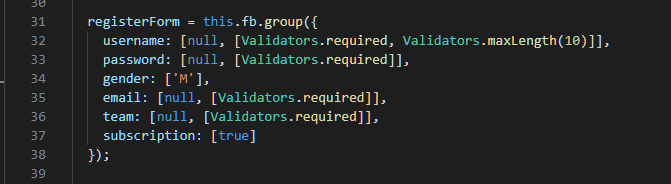
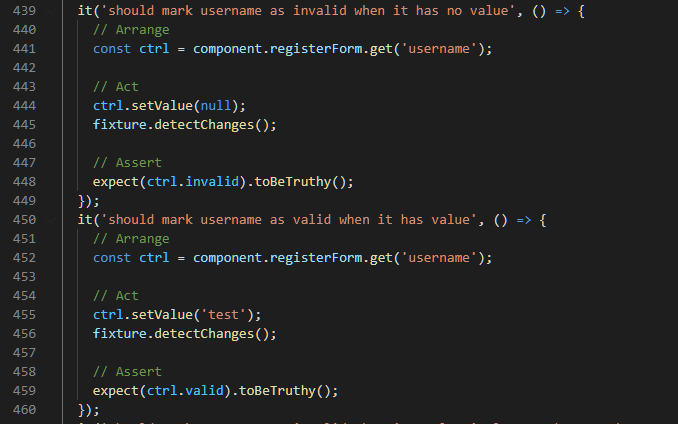
The username FormControl contains two Validators: Required validator and maxLength validator.
We can write two tests for the required validator:
- The username FormControl should be marked as valid when it has a value of length less than 10
- The username FormControl should be marked as invalid when it does not have any value
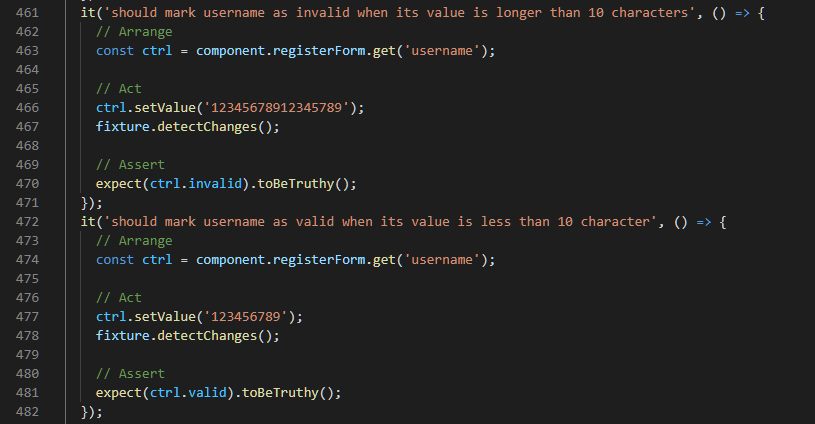
Similarly, for the maxLength test, we could also develop two tests.
- The username FormControl should be marked as valid when its value has a length less than 10
- The username FormControl should be marked as invalid when its value has a length greater than 10
Select Element Testing
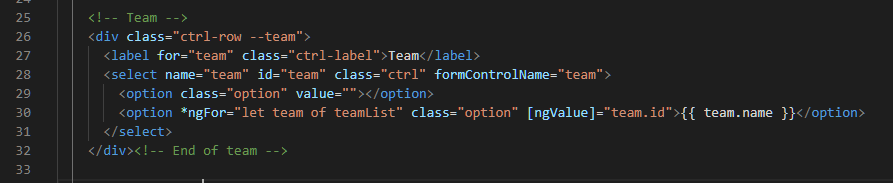
Unlike Username, Password, and E-mail, the Team FormControl uses a dropdown element (select element) with a dynamically generated option list.
HTML Validation
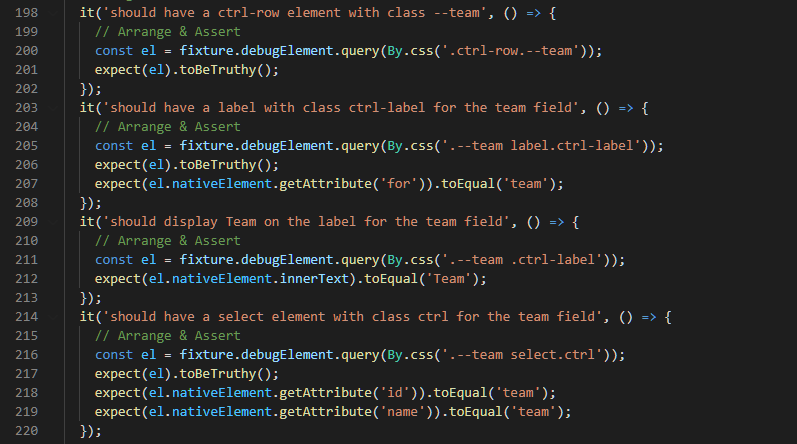
The HTML testing for the Select element is pretty similar to the Input element, where we check the HTML structure and their attributes. However, with Select element, we will have a dynamic number of option elements that are rendered at runtime using ngFor. Therefore, on top of what we test for the Input element, we should at least write two additional tests:
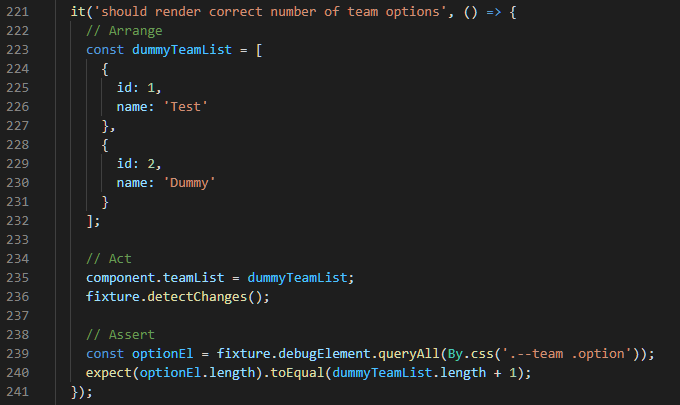
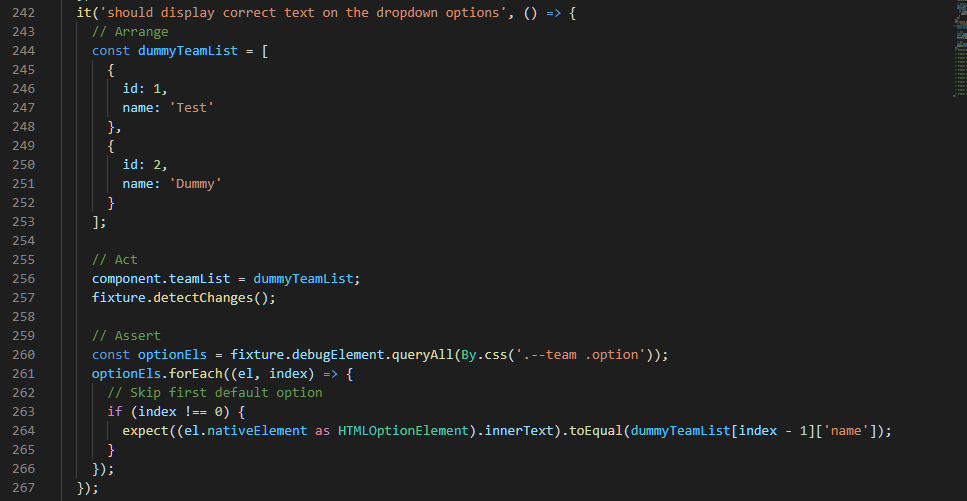
- There are correct number of option elements rendered on the HTML
- Each rendered option element has correct value binding and display the correct text
Form Binding
To test if the team select element is binding to its FormControl correctly, we can also use the same approach: set the value on the control then validate from the HTML. However, it’s a bit tricky to read the selected element from the Select element than from the Input element.
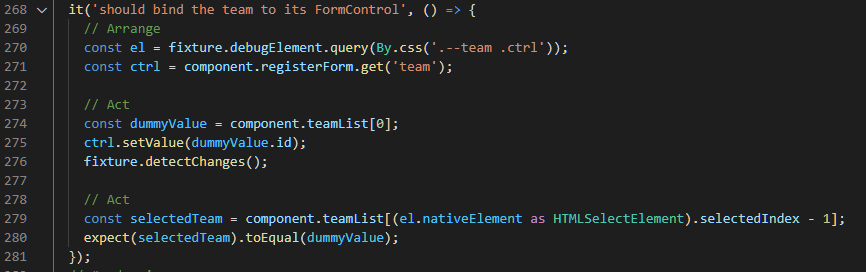
In the example above, we read the value from the HTML by first querying the Select element, reading its selectedIndex, then comparing the value with the option we set on the control.
Validation
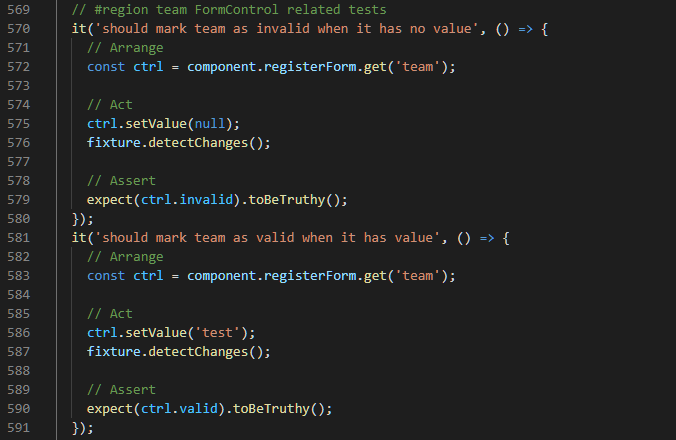
Since we only have a required validator for the team FormControl, we can test its validator function as we did before.
Radio Button Element Testing
The Gender FormControl uses a radio button group with two options.
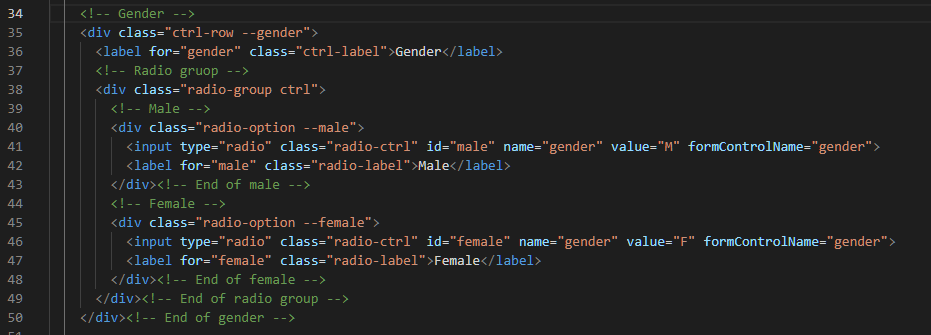
HTML Validation
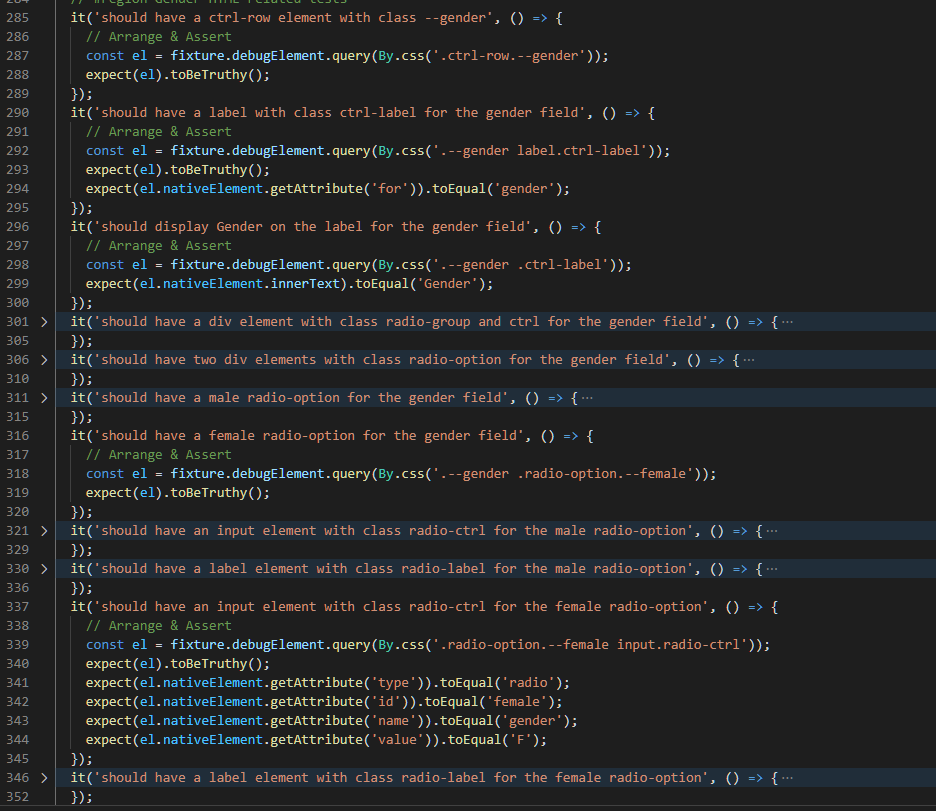
Since the HTML for the gender field is a bit more complex, there are many more test cases in order to cover their HTML structure. However, what’s important is that you should validate its attributes such as type, name, value, … etc.
Form Binding
To test the form binding of radio buttons, we can also set value on its FormControl directly then validate the selected radio button from the HTML.
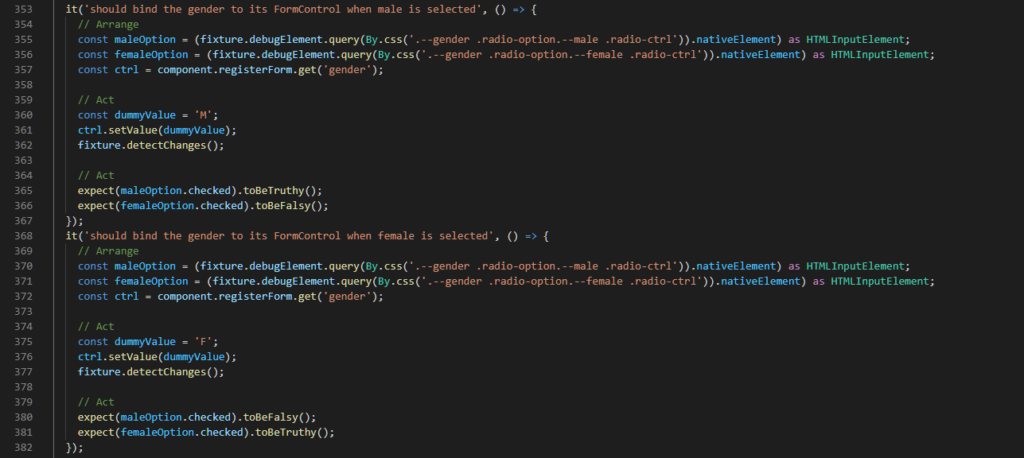
To verify if a radio button element is selected, first query its input element, convert the nativeElement to type HTMLInputElement, then determine if it’s selected by reading from its checked property.
Validation
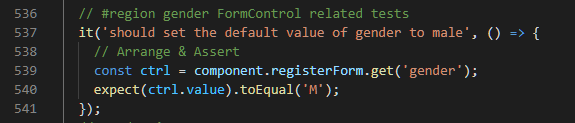
For the radio button validation test, since users will not be able to unselect a radio button, our validation test will focus on if there is a default value given for the radio button.
Checkbox Element Testing
Last but not the least, we have a subscription checkbox that asks if users would like to receive newsletters in the future.

HTML Validation
For the checkbox element HTML tests, besides from the HTML structure tests, we also verify if the correct type attribute is set on the input element.
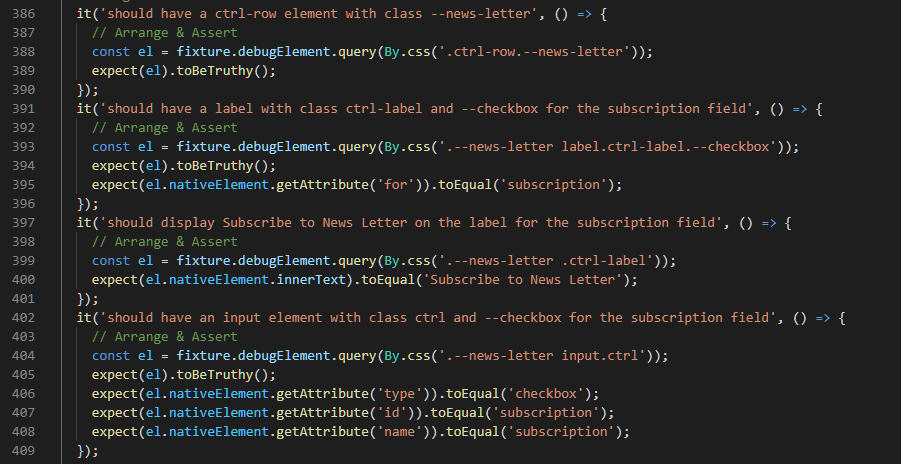
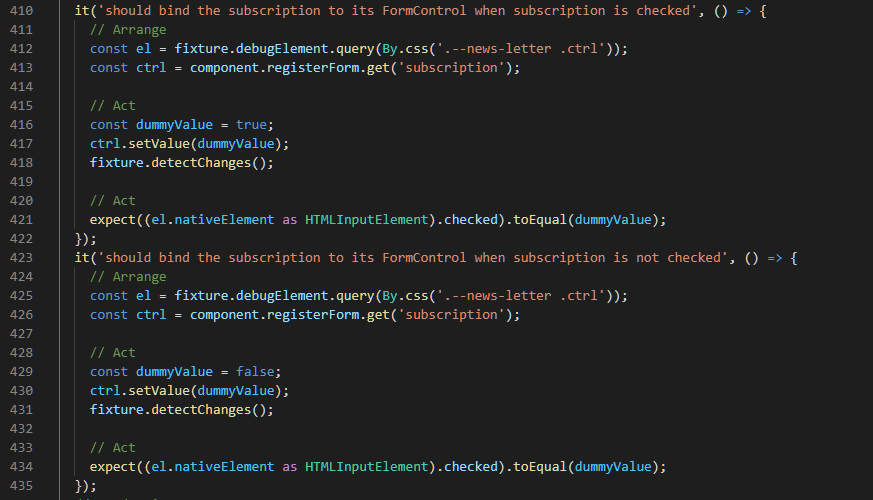
Form Binding
As for the form binding, we set the value on the subscription FormControl and verify if the checkbox element’s checked property is updated accordingly.
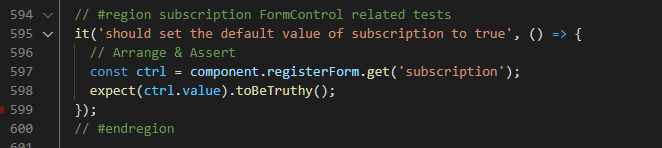
Validation
Similarly to the radio button, for the validation test, we want to check if the checkbox is set to checked by default.
Form Submit Event Testing
There are two ways to test the form submit functionality.
1. Trigger the ngSubmit event directly on the form
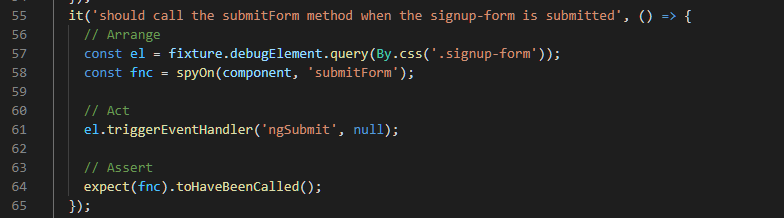
In the test case above, we set a spy on the callback function that’s supposed to be called when the form is submitted, then we trigger the ngSubmit event on the form element and test if the spy was indeed called.
2. Click on the submit button
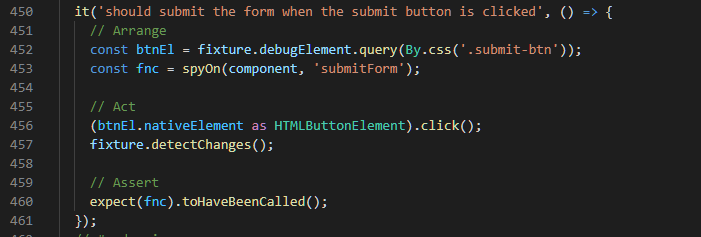
In the second approach, instead of triggering the ngSubmit event on the form, we click on the submit button directly and test if the callback function is called.
Note. In order to test the form submit feature with this approach, you must make sure the type property on the submit button element is not set to button. If the button type is set to button, it will not trigger form submit on click.
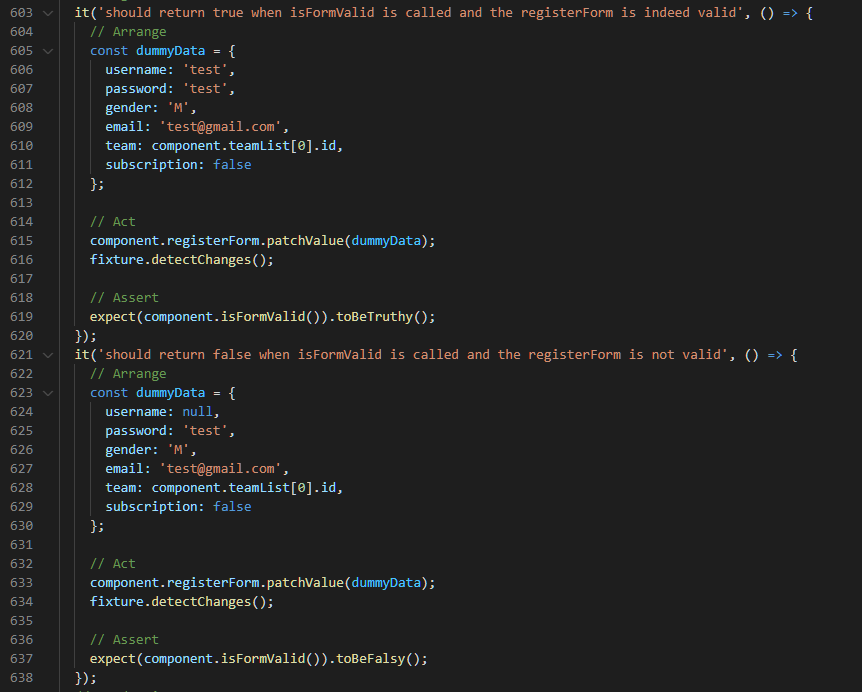
Form Validation Testing
For the validation function, we want to test if the isFormValid function works correctly by only returning true when the form is indeed valid.
Submit Form Testing
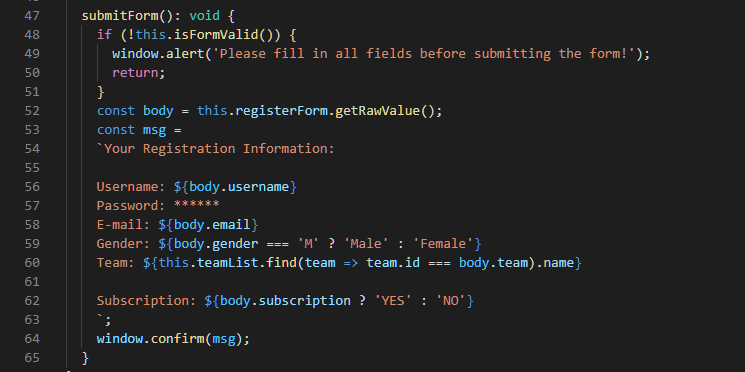
When the submitForm function is called, we want to make sure the form is submitted only when isFormValid returns true, otherwise, it should show an alert message.
Note. We use window.confirm to simulate API calls, in your application, you want to check if the API call to the Backend is made instead.
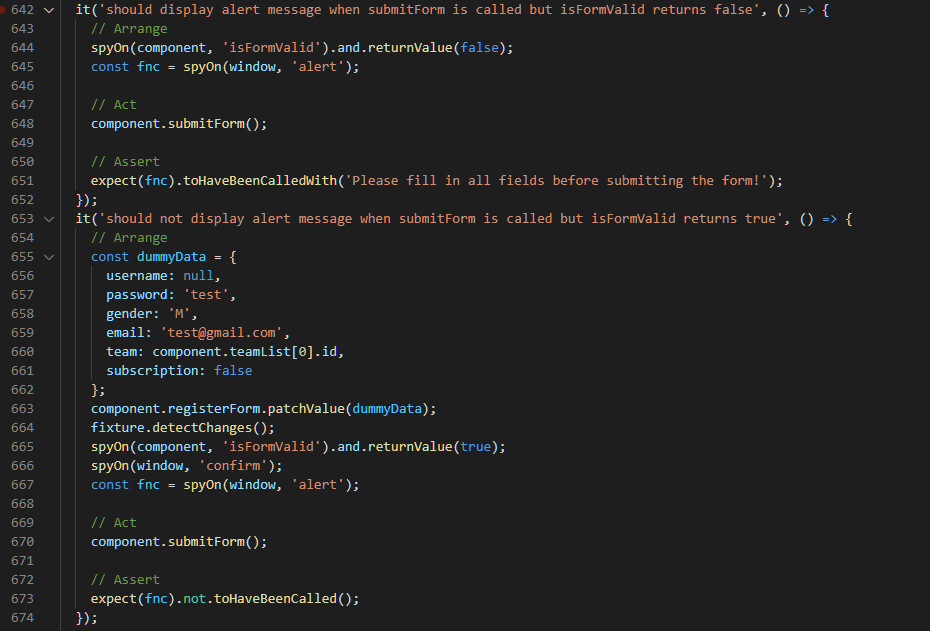
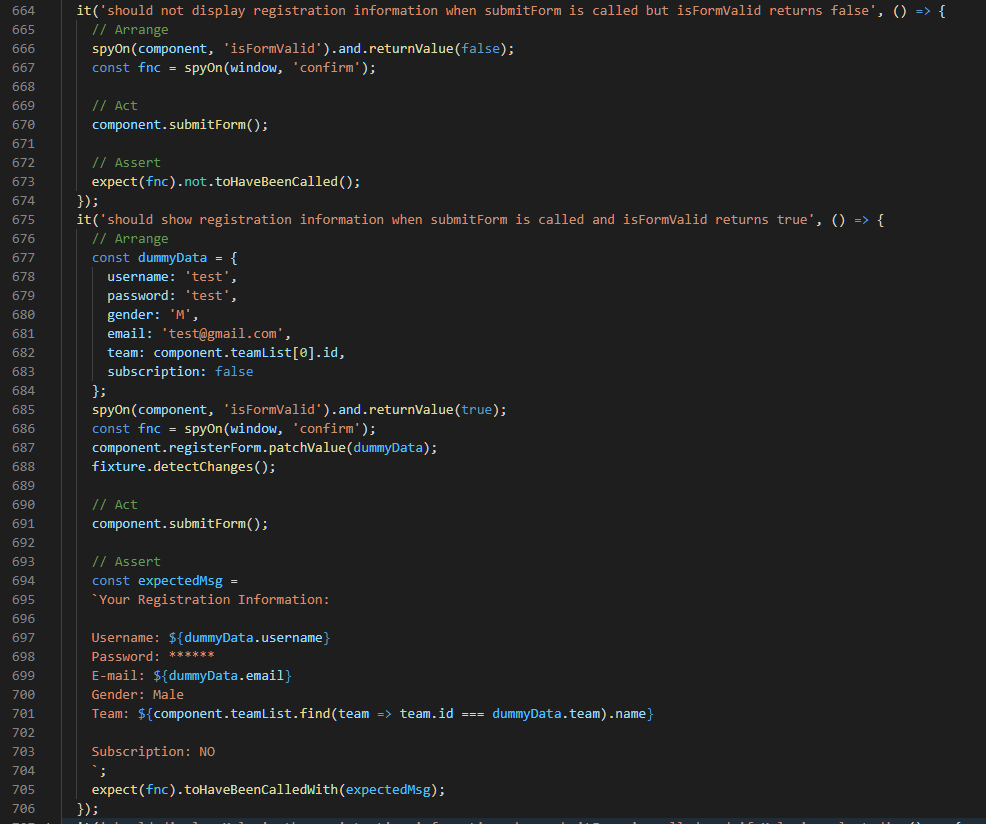
Alert Message Test
For the alert message, we prepare two test cases (one positive and one negative) to test if the alert message is displayed at the appropriate time.
Form Submit Tests
For form submit tests, you’ll want to test when the form is submitted, is the data formatted correctly before passing to the Backend (or in our case the confirm function).
Conclusion
In this tutorial we have covered some commonly used form control HTML elements and how to write tests for them in the aspect of HTML validation, Form Binding, and Form Validation. If you use different form control elements (such as Angular Material), even though the way of reading its value from the HTML element might be different, in the end the form testing for that component should still involve these three aspects of testing.
In the last part of this tutorial, we replace the form submit API call with a window.confirm function, so that we can focus on form testing only. In the next tutorial, we will go over how you may deal with API testing or also known as asynchronous testing in Angular.
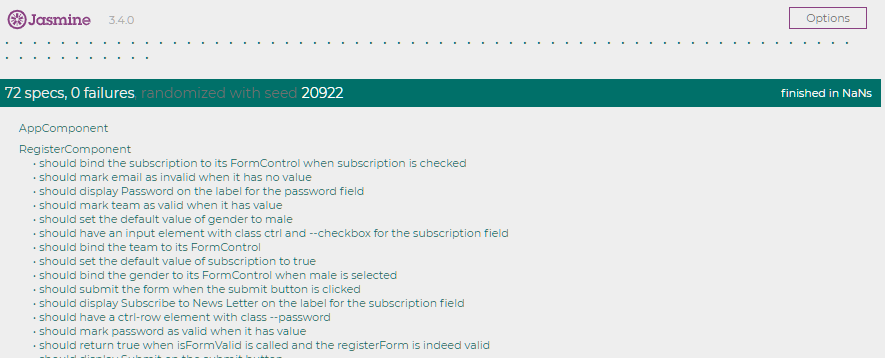
There are a total of 72 tests for this tutorial, and you can find the complete listing on GitHub.