
Introduction
Hello everyone, this is the first tutorial of the series – Complete guide of deploying static websites on AWS. In this series, we are going to walk you through the process of deploying a static website on AWS (Amazon Web Service). Please note that this series is intended for static website deployment only. For dynamic websites, we will need to cover them in another tutorial. The series contains four chapters. If deploying to AWS is all you need then this tutorial will be sufficient. All the other chapters are good to have and can work on their own. However, in professional or industrial scenarios, they are most of the time mandatory.
Outline
We will cover the following topics in this series.
- Host static website on AWS S3
- Set up custom domain with HTTPS and add global cache
- Anomaly detection – protect against DDOS attack
- CICD support – automatically deploy to AWS
Concept
A website is referred to as a static website when all of its contents are formed at the client side (the web browser). In a typical static website, when a visitor visits the page, the server will only send an empty HTML page, Javascript files and CSS style sheets to the client. The client will be responsible for rendering the final HTML using the logics defined in Javascript files. If you are using any of the popular Frontend frameworks: Angular, React and Vue then most likely your website is a static website.
In contrast, a website is referred to as a dynamic website when all of its contents are formed at the server side. When a visitor visits the page, the client browser will send the url request to the server. The server will form an HTML page based on the request URL and return the final page to the client. Some populate frameworks that build dynamic websites are: Laravel, Ruby on Rails, and ASP.NET.
Now you understand the difference between a static website and dynamic website, we can move on to the deployment part.
There are typically two ways to deploy a website:
1. Have a server and render your website contents (dynamic or static)
2. Bundle all your code in docker and run the docker on a server (more preferable way nowadays).
With either approach, you will need to rent a server and keep in running 24/7 to ensure there will not be interruption of your service. Furthermore, you will also need to consider auto scaling your website during high traffic and pick the right hardware spec (CPU and memory). All of these can be expensive and that’s why we have the third approach for static websites – The Serverless approach.
In a Serverless deployment, we do not need to rent a server and keep it running for 24/7 nor do we need to worry about autoscaling or hardware spec. Instead what we need is a file storage service where we can put our Frontend files since what we have is a static website (Yes, you can also deploy static websites with Google Drive). AWS has a service that is exactly for this purpose – S3 (Simple Storage Service). The benefits of using AWS S3 include the unbelievable low cost and the high durability. Amazon claims files stored on S3 have a durability of 99.99999999999% (11 9’s) because when a file is stored on S3, AWS will automatically create backups for you. To learn more about AWS S3 visit their official website at https://aws.amazon.com/s3/ and about their pricing you may visit https://aws.amazon.com/s3/pricing/.
Prepare the Frontend code
While there are many ways to prepare a static website, we will use Angular for this tutorial, but the concept should be the same.
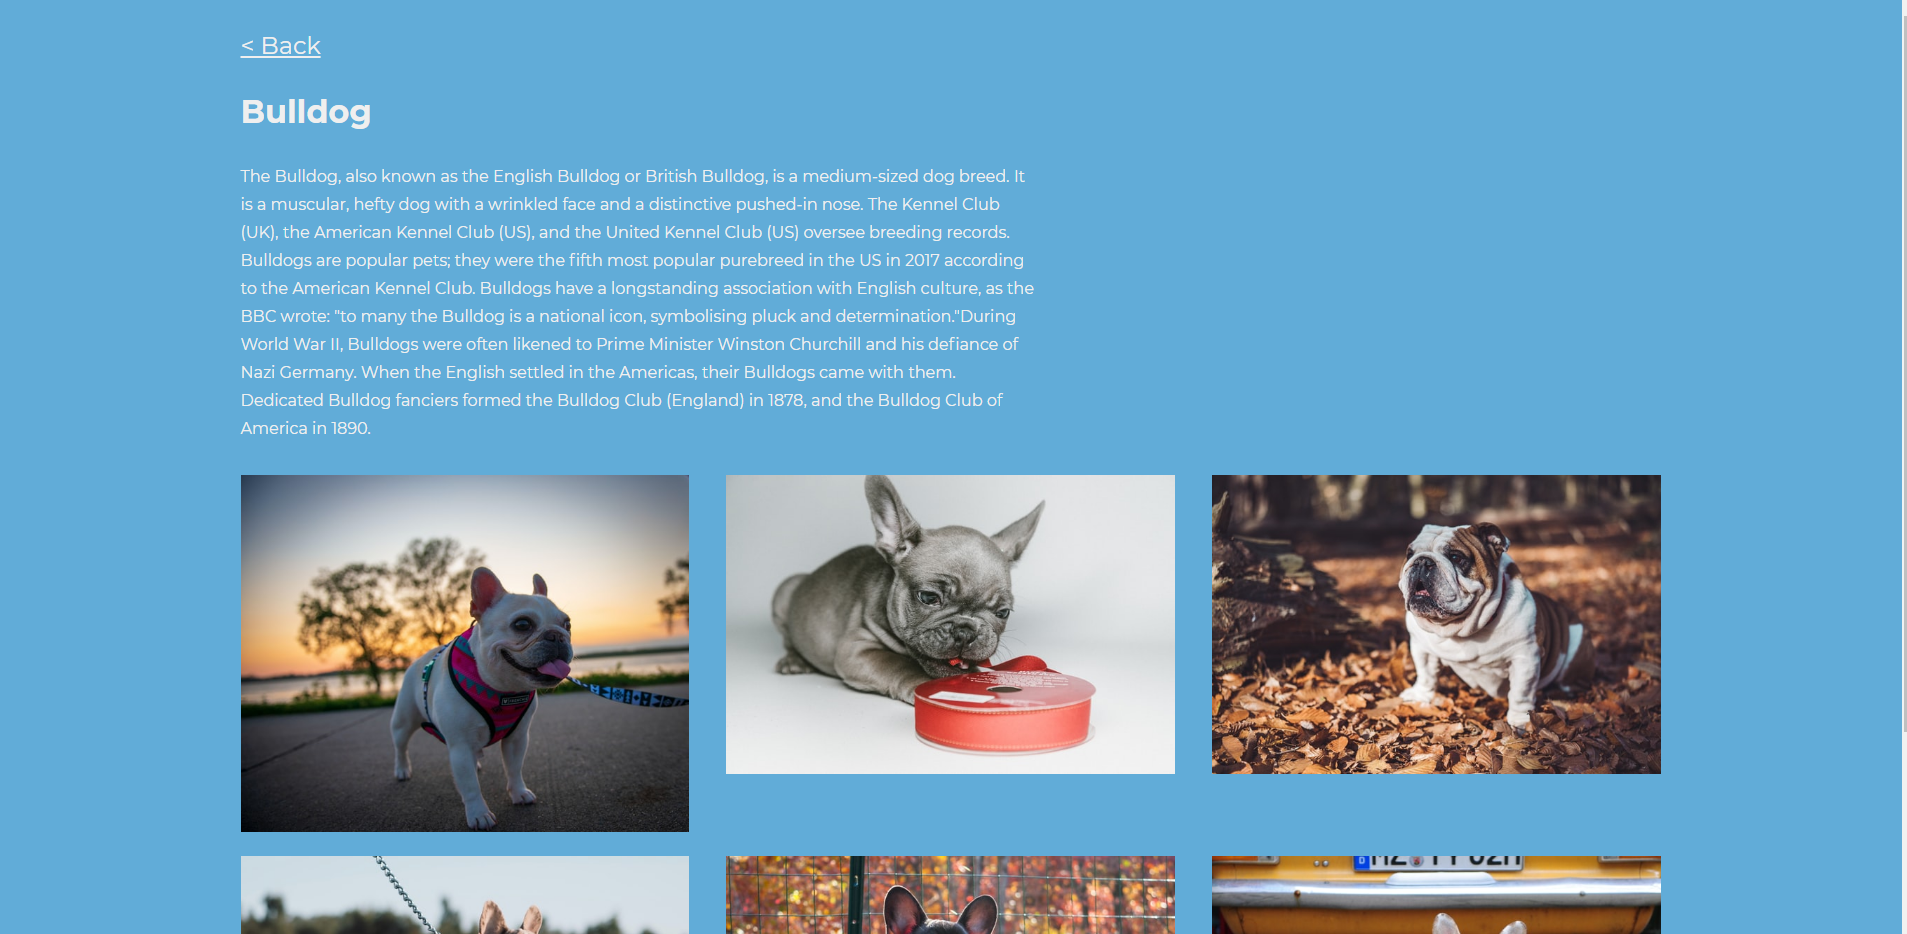
For the purpose of this tutorial, I have prepared a very simple Angular website. The website has a home page where you can see a list of three dogs. When you click on any of the three dogs, you will navigate to a detail page where you see some description of the dog you selected and many more pictures.
You may find the source code on GitHub:
https://github.com/chen1223/s3-demo
Home Page

Bulldog Page
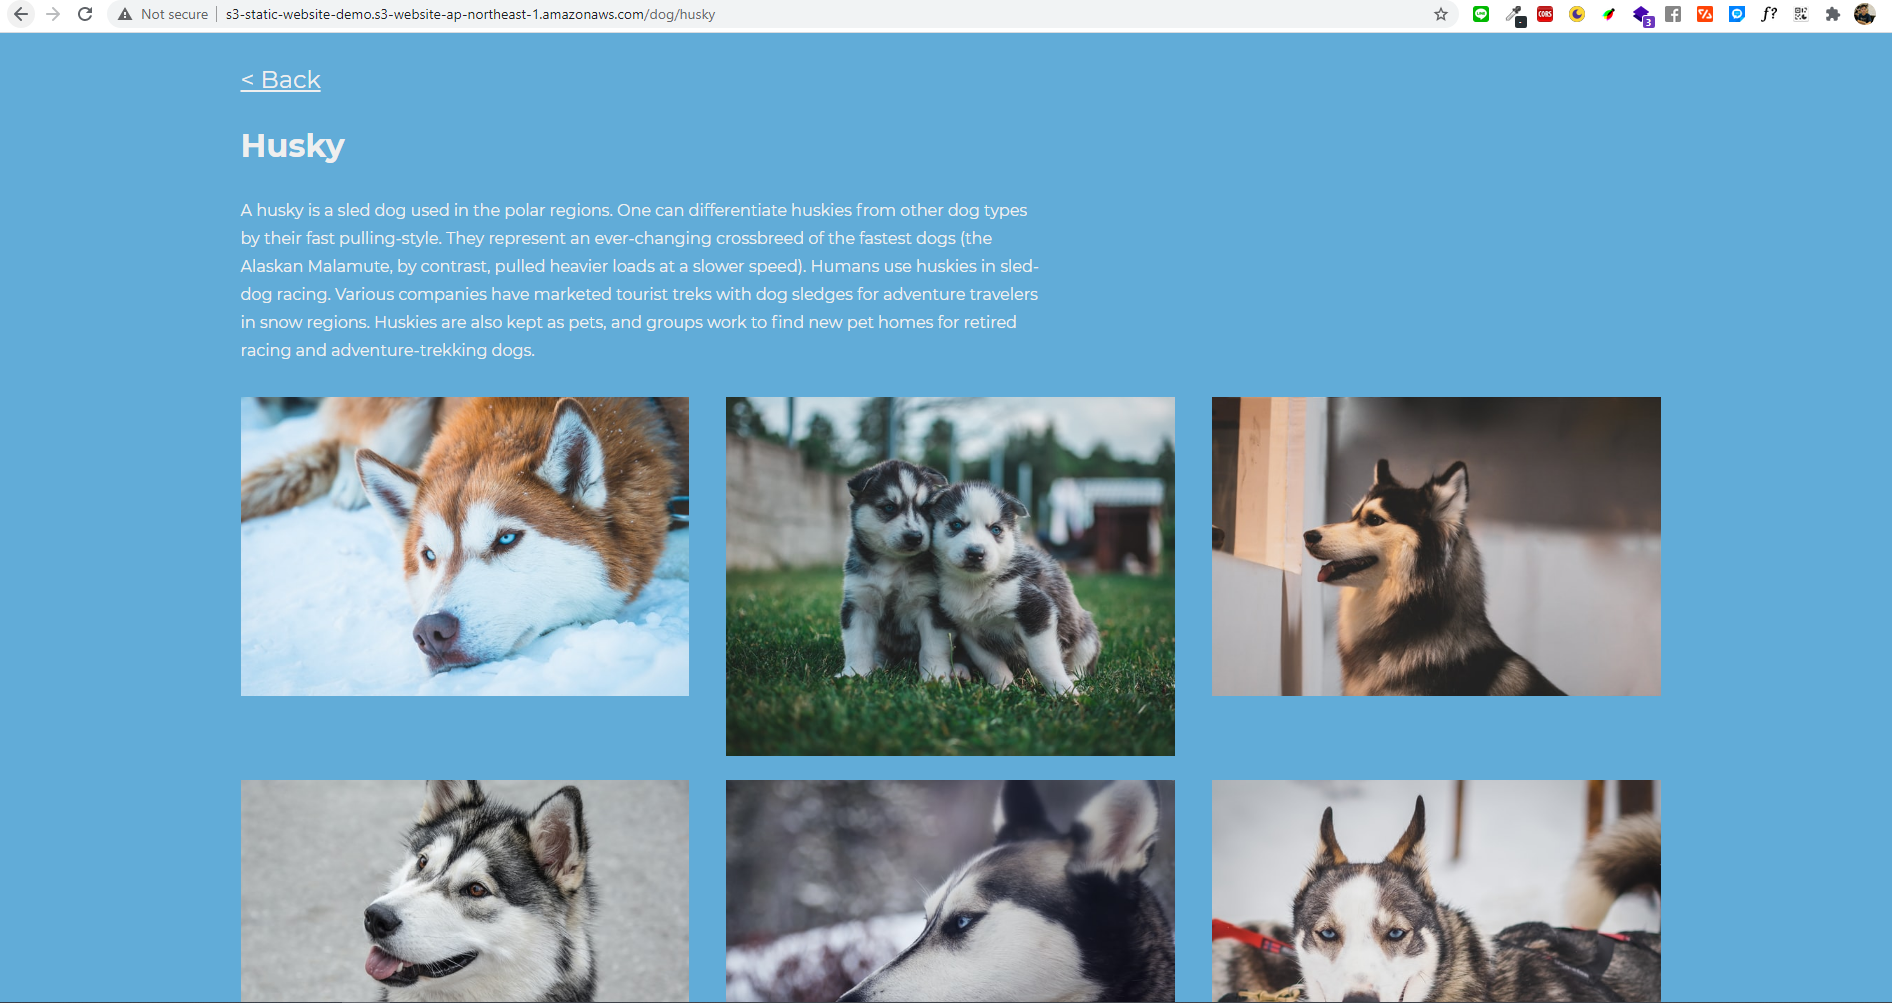
Husky Page

Golden Retriever Page

With the code ready, let’s compile the code by running
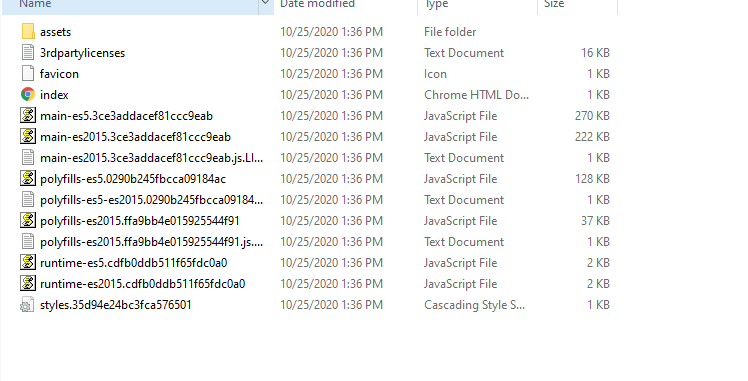
ng build --prodThe command above will generate a dist folder and this folder will contain all static files we need to upload to S3.
Deploy to S3
In this section, we will go through the process of deploying our Frontend code to S3 step by step. Note. all resources created during this tutorial will be removed when the tutorial is done, so it’s normal if you can’t access the link demonstrated in this tutorial.
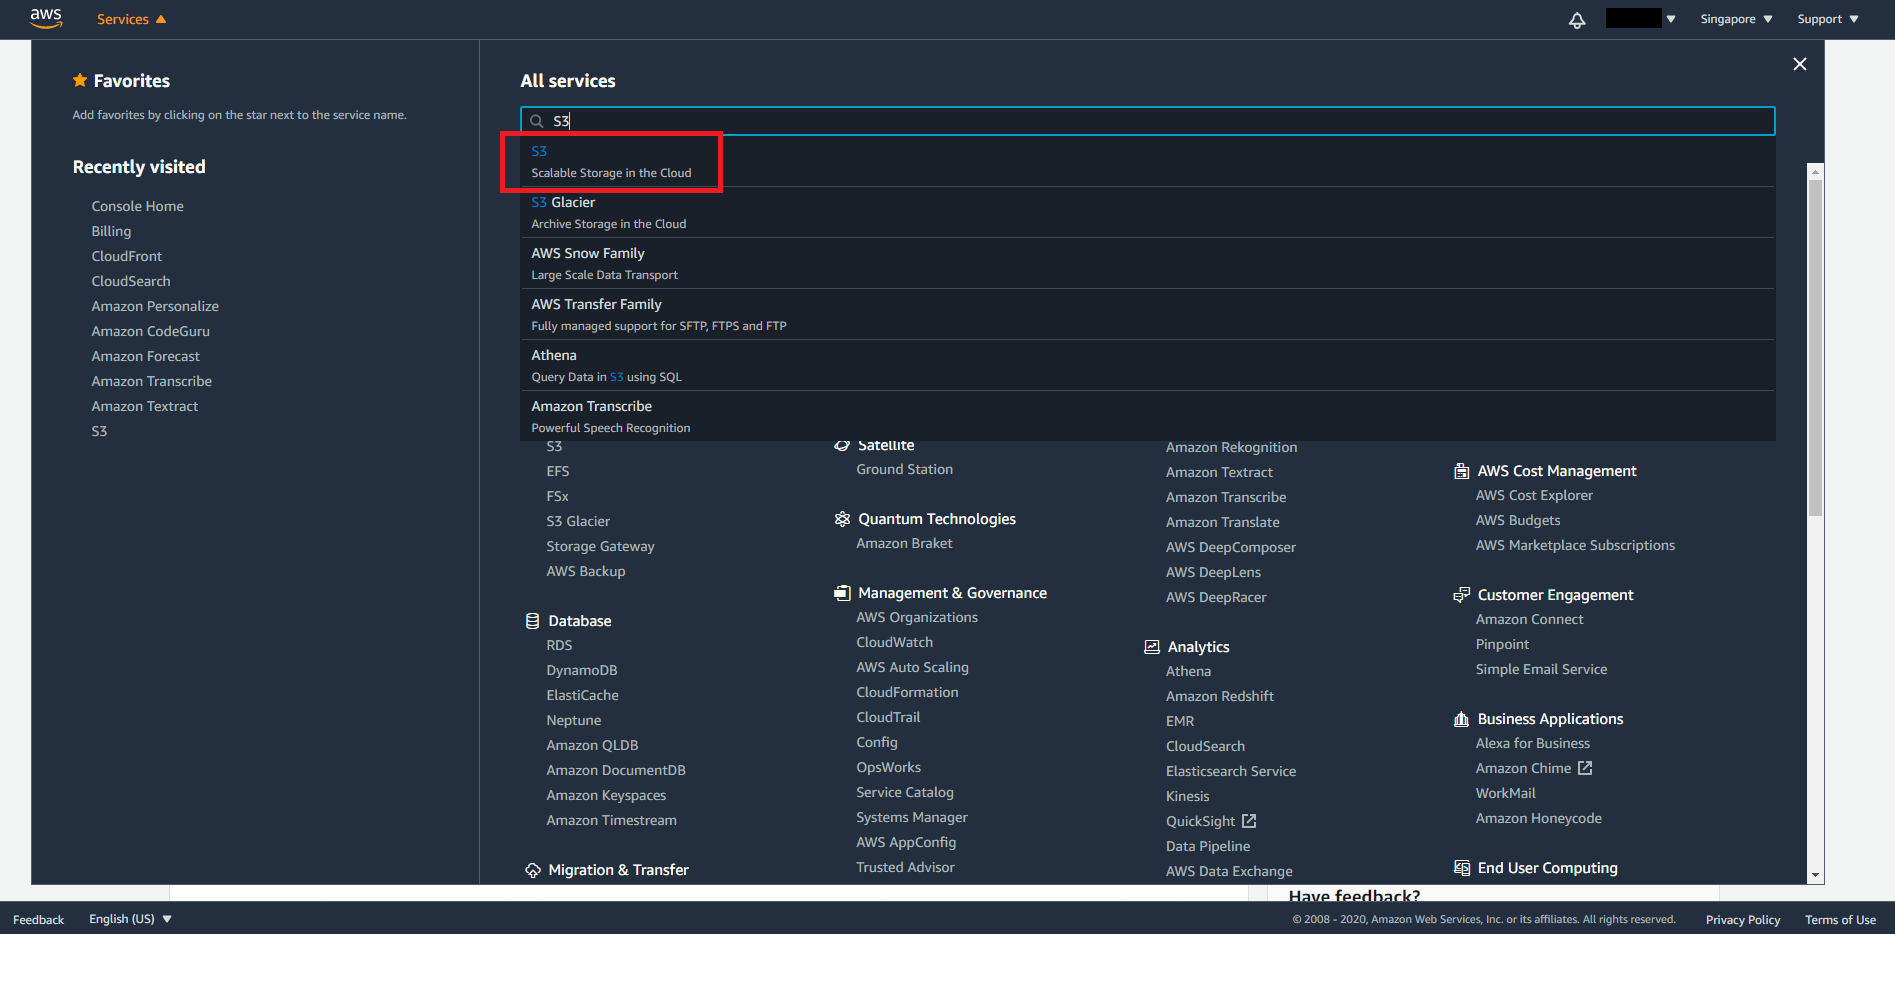
Login to the AWS console and from the menu on the top left corner, click on Services and search for S3.
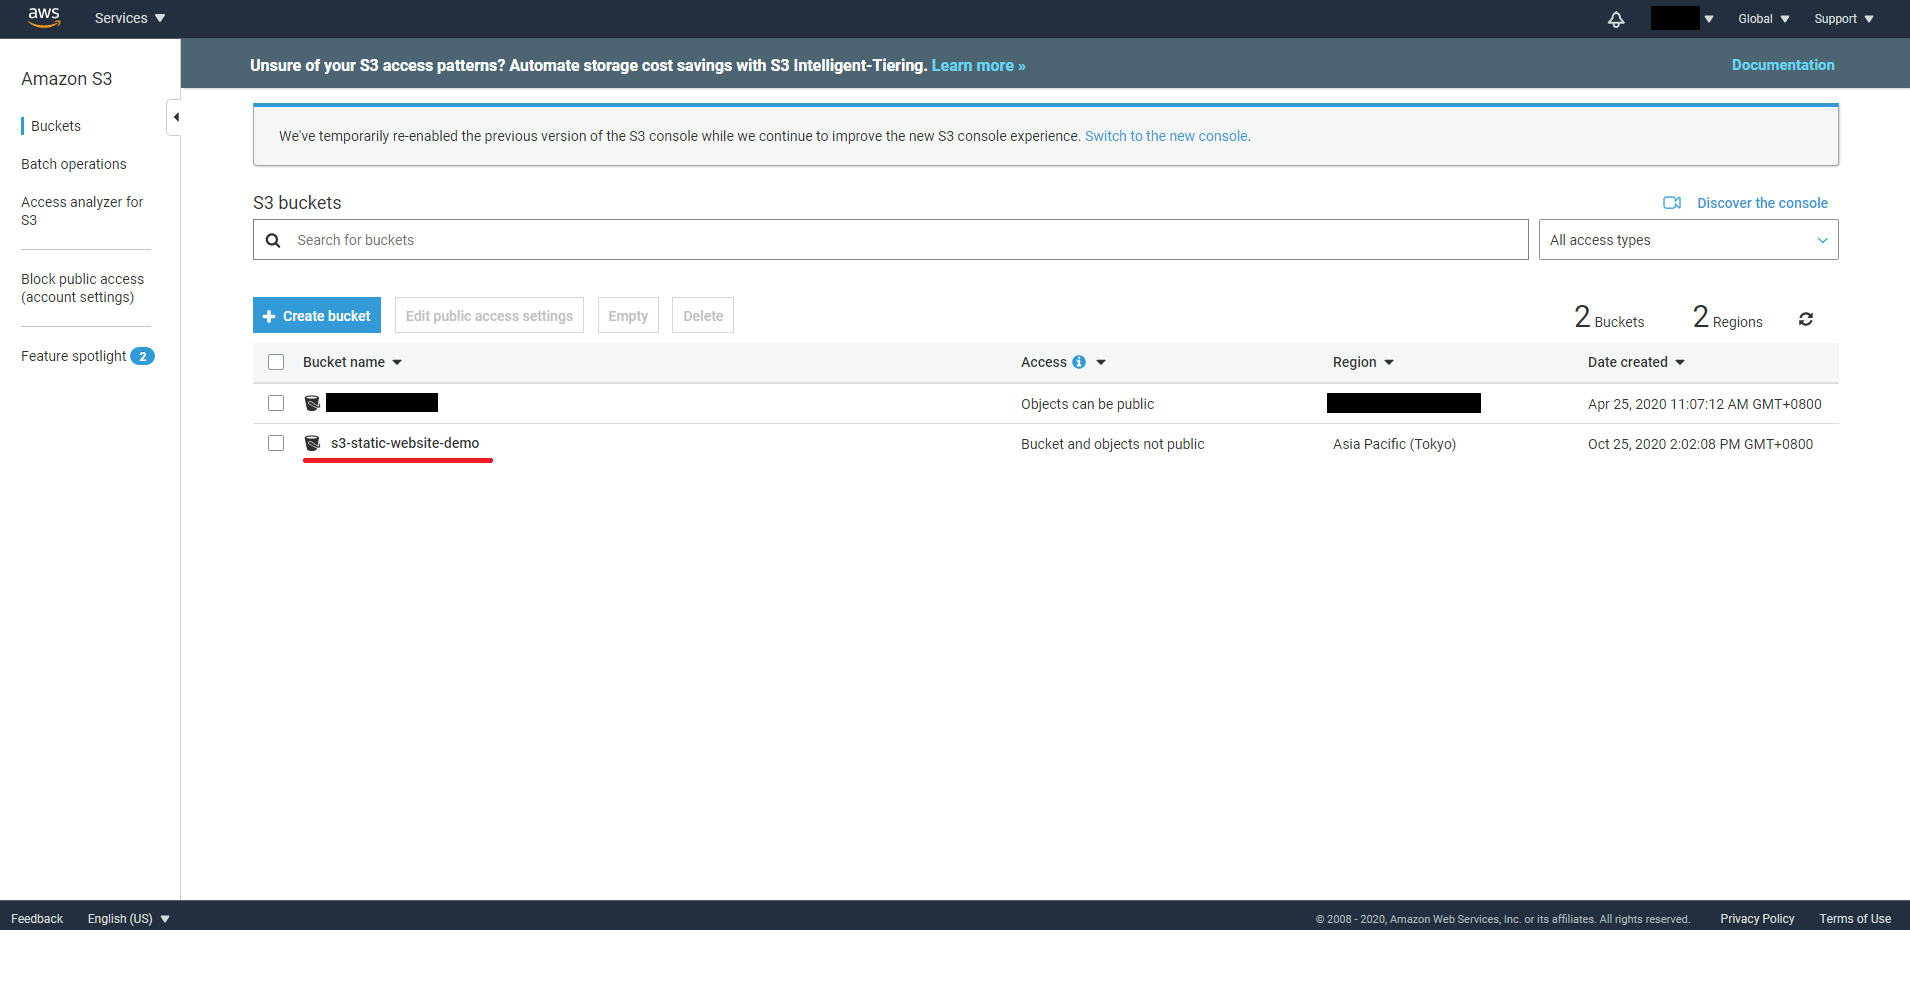
On my AWS account I already have a bucket, but we will create a new bucket for this tutorial.
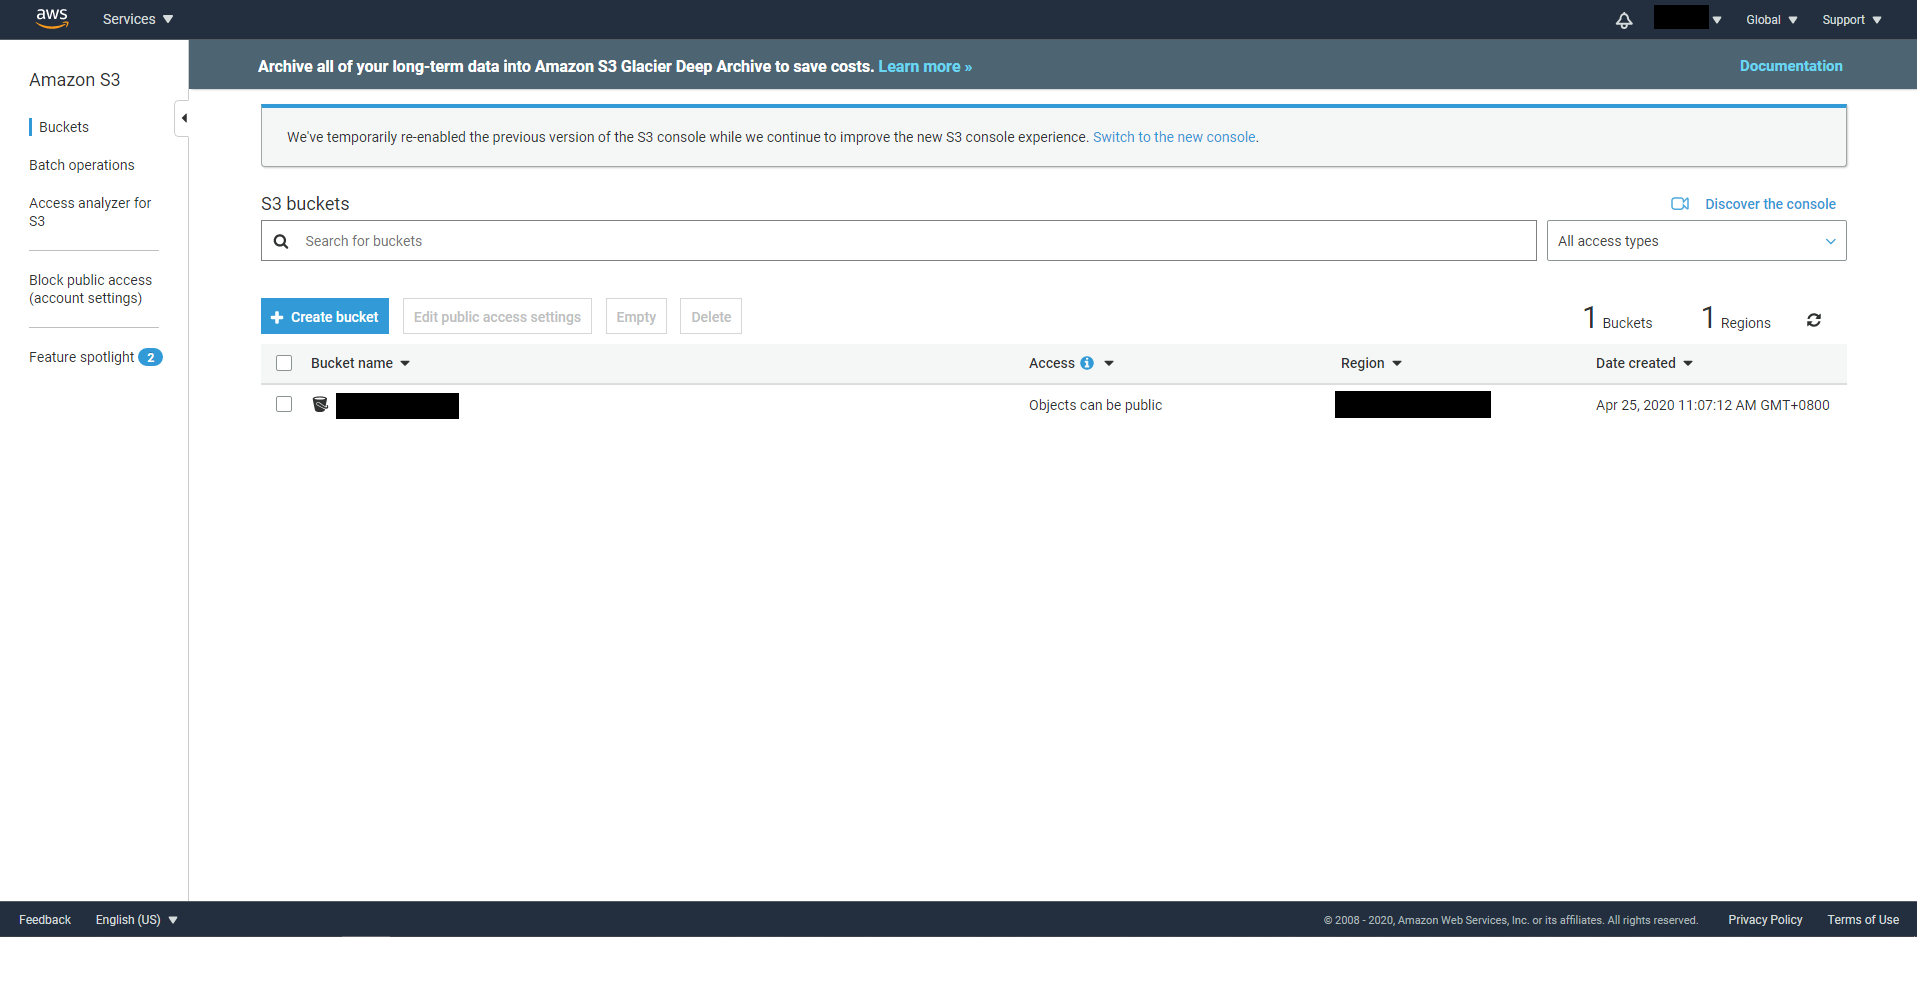
AWS S3 is very similar to Google Drive, but with many more additional features. When you enter the S3 dashboard, you will see all Buckets you have on your account. Since AWS S3 is not region specific, you will see all Buckets here and the region on the top right of the corner will be Global. AWS S3 refers to root folders as Buckets and inside each Bucket you may create as many folders as you want.
To get started, let’s create a folder called s3-static-website-demo. The name of your Bucket must be globally unique because AWS will create a url that points to your Bucket.
Click on the Create bucket button and enter Bucket name as the name you desired and select the Region you wish your bucket is in.

You may click on Next to review the default setting on each step or click on Create directly to create your Bucket.
After you click on create, you will see your Bucket on the dashboard.
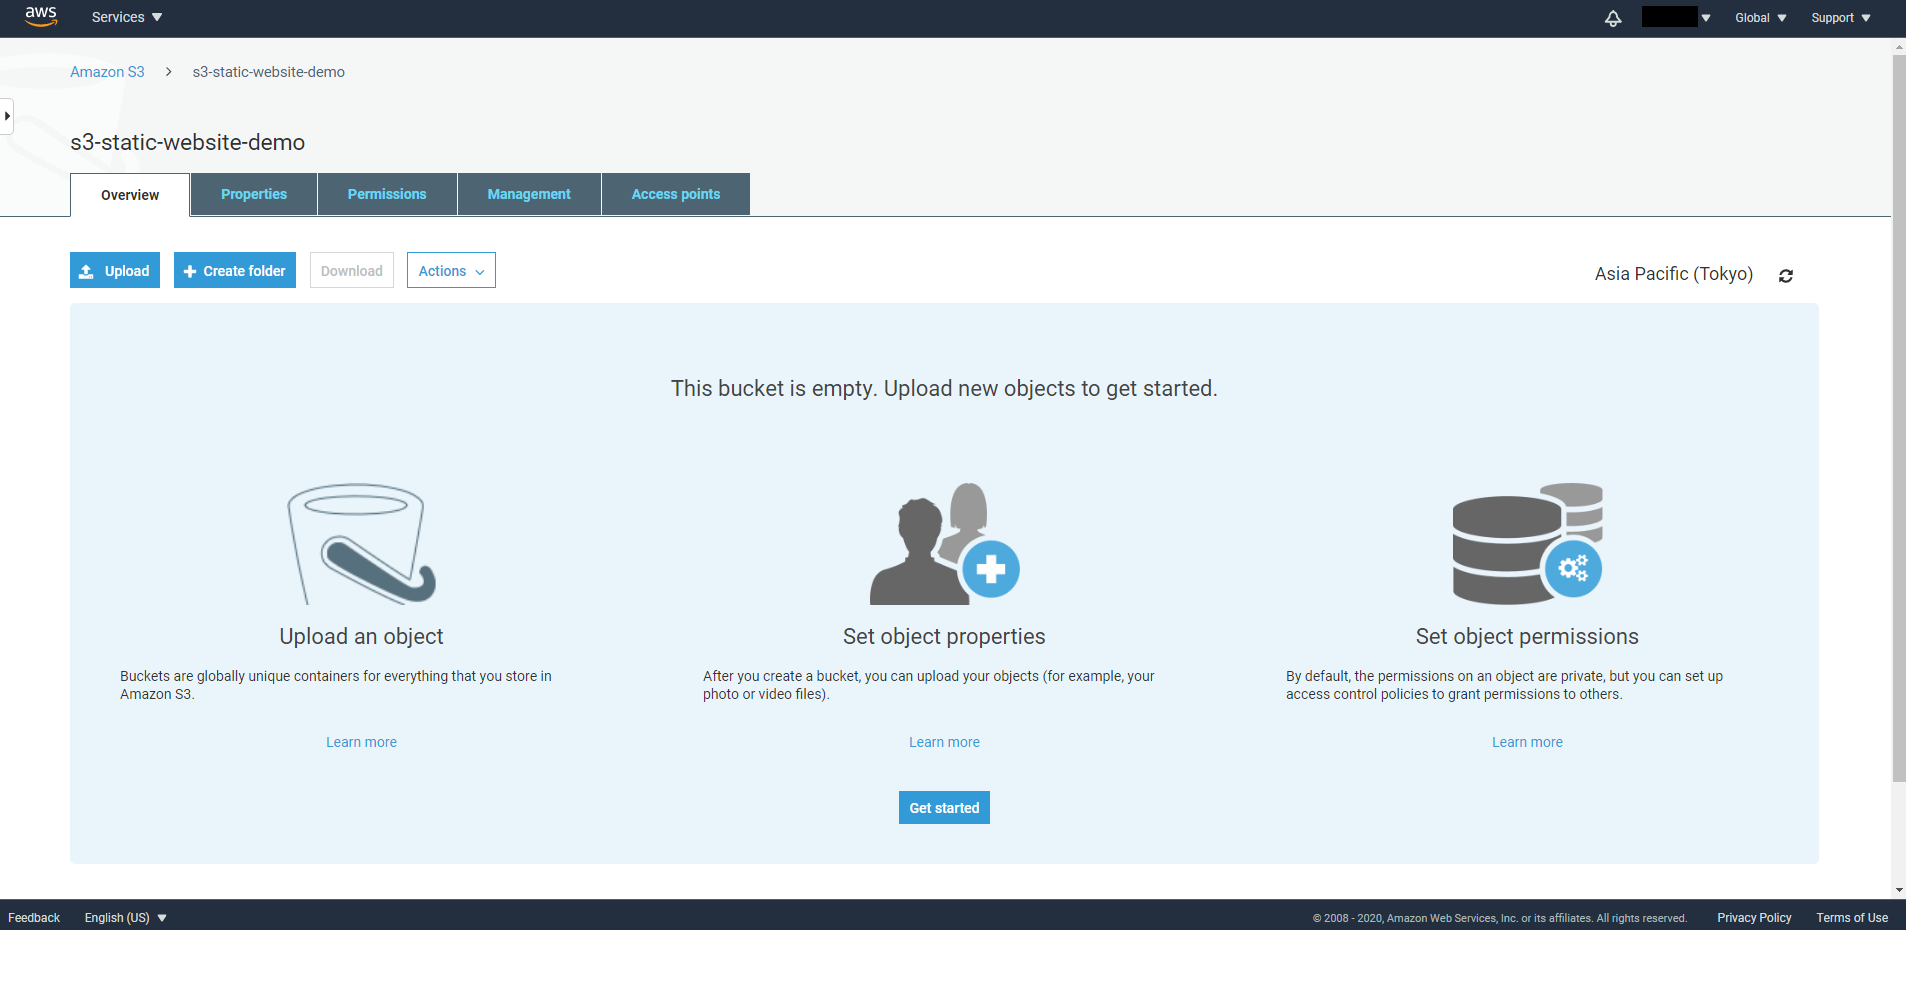
Let’s upload the dist folder we created in the previous section which contains all our Frontend static files.
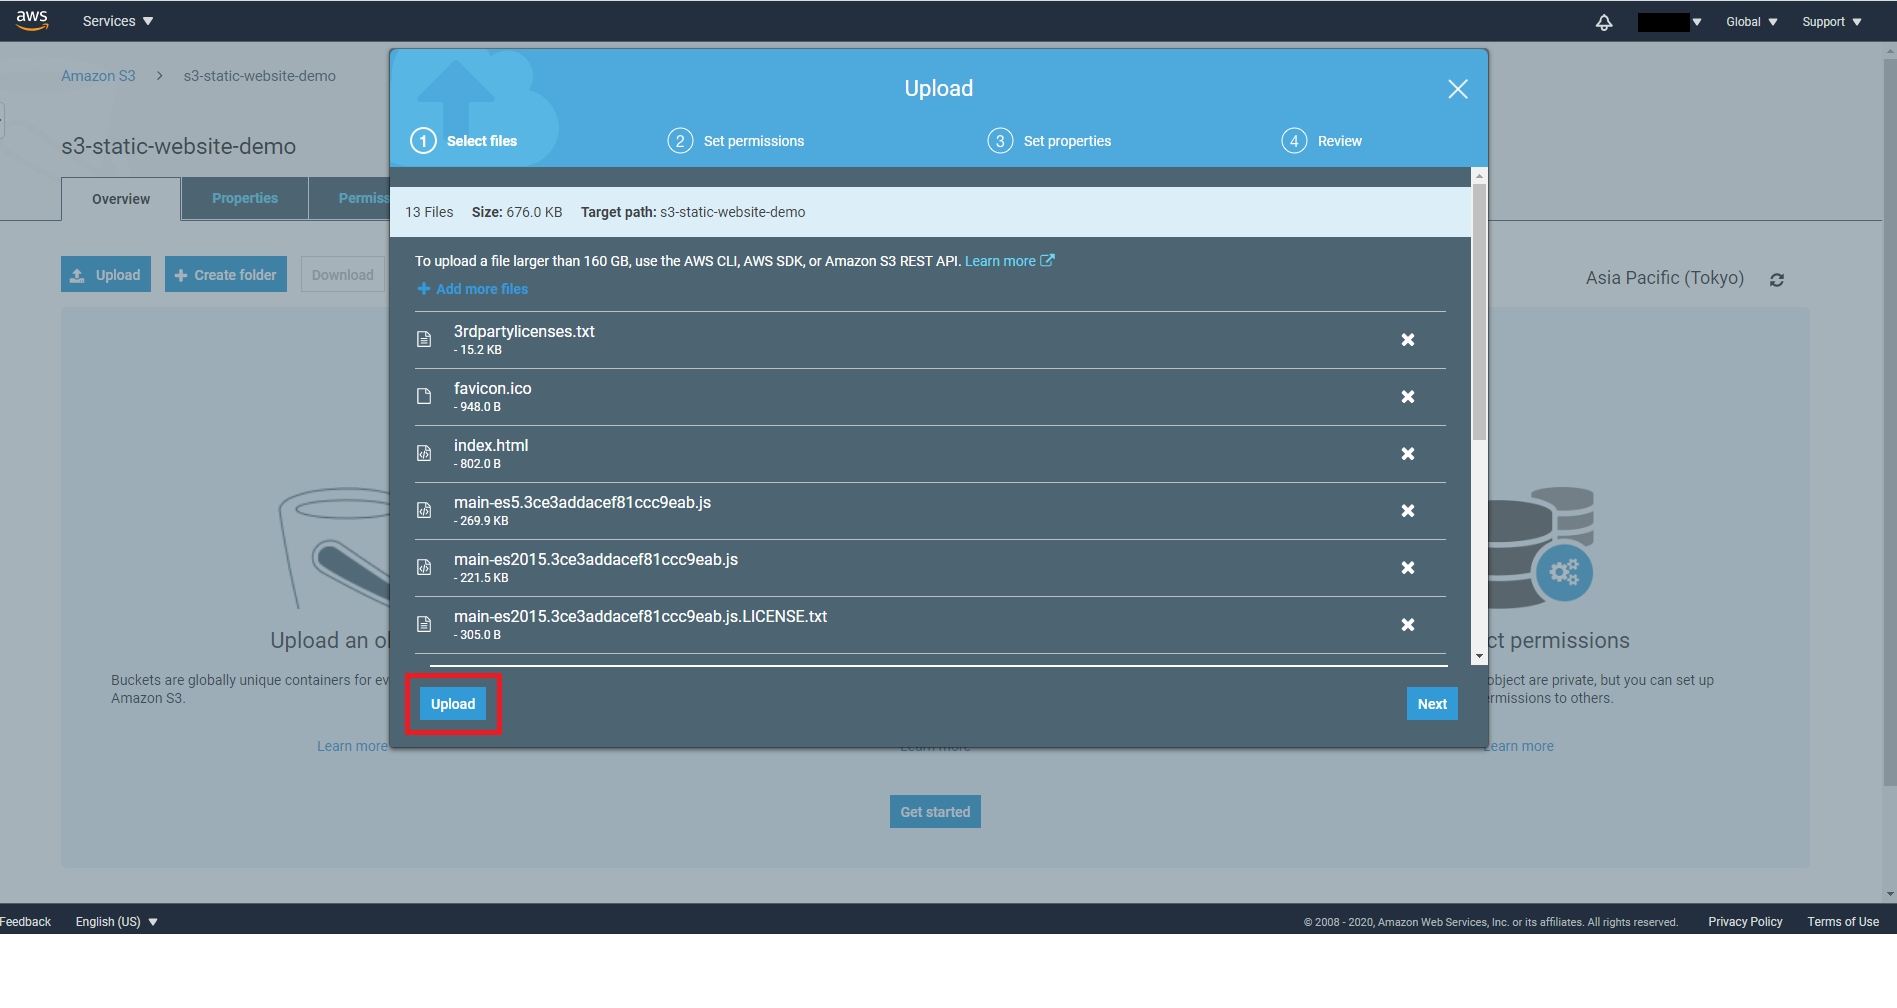
Click on the Upload button
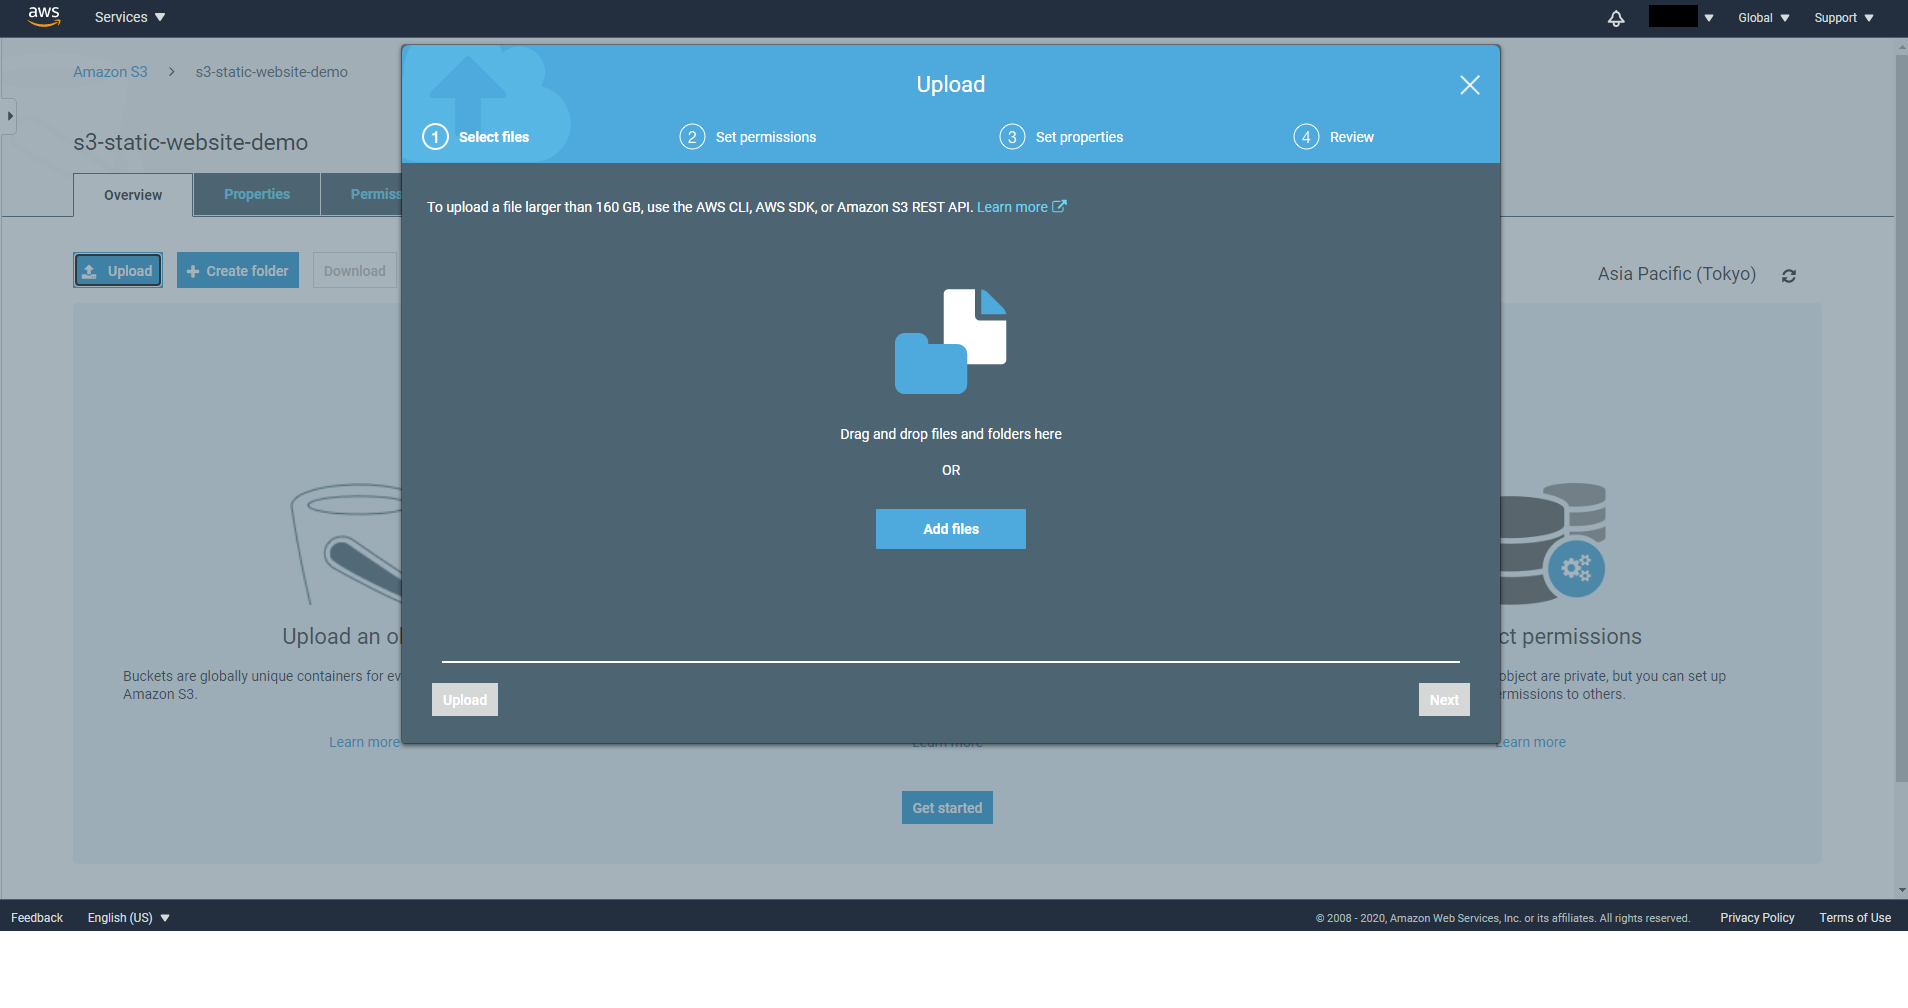
Click on the Add files button and select contents in your dist folder
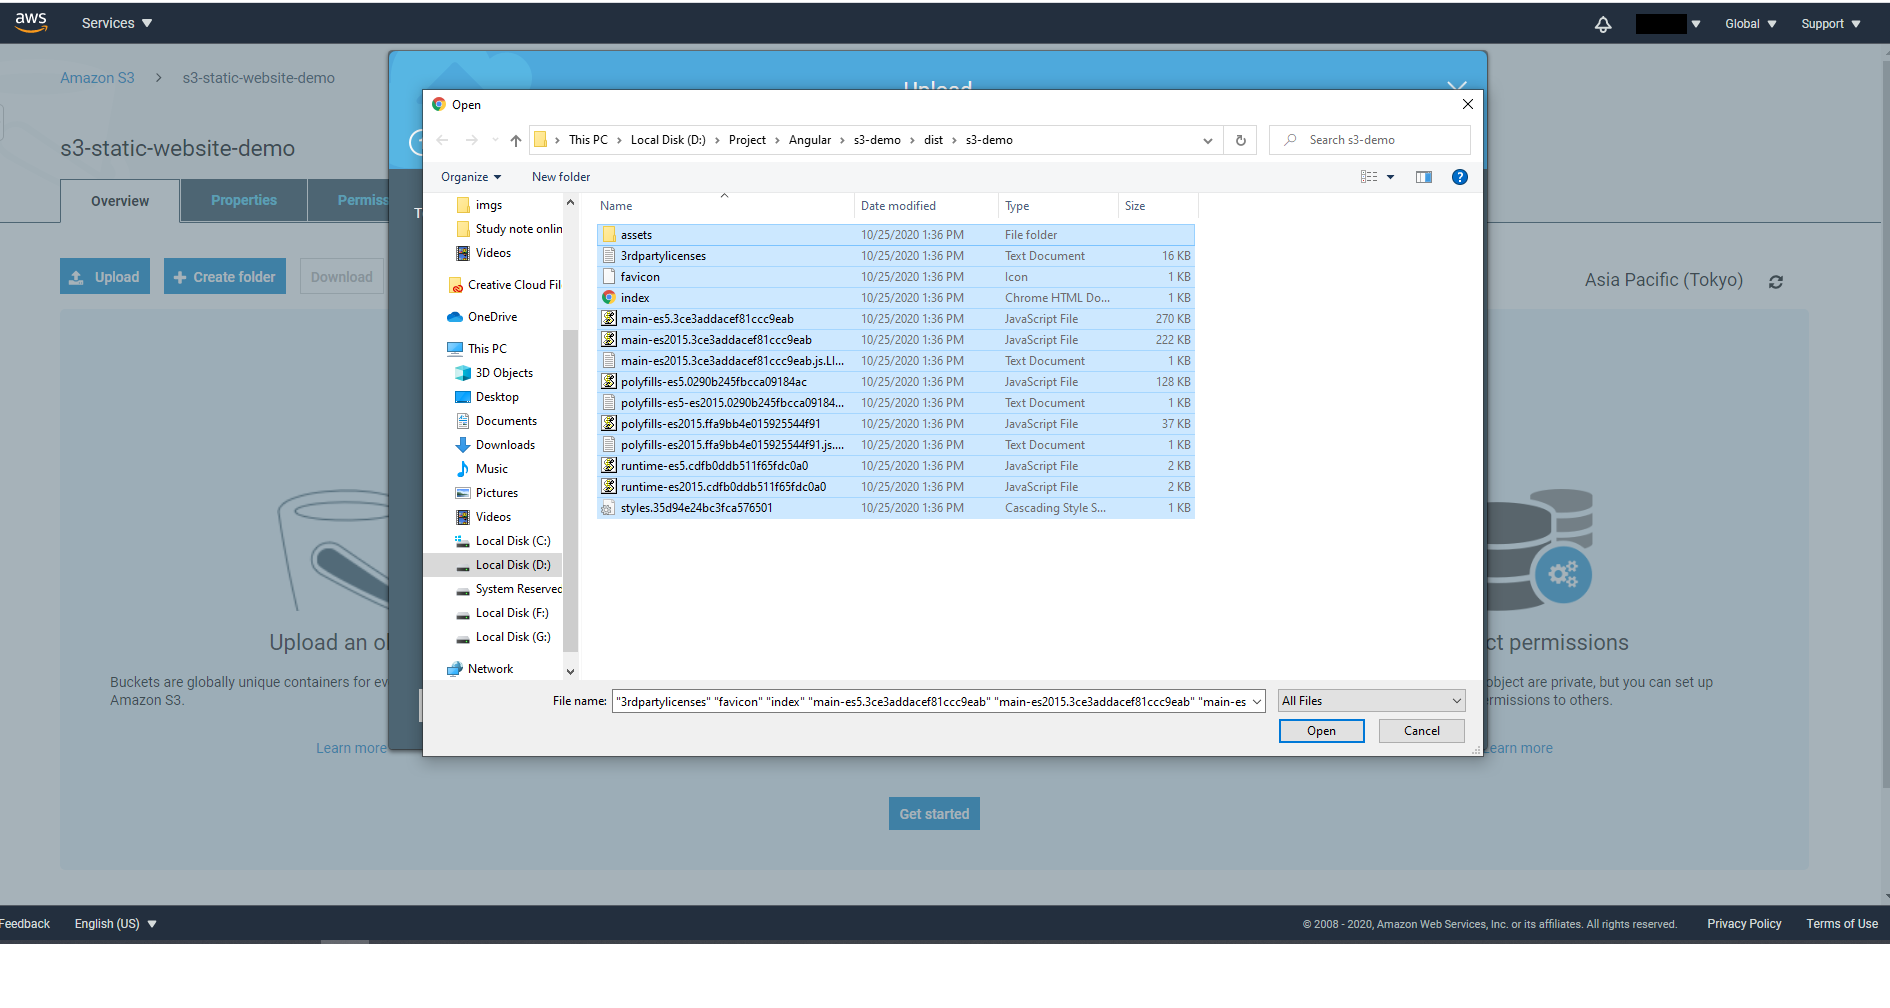
Click on Upload to confirm the file upload
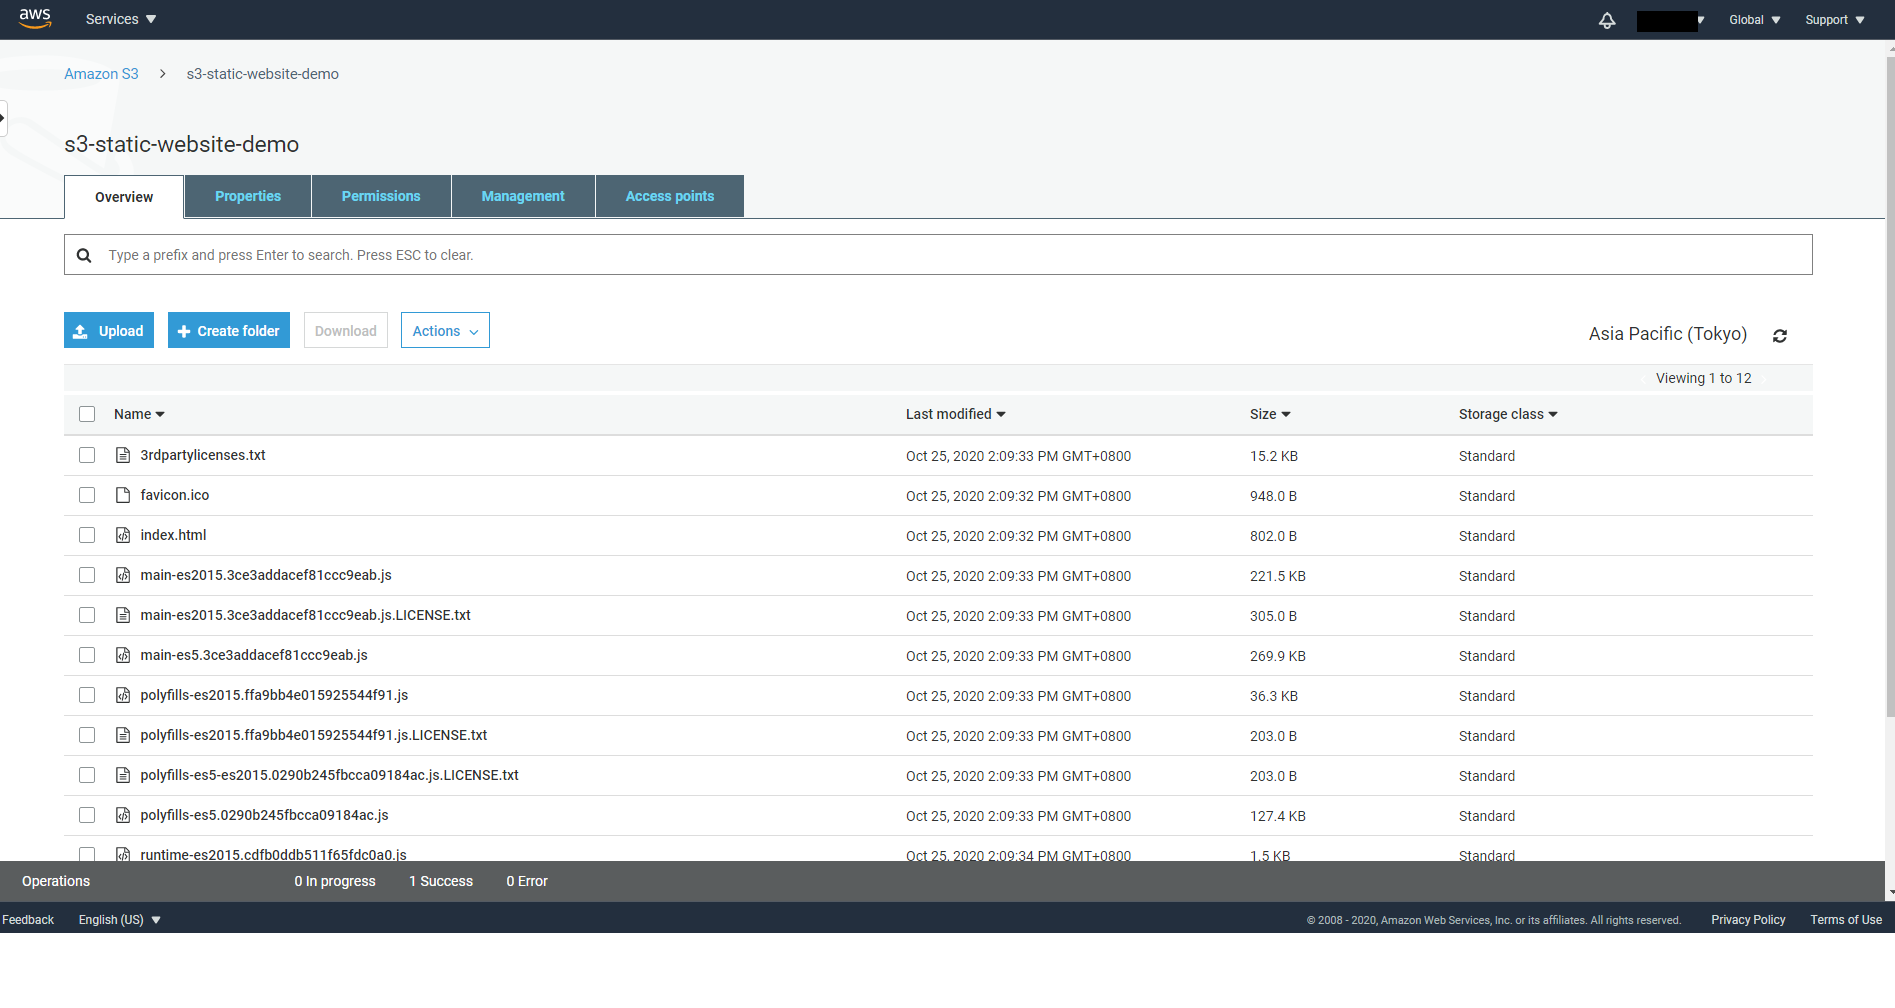
Your files are now on S3 Bucket.
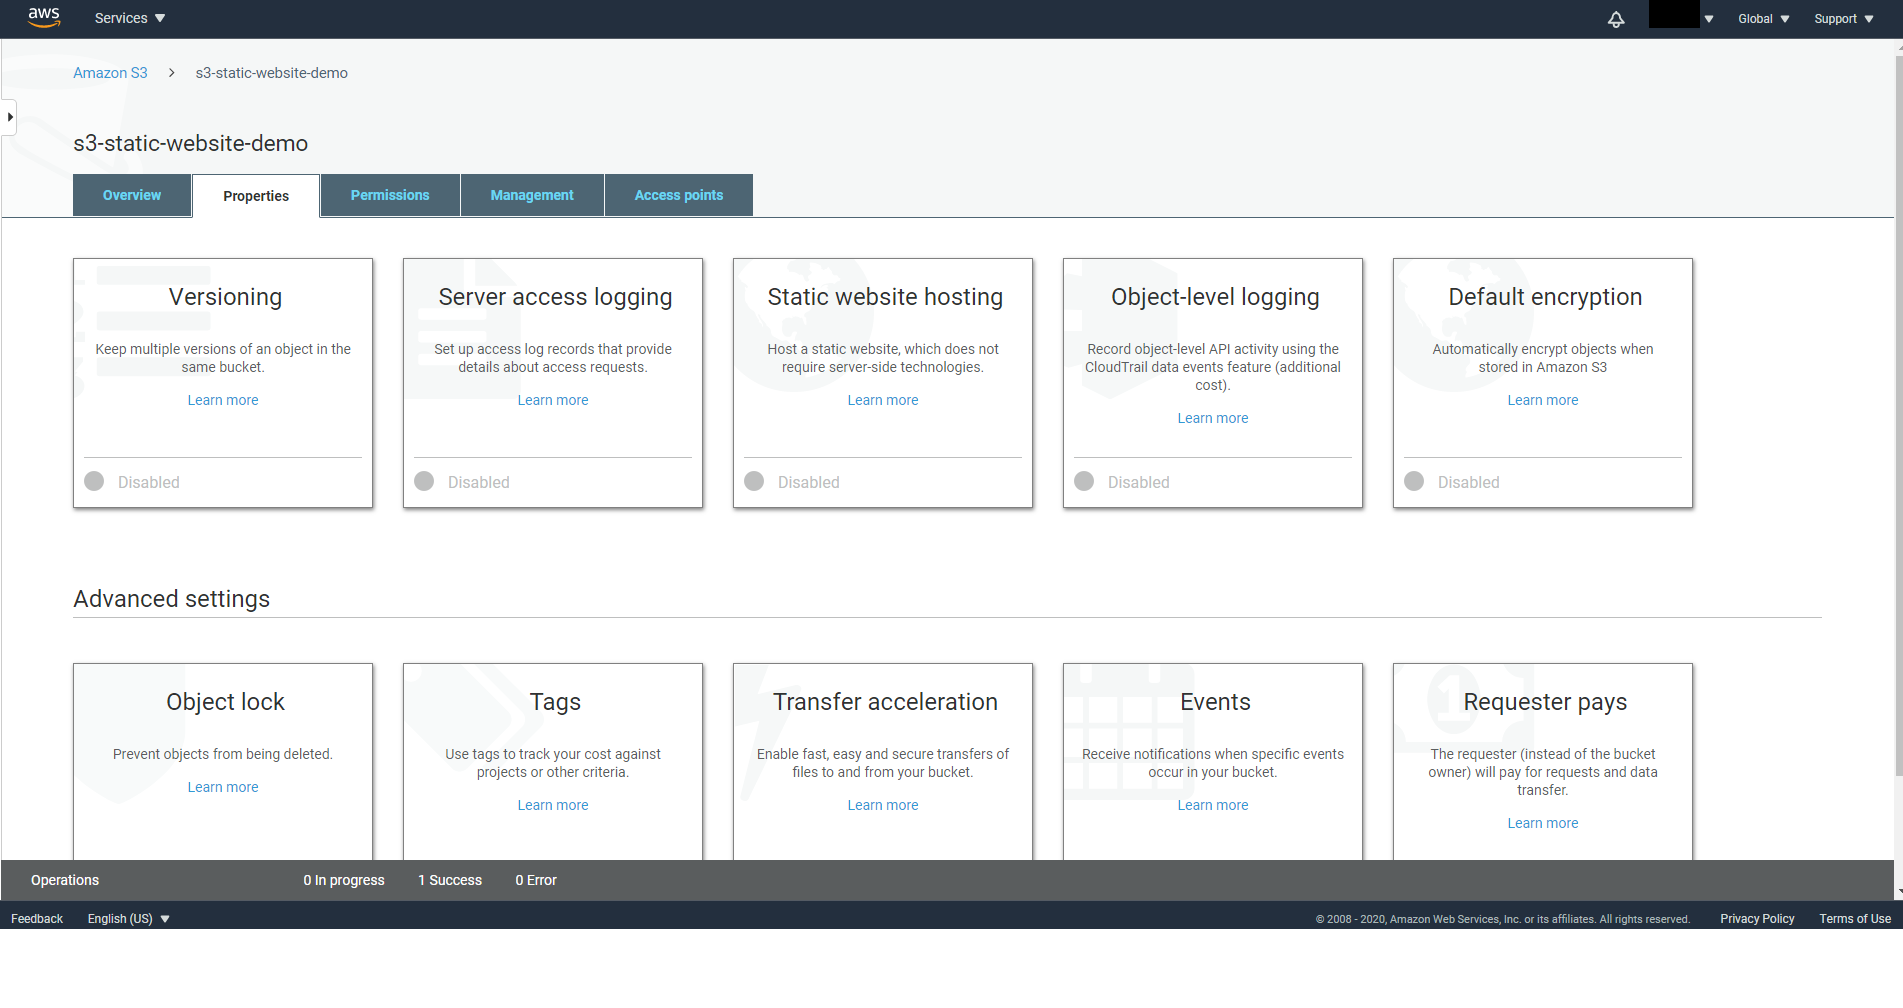
Now to serve your files as a static website, go to the Properties tab of your Bucket.
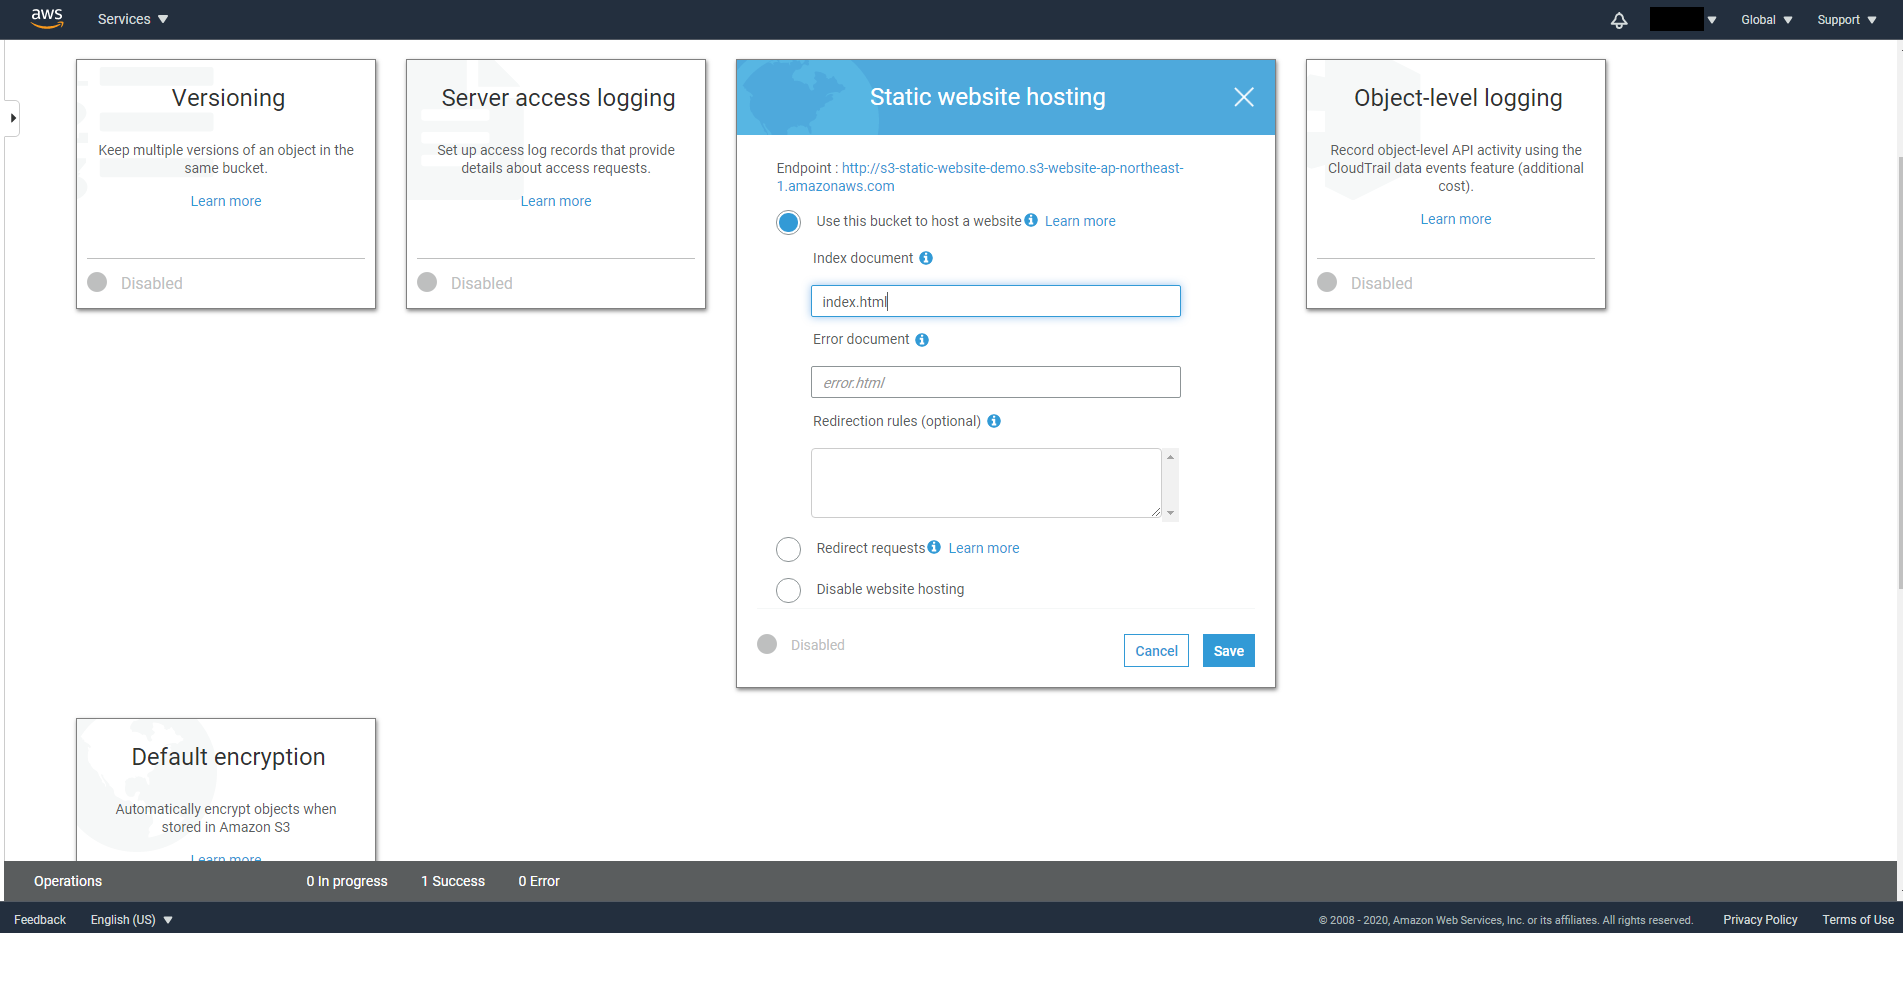
Click on the Static website hosting property and select Use this bucket to host a website. For the index document enter index.html since the root HTML of an Angular application is index.html then click on Save. Adjust the input accordingly if yours is different.
You will see the URL endpoint of your website in the dialog.
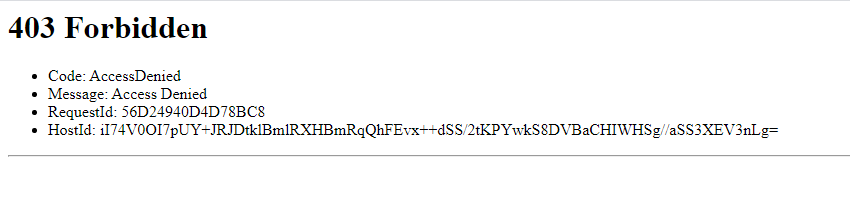
However if you visit the URL in a new tab you will see a 403 Forbidden error that is because by default S3 blocks all public access to your Bucket for security purposes.
To solve this issue, we will need to allow public access to your Bucket.
Go to the Permissions tab of your Bucket.
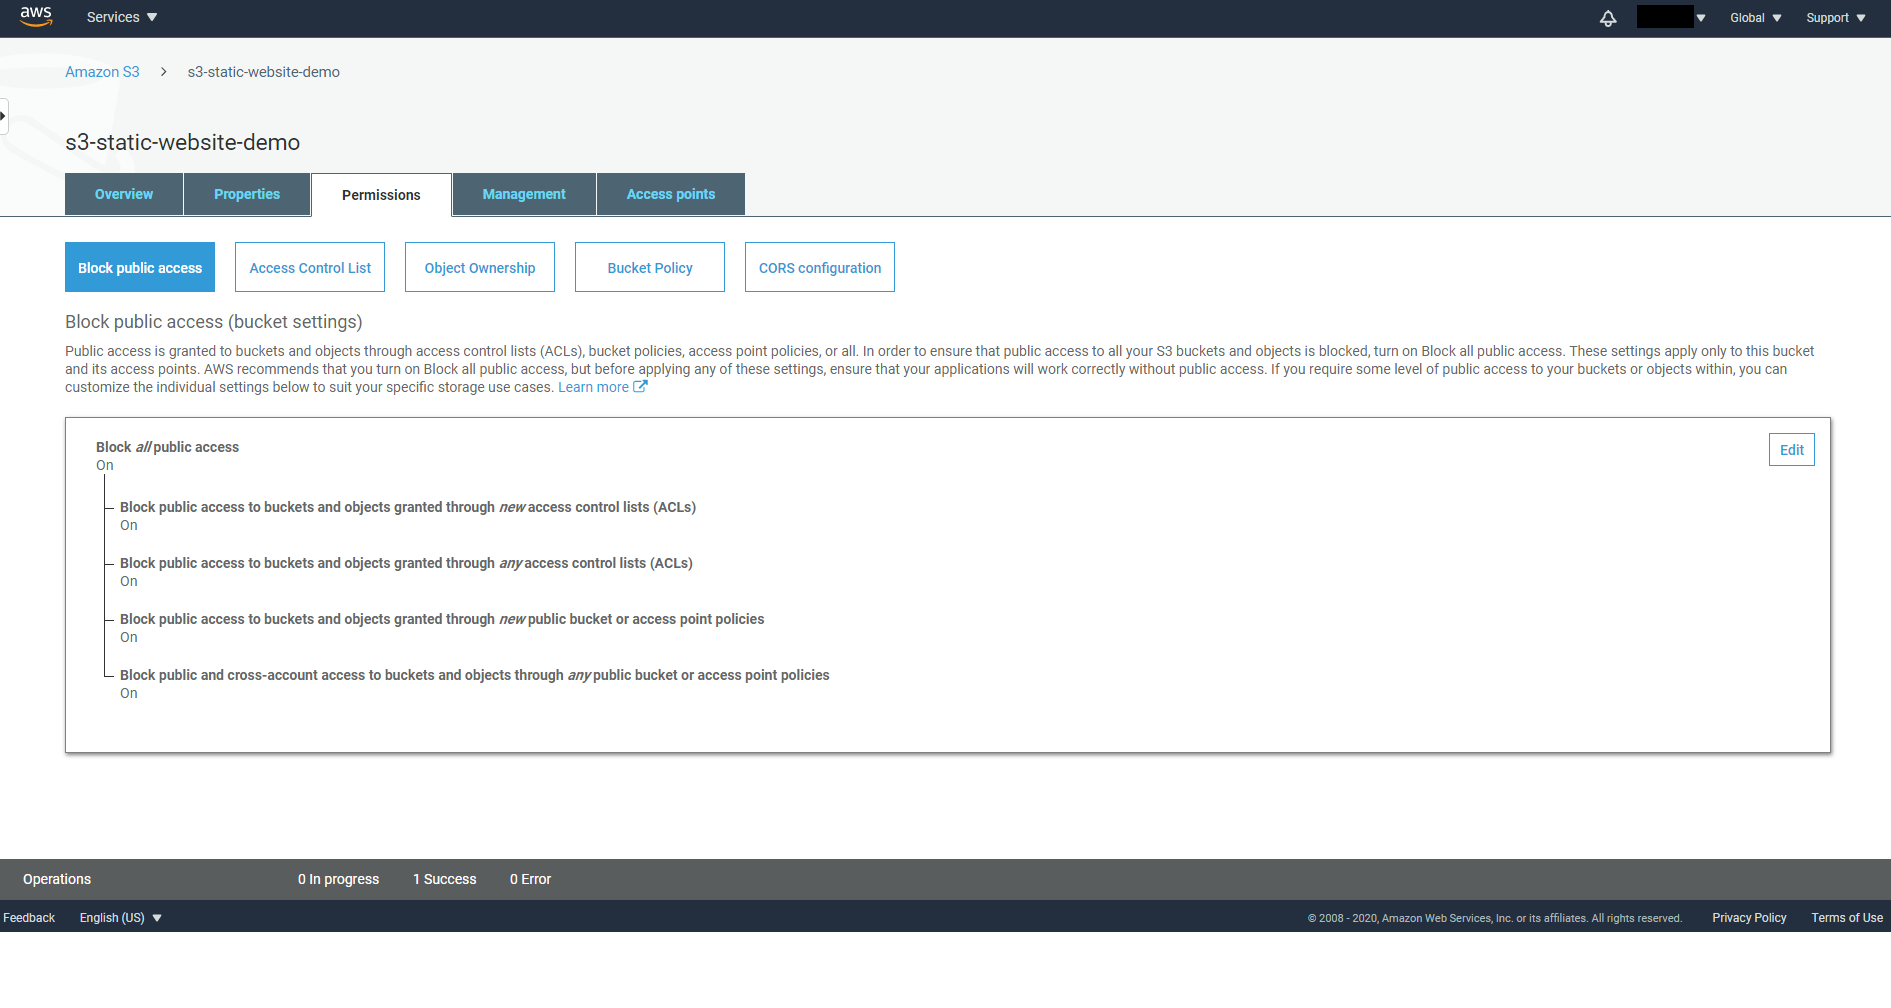
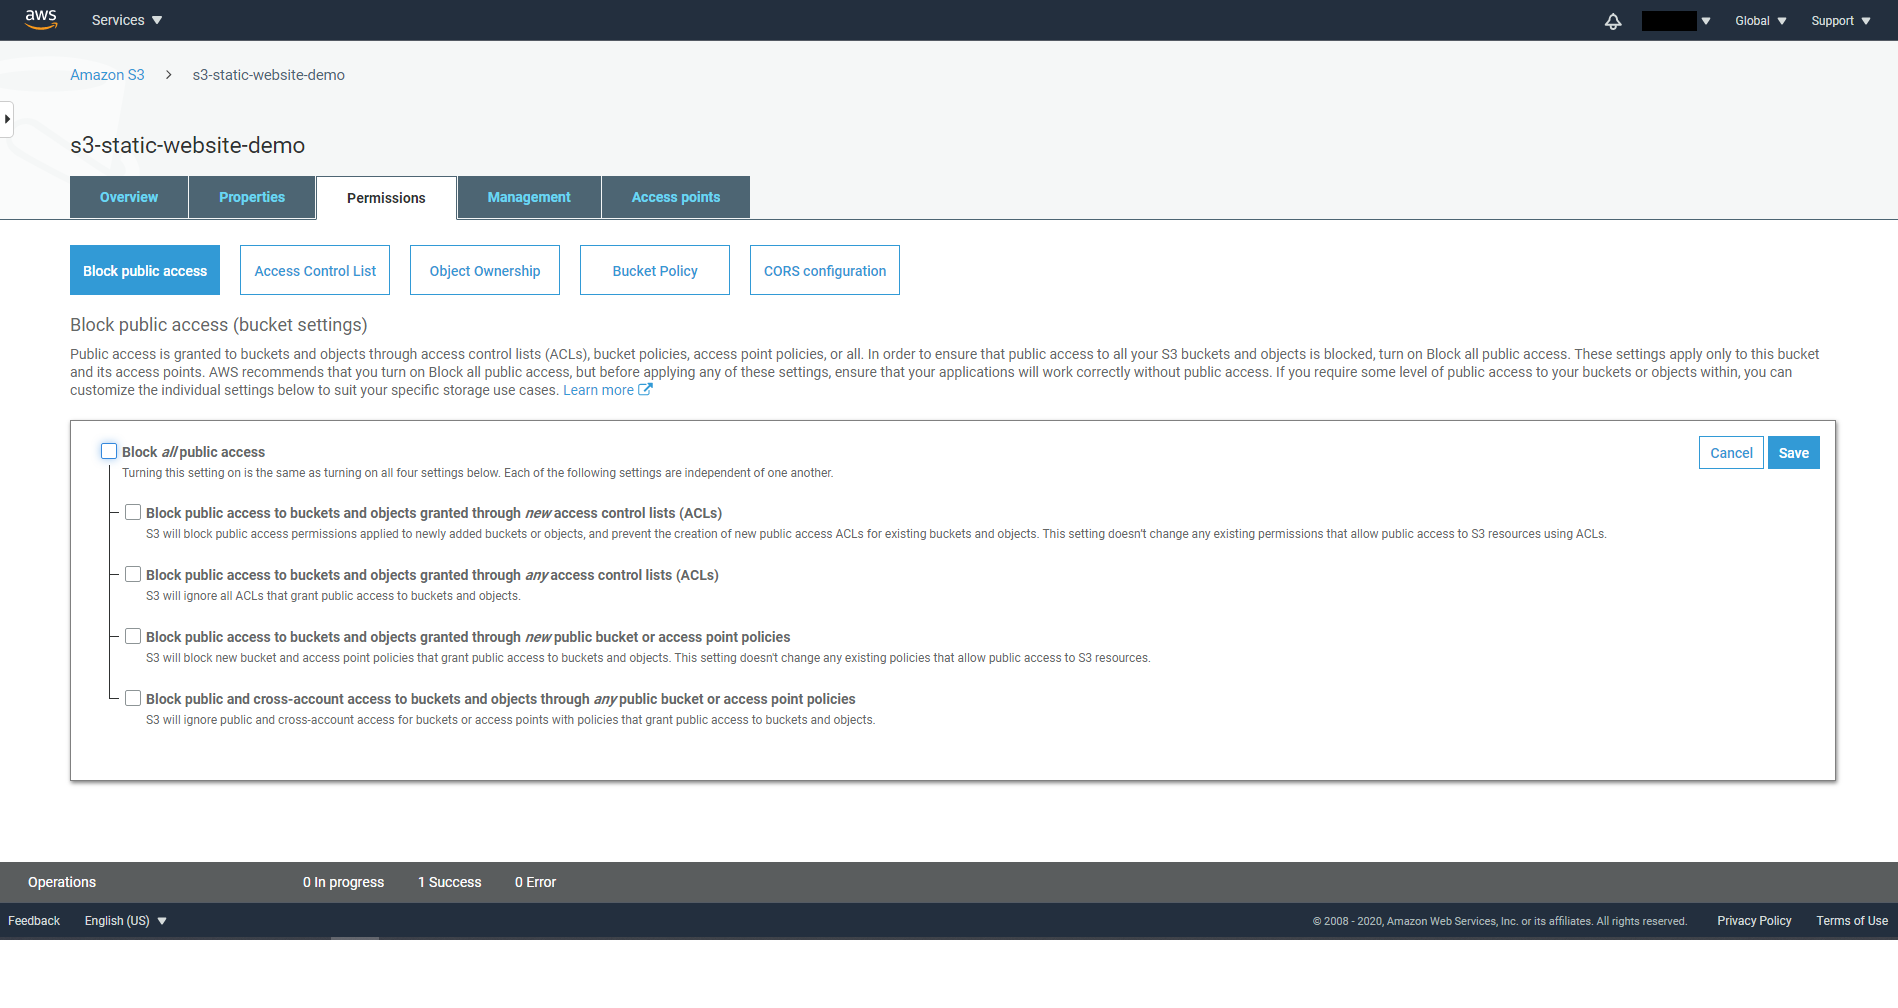
In the dialog below where it says Block all public access click on Edit then uncheck Block all public access and click on Save.
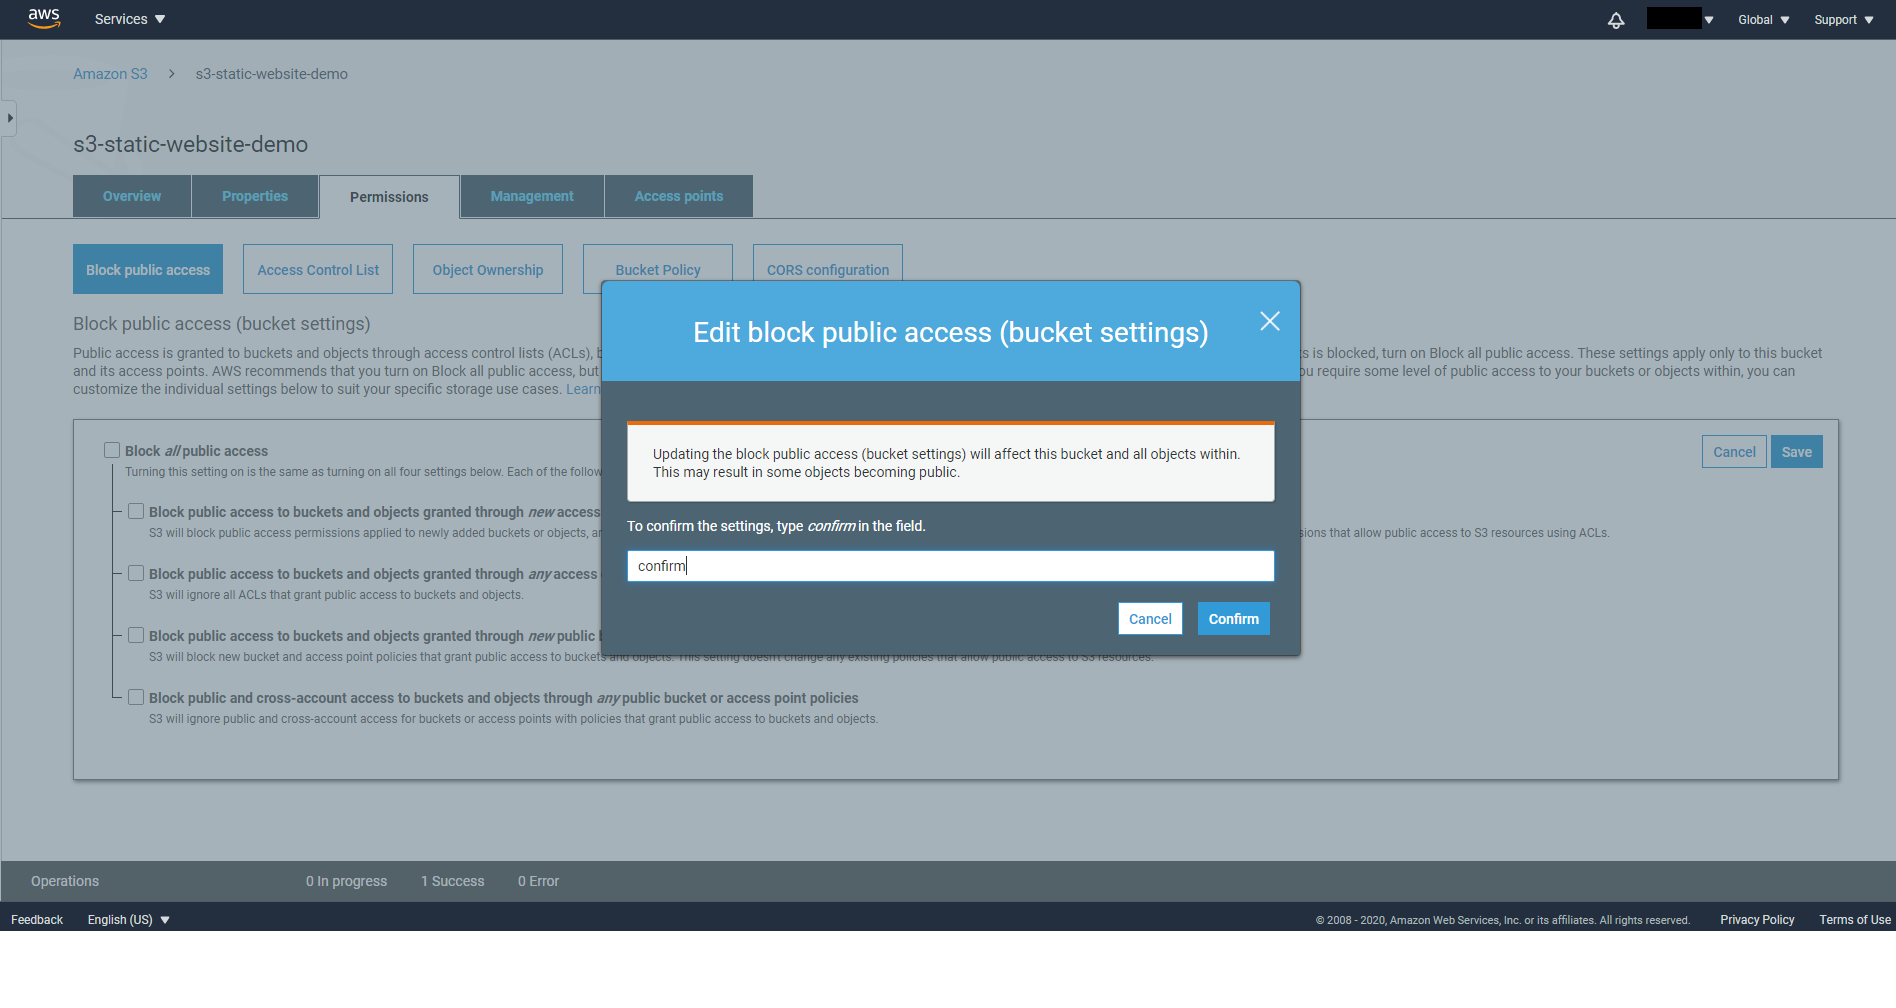
Type in Confirm to confirm you indeed want to allow public access to your Bucket.
Navigate to the Bucket Policy tab under Properties and click on generate policy.
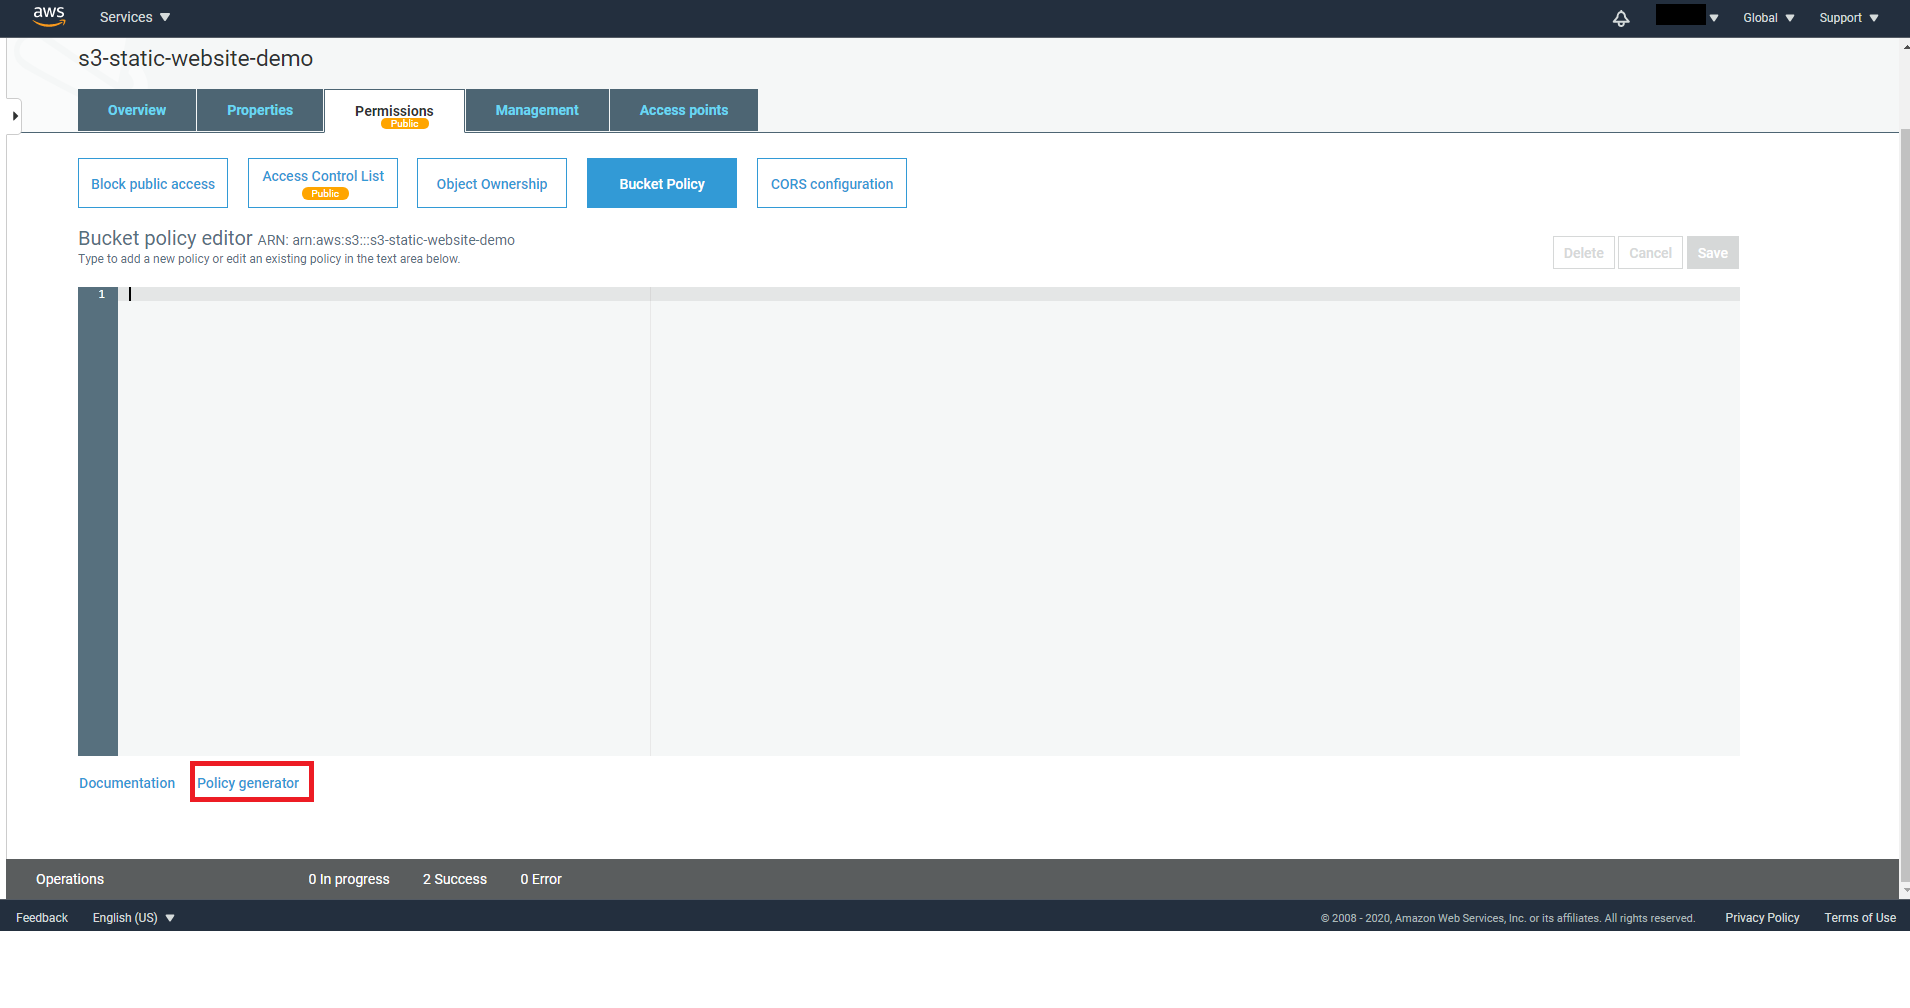
On the policy generator page, for Type of policy select S3 Bucket Policy.
Choose Allow for Effect and type in * for Principal to allow access from the public. Select GetObject for Actions
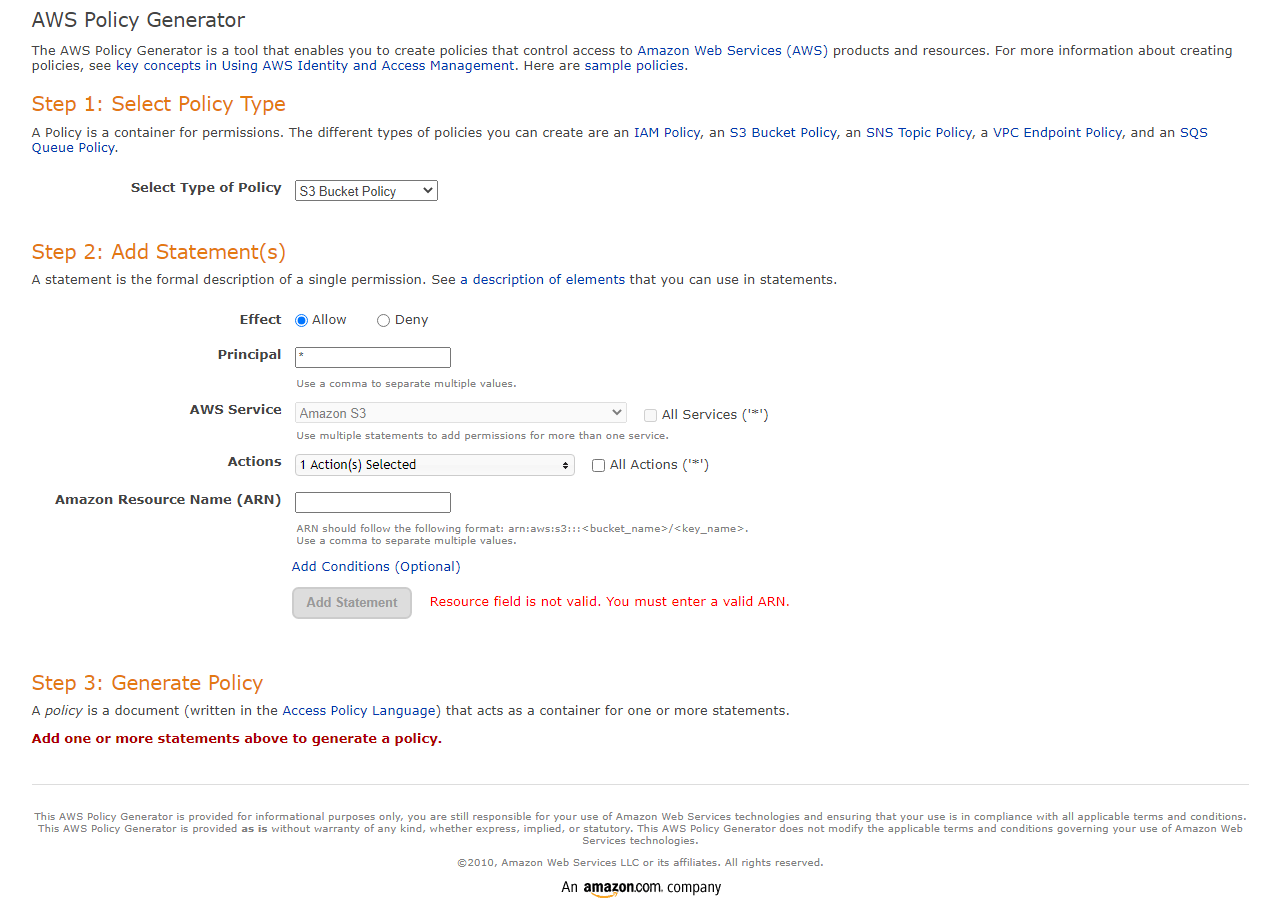
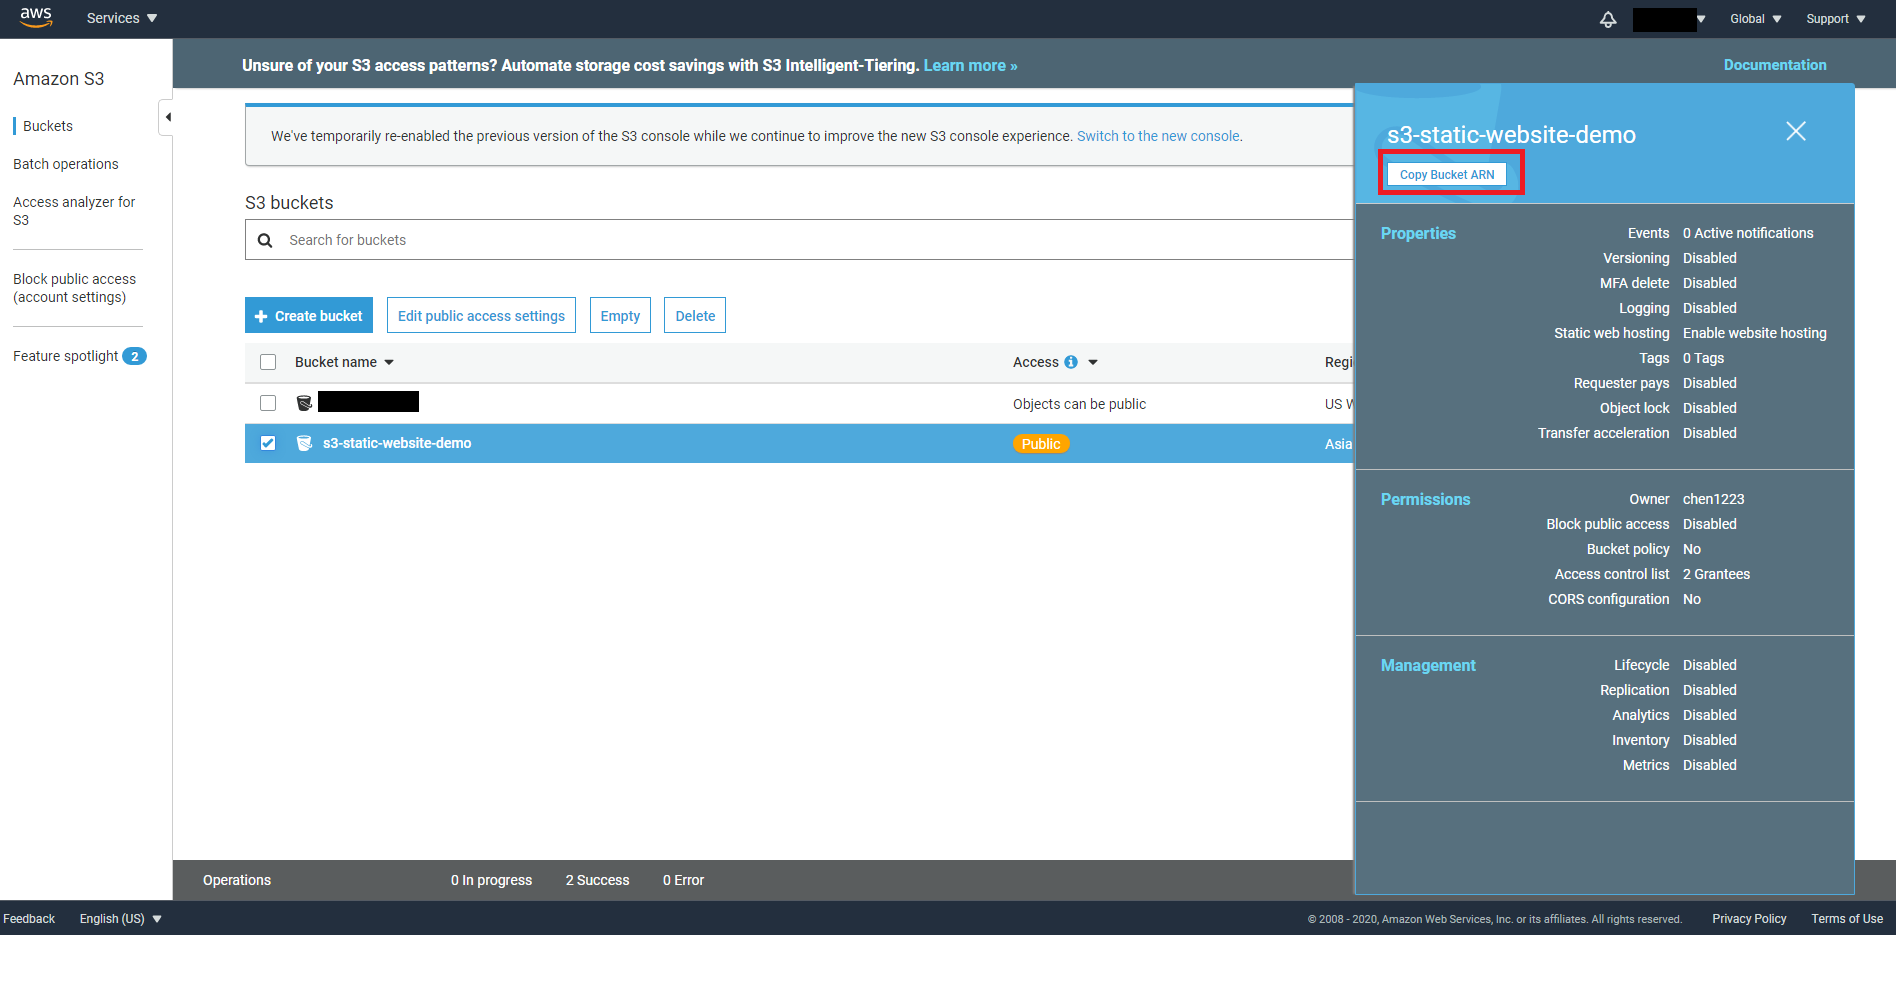
For ARN you need to enter your Bucket ARN which you can find on the S3 console when you select your bucket. The ARN will be in the following format:
arn:aws:s3:::<bucket_name>Don’t forget to add /* at the end of the ARN you copied.
Click on Add statement and Generate Policy.

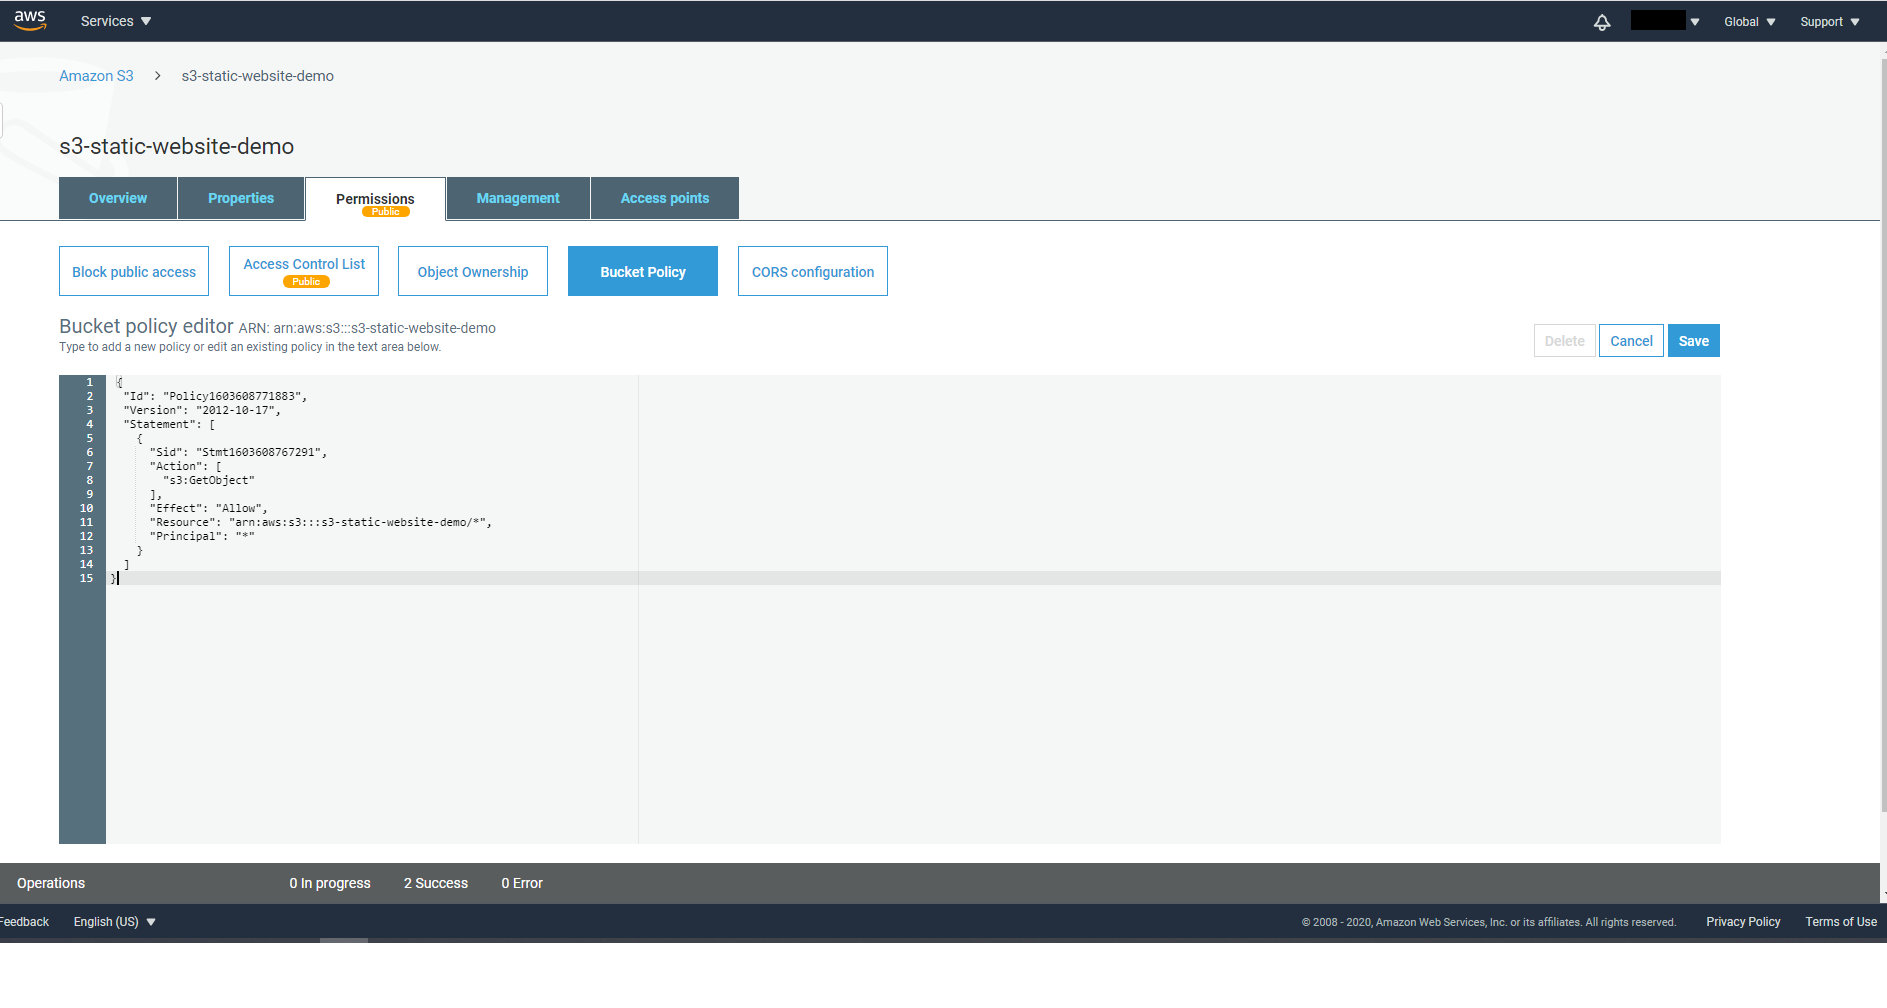
Copy the policy in JSON format and paste them into your Bucket Policy and click on Save.
{
    "Id": "Policy1603608771883",
    "Version": "2012-10-17",
    "Statement": [
        {
            "Sid": "Stmt1603608767291",
            "Effect": "Allow",
            "Action": [
                "s3:GetObject"
            ],
            "Resource": "arn:aws:s3:::s3-static-website-demo/*",
            "Principal": "*",
        }
    ]
}
When you’re done, visit the link again you received from Static website hosting and you will be able to see your website! In the future if you need to update your website, simply remove files from the Bucket and upload the updated contents.

Summary
In this tutorial, we have learned how to deploy static websites to AWS S3. However, we still have two problems remaining to solve: 1. The URL generated by AWS doesn’t look ideal. We want to use our custom domain. 2. The website is currently served as HTTP instead of HTTPS. According to Google, websites without HTTPS will have a huge impact on their SEO ranking. We will solve these two issues in the next tutorial.