
Introduction
Welcome everyone! In this new series – Unit Test in Angular, we will go over every knowledge you need to know in order to do unit testing in Angular. We will start by introducing some basic concepts of unit testing in this tutorial, followed by focusing on different aspects of unit testing in Angular in each of the following tutorials. Enough speaking, let’s jump into the world of unit testing in Angular. This series is meant for absolute beginners. We will go from the very basic ideas of unit testing in Angular and gradually add each chapter to cover the whole aspect of unit testing in Angular. No prior knowledge of unit testing is required, so if you feel the topic is too basic for you, feel free to skip to the next suitable tutorial.
How are tests run in Angular?
When you start a brand new Angular project, you’ll notice that besides the HTML, Javascript, and CSS file for the app component, there’s also another file called app.component.spec.ts.
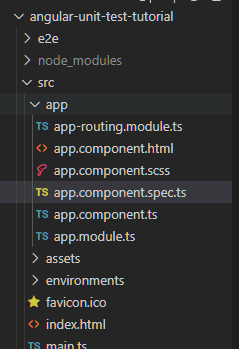
By default, Angular creates a test file for each file that is created using the ng command. Test files in Angular are specified with the *.spec.ts extension. So depending on the file you want to test against, the test file Angular created for you might be named as xxx.component.spec.ts or xxx.service.spec.ts. When you start running tests in Angular, Angular will find all test files with the spec.ts extension and execute test cases one by one.
Angular test can be started with the command ng test. When you type in the command, by default a Chrome window will open up and you will see your test results from there.

In Angular, tests are written in Jasmine – A Javascript framework that allows us to write tests in human readable format. Jasmine is used not only for Angular, but for pure Javascript as well as other Frontend frameworks like Vue or React. It comes with Test Suite, Test Case, and some built in matchers which we will cover in a later point of the series.
On top of Jasmine, we use Karma to run tests for us. When we start tests with Karma, it will open up a browser and monitor our files. Whenever files are changed, Karma will refresh the browser for us, so that our test results will always reflect the latest code.
Understanding the test results
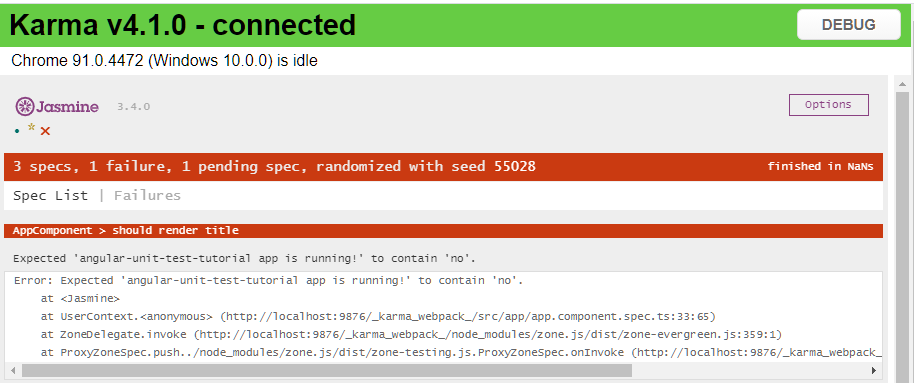
In Angular testing, there are three possible outcomes for each test: Succeed (passed), Failed, or Skipped.
A passed test case will be presented by a green dot.
A failed test case will be presented by a red cross sign followed by failed reasons.
A skipped test case will be presented by a yellow star sign.

Terminologies
Let’s try to understand some terminologies by looking in a test file.
Test Suite
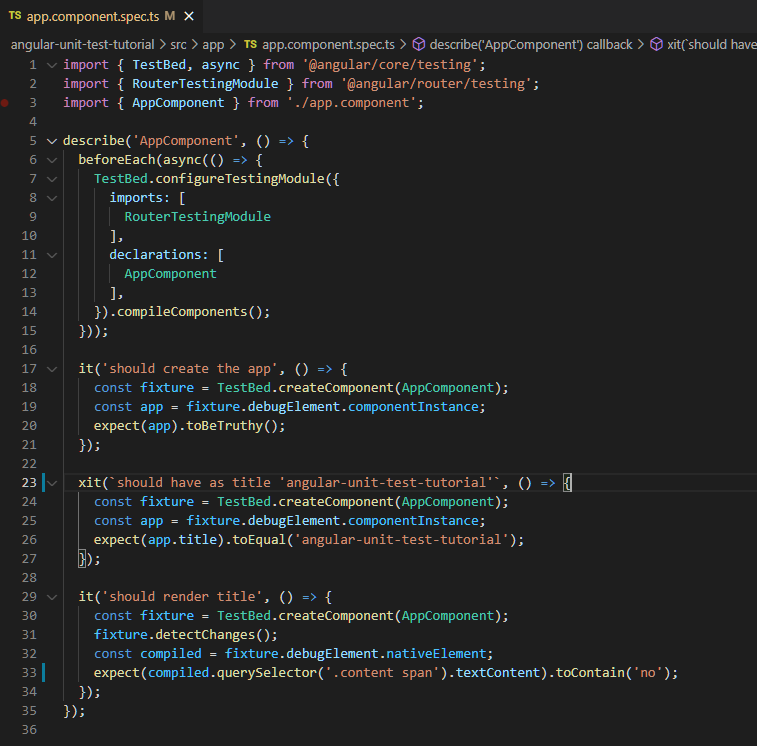
Each Angular test file starts with a function called describe – also known as Test Suite. The describe function takes in two arguments, the name of the Test Suite and a callback function that includes all test cases. By default, the name of the Test Suite will be set to the file name, so that you can easily distinguish which test file contains failing tests directly from the test result window.
Setup and Teardown Functions
Inside a Test Suite, we’ll see a beforeEach function that prepares the TestBed for us. As the name suggested, the beforeEach function will be executed by Angular before each test case. Instances that are registered inside a beforeEach function will be reinitialized before each test case to ensure all instances are in a clean state before a new test is about to start. This process is called the Setup process.
In contrast, there’s another function called afterEach which will be executed after each test case. The purpose of the afterEach function is for you to do some clean up jobs. Even though instances declared in beforeEach function are reinitialized before each test, there is still some data that may persist between tests. For instance, data stored in browsers such as localStorage or sessionStorage. It’s always a good practice to clean up in the afterEach function if you have data that may persist across test cases. This process is called the Teardown process.
beforeEach – Executed before each test case
afterEach – Executed after each test case
beforeAll – Executed once at the beginning of all testsafterAll – Executed once the the end of all tests
TestBed
TestBed is where we can prepare our test environment. Nothing will be included in the test environment unless they are specifically registered or provided in the TestBed. You can think of it as the combination of a module and a constructor in any file. If you need to import any modules in order for your component to work, you will need to import the module in the TestBed. If you provide a service in your component’s constructor, then you will also need to provide it in the TestBed.
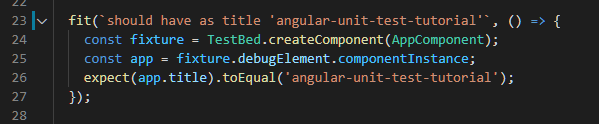
Test case
In Angular, test cases are written in the it function. The it function takes in two arguments, a description of the test case and a callback function that defines the test. Although it’s not mandatory, Angular suggests developers to write test descriptions following the pattern: should do something. Following this pattern has a couple benefits: first your test result window will look very organized as all test case descriptions start with the same word “should…”; secondly, people can easily understand the purpose of the test case by just looking at the test case description.
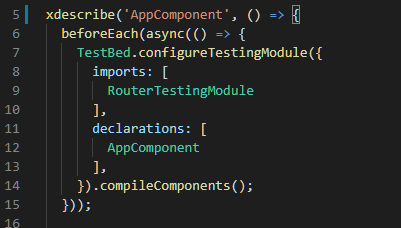
Omitted Test Case and Omitted Test Suite
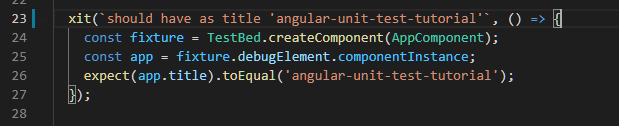
If somehow you wish to skip a single test case or the entire test suite, you can do so by simply adding an x before the test case / Test Suite you want to omit.
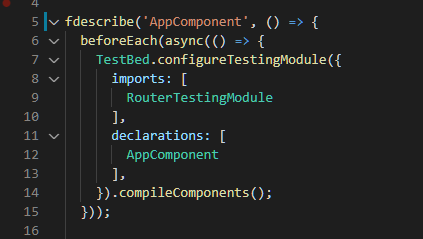
Focused Test Case and Test Suite
In contrast, if you wish Angular to only run a single test case or a single Test Suite, you may add an f before the test case /Test Suite you want Angular to focus on.
Test Coverage
Angular provides a handy command that allows you to quickly identify what functions are covered in tests and what are missing. Start the test with the following ng command
ng test –code-coverage
This will print out a test summary in the console
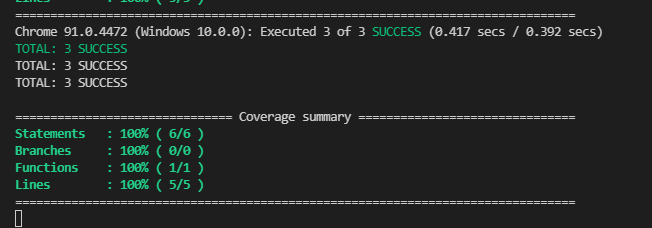
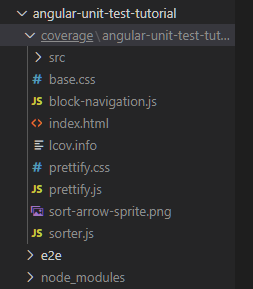
Along with a new directory that contains the detailed test report.
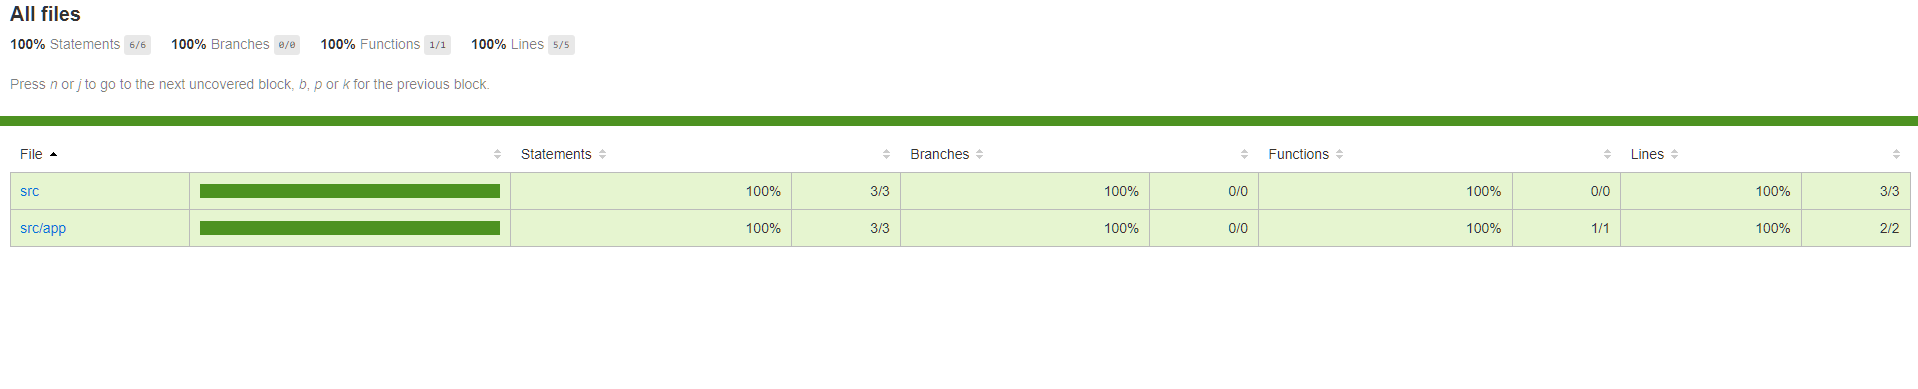
If you open the index.html in browser you can view in detail the total percentage of code coverage
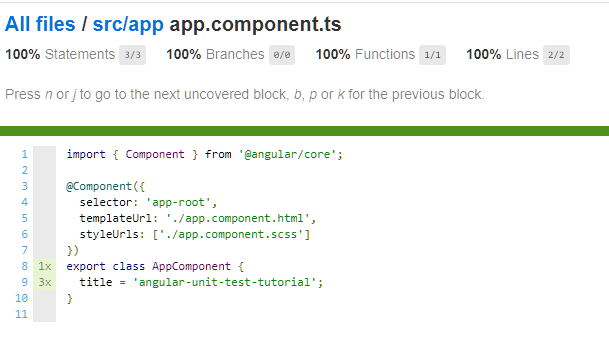
And if you click into a single file, you can view which lines of code are not covered in tests yet. Programs that are not covered in tests yet will be highlighted in red. Programs that are already covered in tests will be highlighted in green with a number shown on the left to indicate in how many test cases the program has been run.
In general, a test coverage of 70% should be good enough, but this may vary depending on the company you are in.
Summary
In this tutorial we cover some basic concepts of unit testing in Angular. We learned how tests are executed, some important terminologies, and how to understand the test result. Despite the fact that we went over many topics in this tutorial, we barely touched the surface. However, it’s important to keep these concepts in mind before we can move forward. In the next chapter, we will learn how test cases are written, and we will also introduce some important helper functions that are commonly used in Angular testing.