Introduction
This is the last tutorial of the series – Complete guide of deploying static websites on AWS. Even though there are many different ways to deploy to AWS, in this tutorial we will only focus on deploying static websites because that’s the focus of this series. Recall earlier in the series we have learned that we can host static websites on AWS S3 by directly uploading our Frontend code to S3 Bucket. And to update the site, we need to manually upload the new contents to S3 Bucket and request invalidation in the CloudFront dashboard. In this tutorial, we will automate the process, so that when a developer pushes his commits, his Frontend code will be automatically compiled, uploaded to S3 Bucket, and finally the CloudFront cache will be automatically invalidated as well.
Set up AWS CodeBuild
In order to achieve automation, we need to use a service provided by AWS called CodeBuild. AWS CodeBuild works like other popular CICD platforms (Jenkins, Travis, etc…), it allows you to define a build file (default buildspec.yml) and specify what should happen in each stage during the build process.
By default CodeBuild will look for a file called buildspec.yml in your project root directory. However, you may also specify a different name or a different path during CodeBuild setup. This buildspec.yml will contain the logic of automating the website update process, so mainly the following three tasks:
- Compile our Angular project to output a dist folder (the output directory is specified in the angular.json file)
- Upload the dist folder to the S3 Bucket associates with CloudFront
- Clear CloudFront cache by submitting invalidation request
Let’s get started by creating a file called buildspec.yml in your project root directory with the following contents:
# CodeBuild Version
version: 0.2

env:
 shell: bash
 variables:
   BUCKET_NAME: "s3-static-website-demo"
   DISTRIBUTION_ID: "E2E0K0WPAWHH6K"

phases:
 install:
   commands:
     # Install the sudo package
     - apt-get update -y
     - apt-get install -y sudo
     # Download and Install NodeJS 12.0
     - curl -sL https://deb.nodesource.com/setup_lts.x | sudo -E bash -
     - sudo apt-get install -y nodejs
     - nodejs -v
     - echo Installing source NPM dependencies...
     # Install http drivers for node
     - sudo apt-get install -y apt-transport-https build-essential
     - npm install

 build:
   commands:
     # Builds Angular application
     - echo Build started on `date`
     - npm run build

 post_build:
   commands:
     # Clear out the old contents in the bucket connected to CloudFronts
     - aws s3 rm s3://${BUCKET_NAME} --recursive
     - echo S3 bucket ${BUCKET_NAME} is cleared.
     # Copy Angular build output (dist) folder to S3 bucket
     - aws s3 cp dist s3://${BUCKET_NAME} --recursive
     # Create CloudFront invalidation to clear CloudFront cache
     - aws cloudfront create-invalidation --distribution-id ${DISTRIBUTION_ID} --paths "/*"
     - echo Build completed on `date`
Code explain:
In the env -> variables section, we define the following two variables:
BUCKET_NAME: Name of your S3 Bucket
DISTRIBUTION_ID: ID of your CloudFront Distribution
Phase explain:
install: In the install phase, we start by installing the nodejs and Angular cli dependencies we need on the machine. Then we perform an npm install as you normally would when you git clone an Angular project to your local machine to install the Frontend dependencies.
Note. Please note that we can assume the code has already been git cloned to the build server when the install phase starts. We will cover this in the next section.
build: During the build phase, we simply perform npm run build to build our Angular project. By the end of this phase, a dist folder should be generated.
post_build: Finally, in the post_build phase, we first remove old contents in our S3 Buckets using commands from aws cli. Copy contents from the dist folder to our S3 Bucket, and then create invalidation on our CloudFront by specifying the Distribution ID.
Note. We can assume aws cli is already installed on the build server provided by AWS.
With the buildspec.yml ready in your project root directory, we can move on to setup AWS CodeBuild.
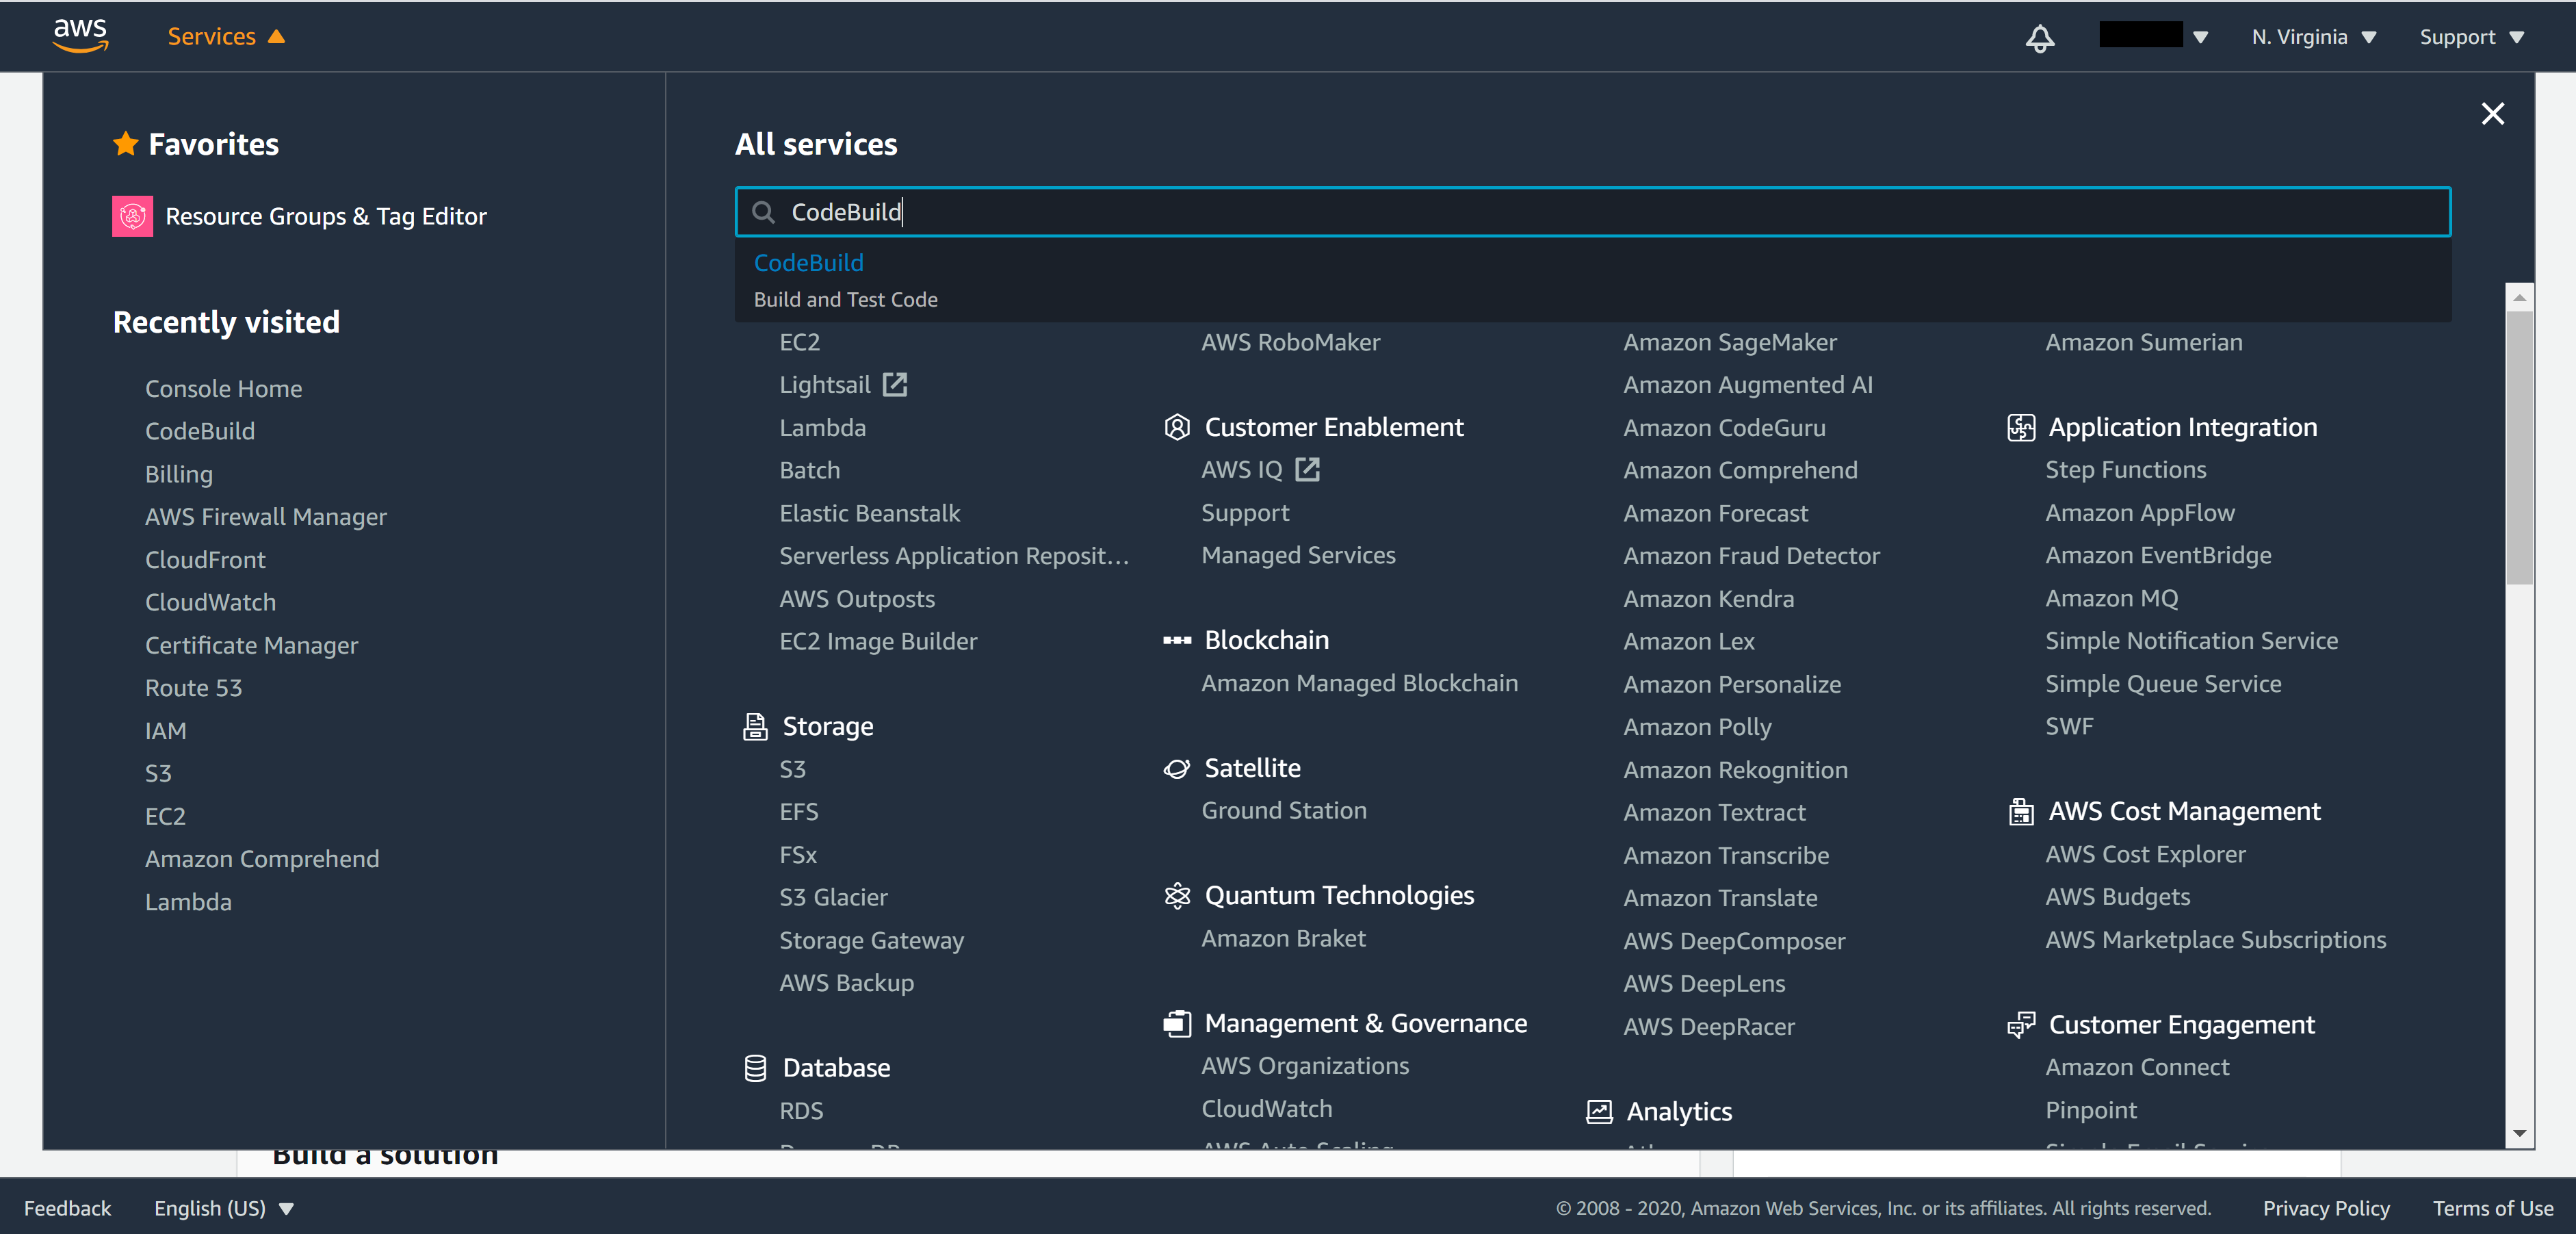
From the menu on the top left corner of AWS console, select Services and search for CodeBuild.
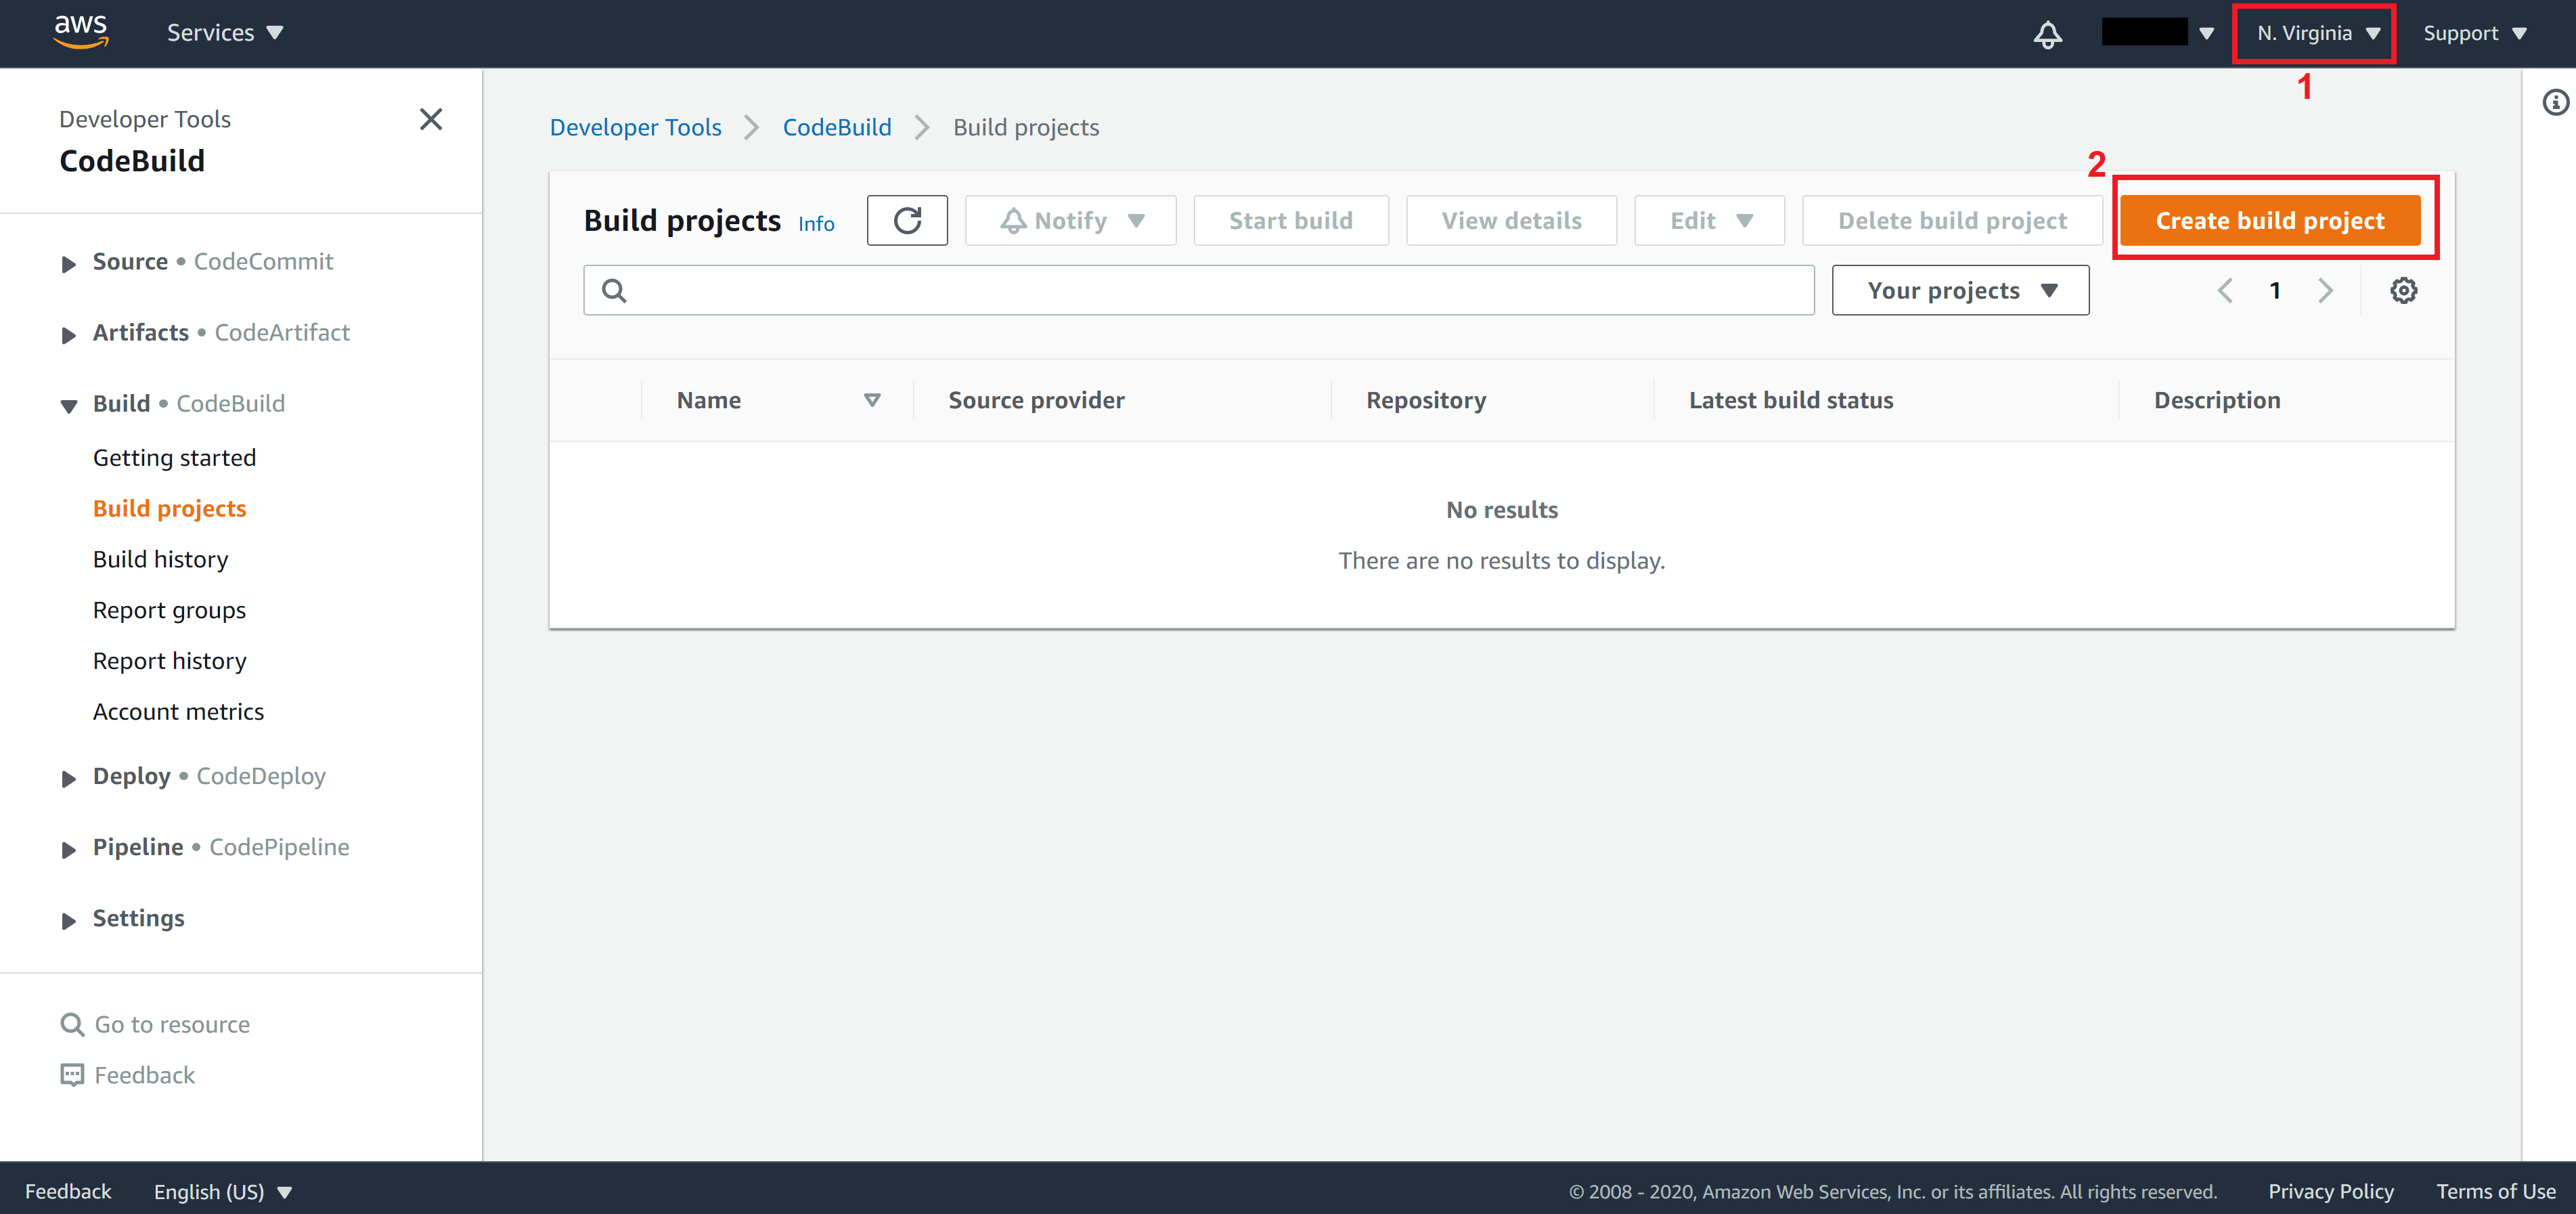
Once you are in the CodeBuild console, switch the region to N. Virginia because CloudFront can only be seen in the N. Virginia region then click on Create build project.
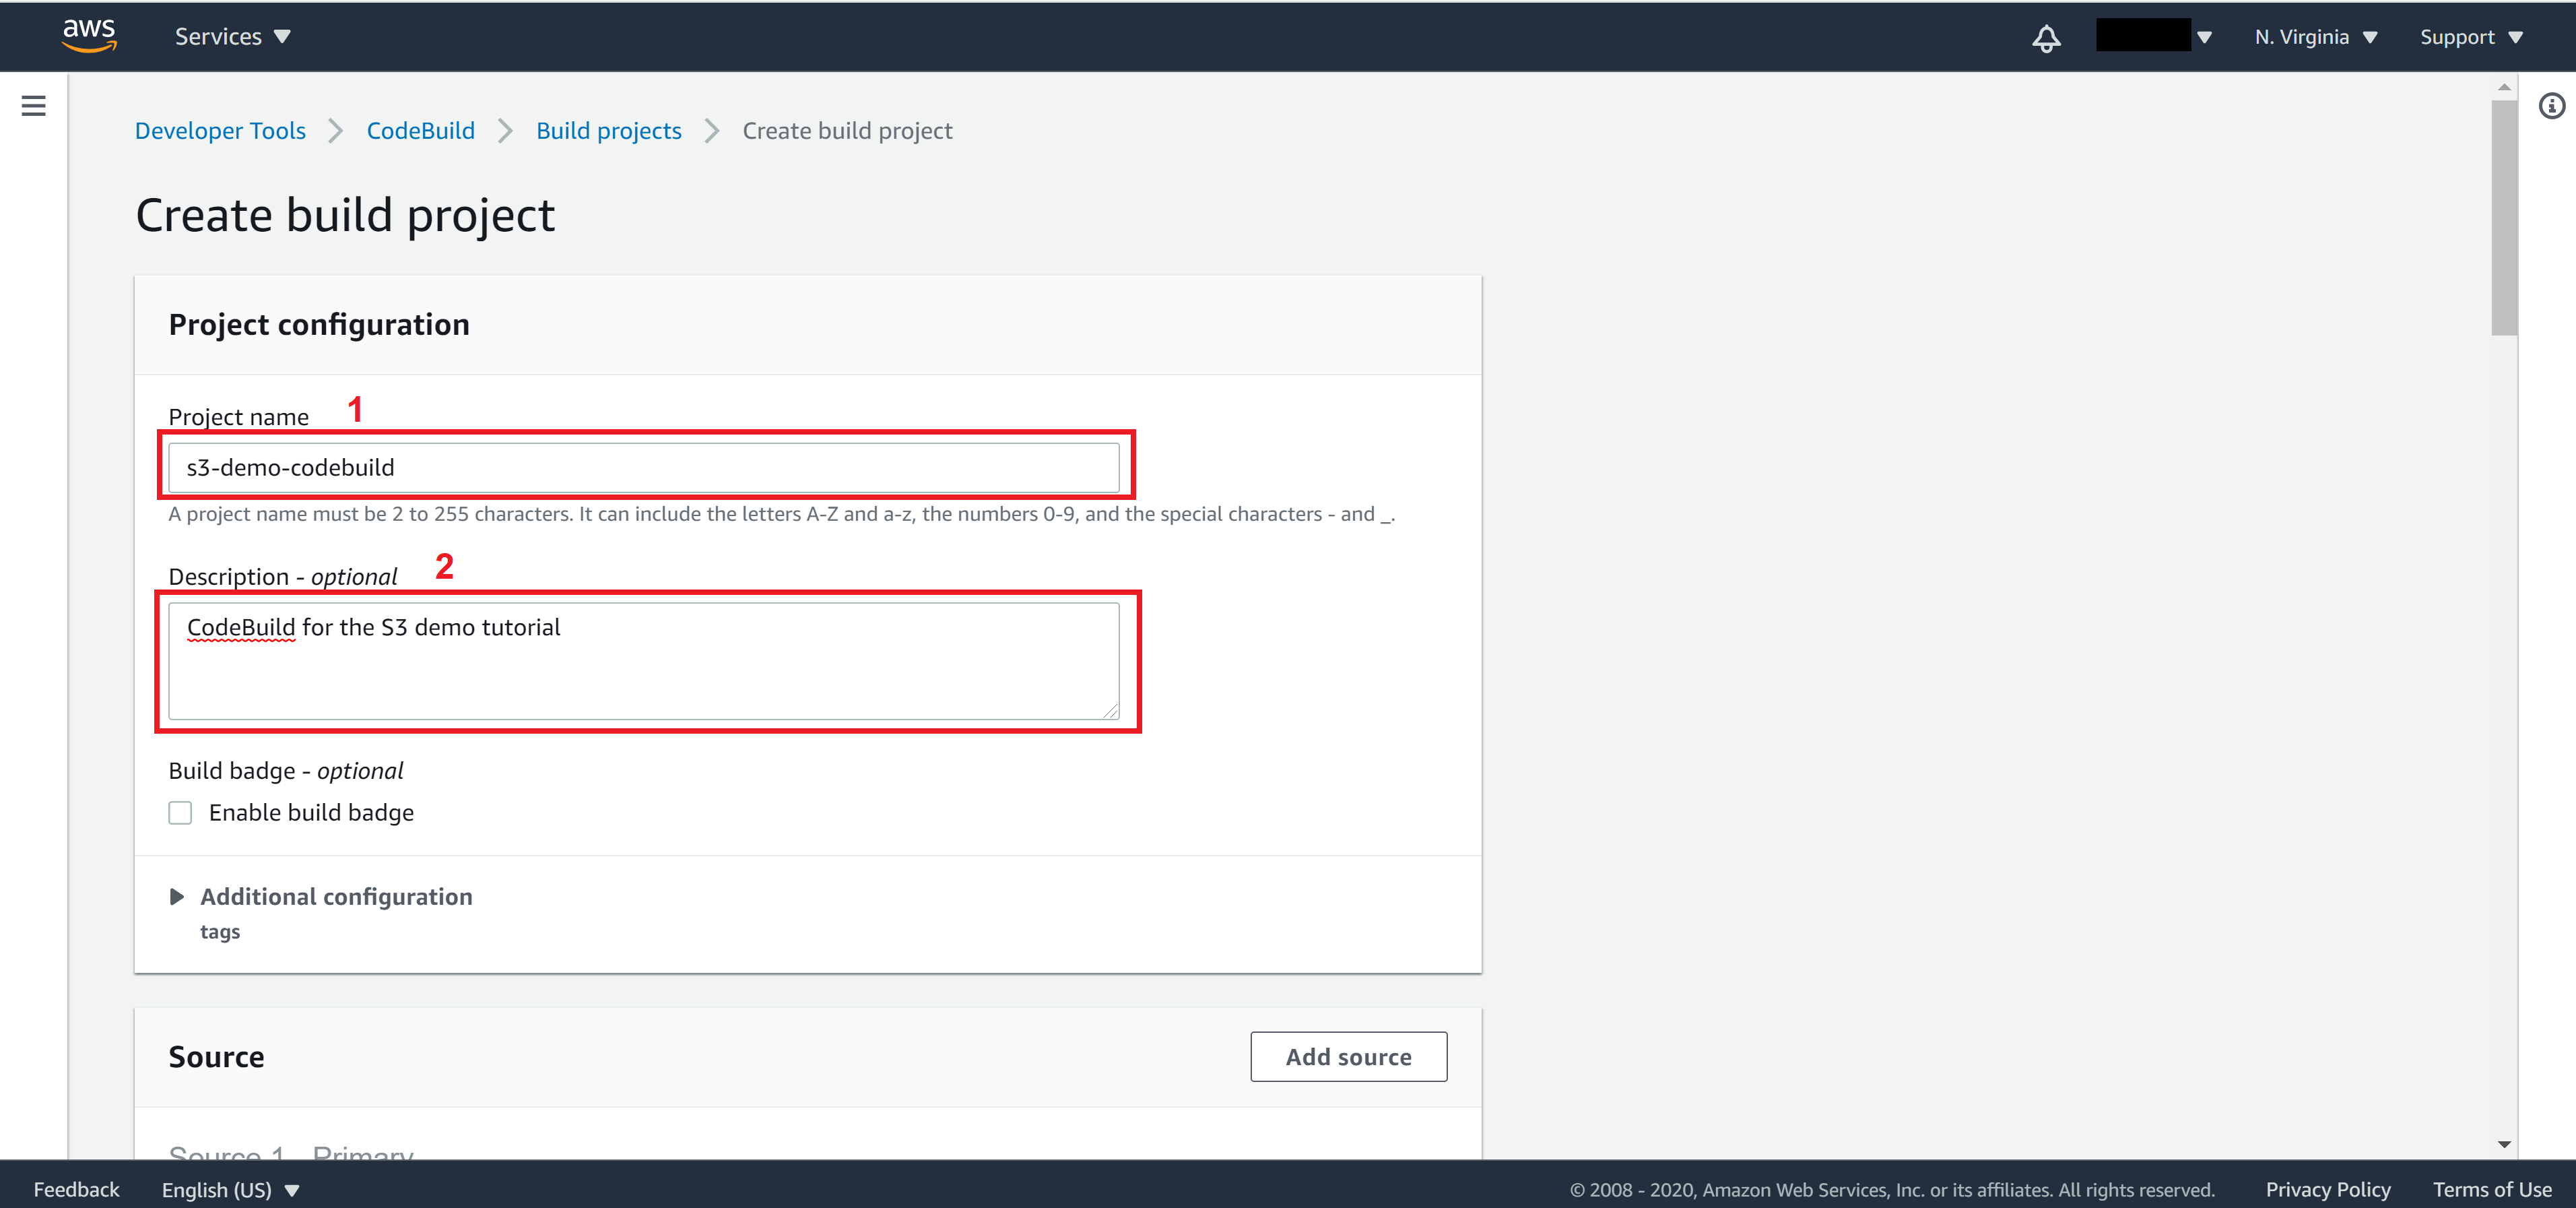
Enter Project name and Description for this CodeBuild
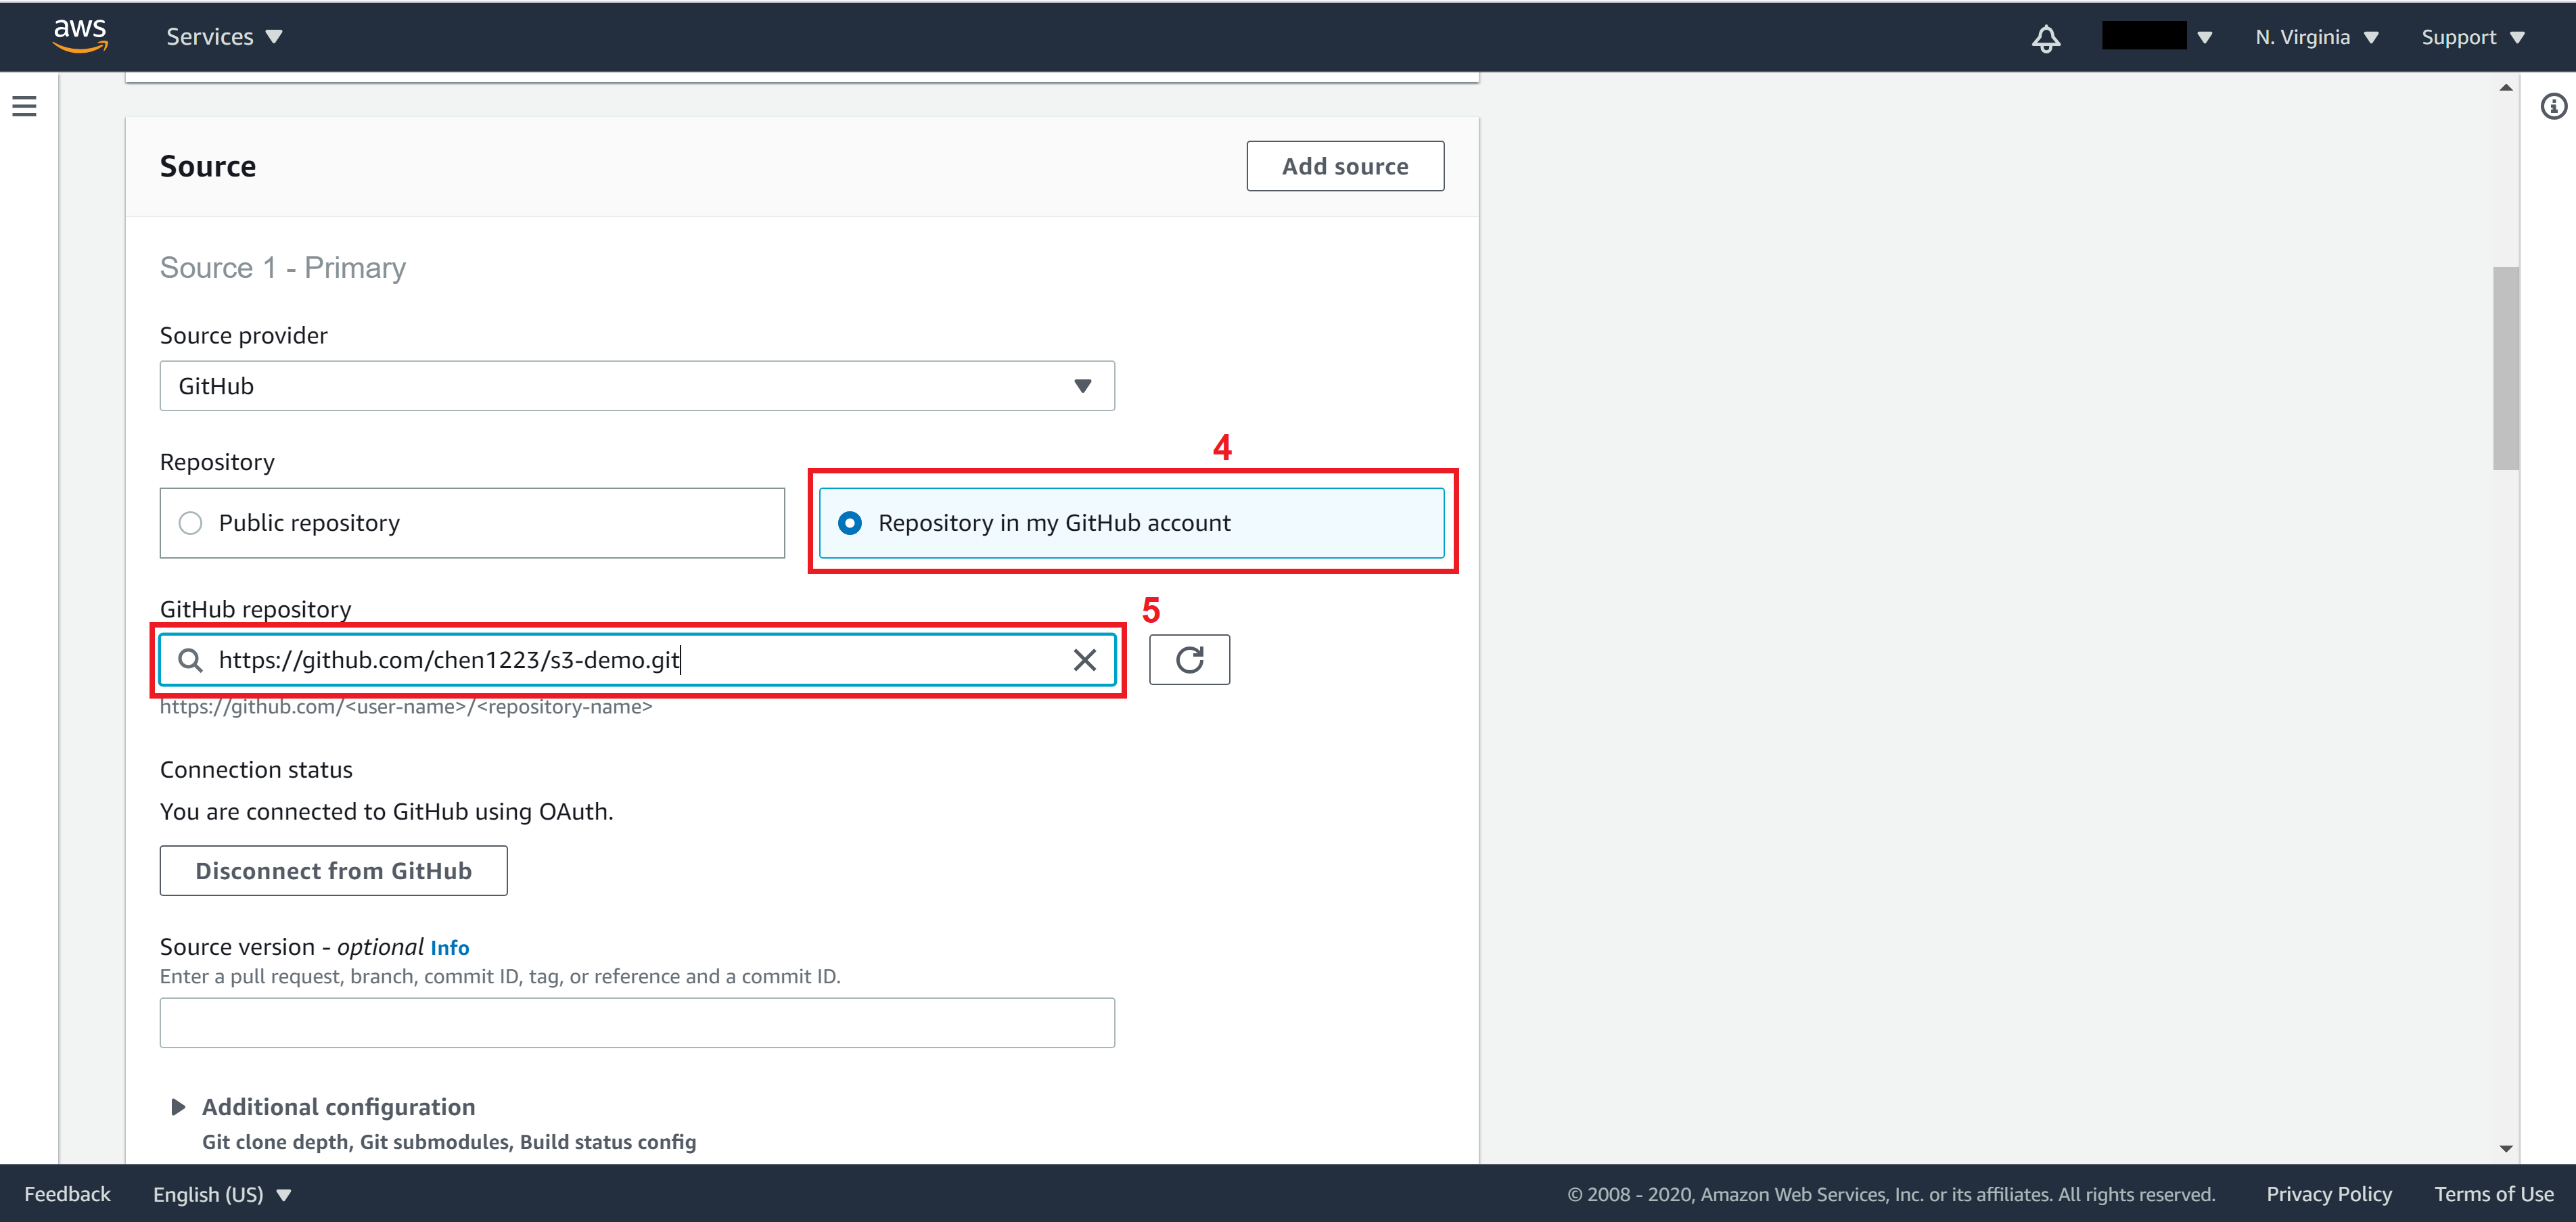
Select source. This is where CodeBuild will pull your Frontend code from. There are various options in the Source provider dropdown menu. If your code is hosted on AWS CodeCommit then choose AWS CodeCommit and select Repository.
Otherwise if your code is stored on Gitlab or Github, you will need to provide a way for AWS CodeBuild to authenticate. For GitHub you may provide a personal access token directly, which can be found in Account -> Settings -> Developer Settings.
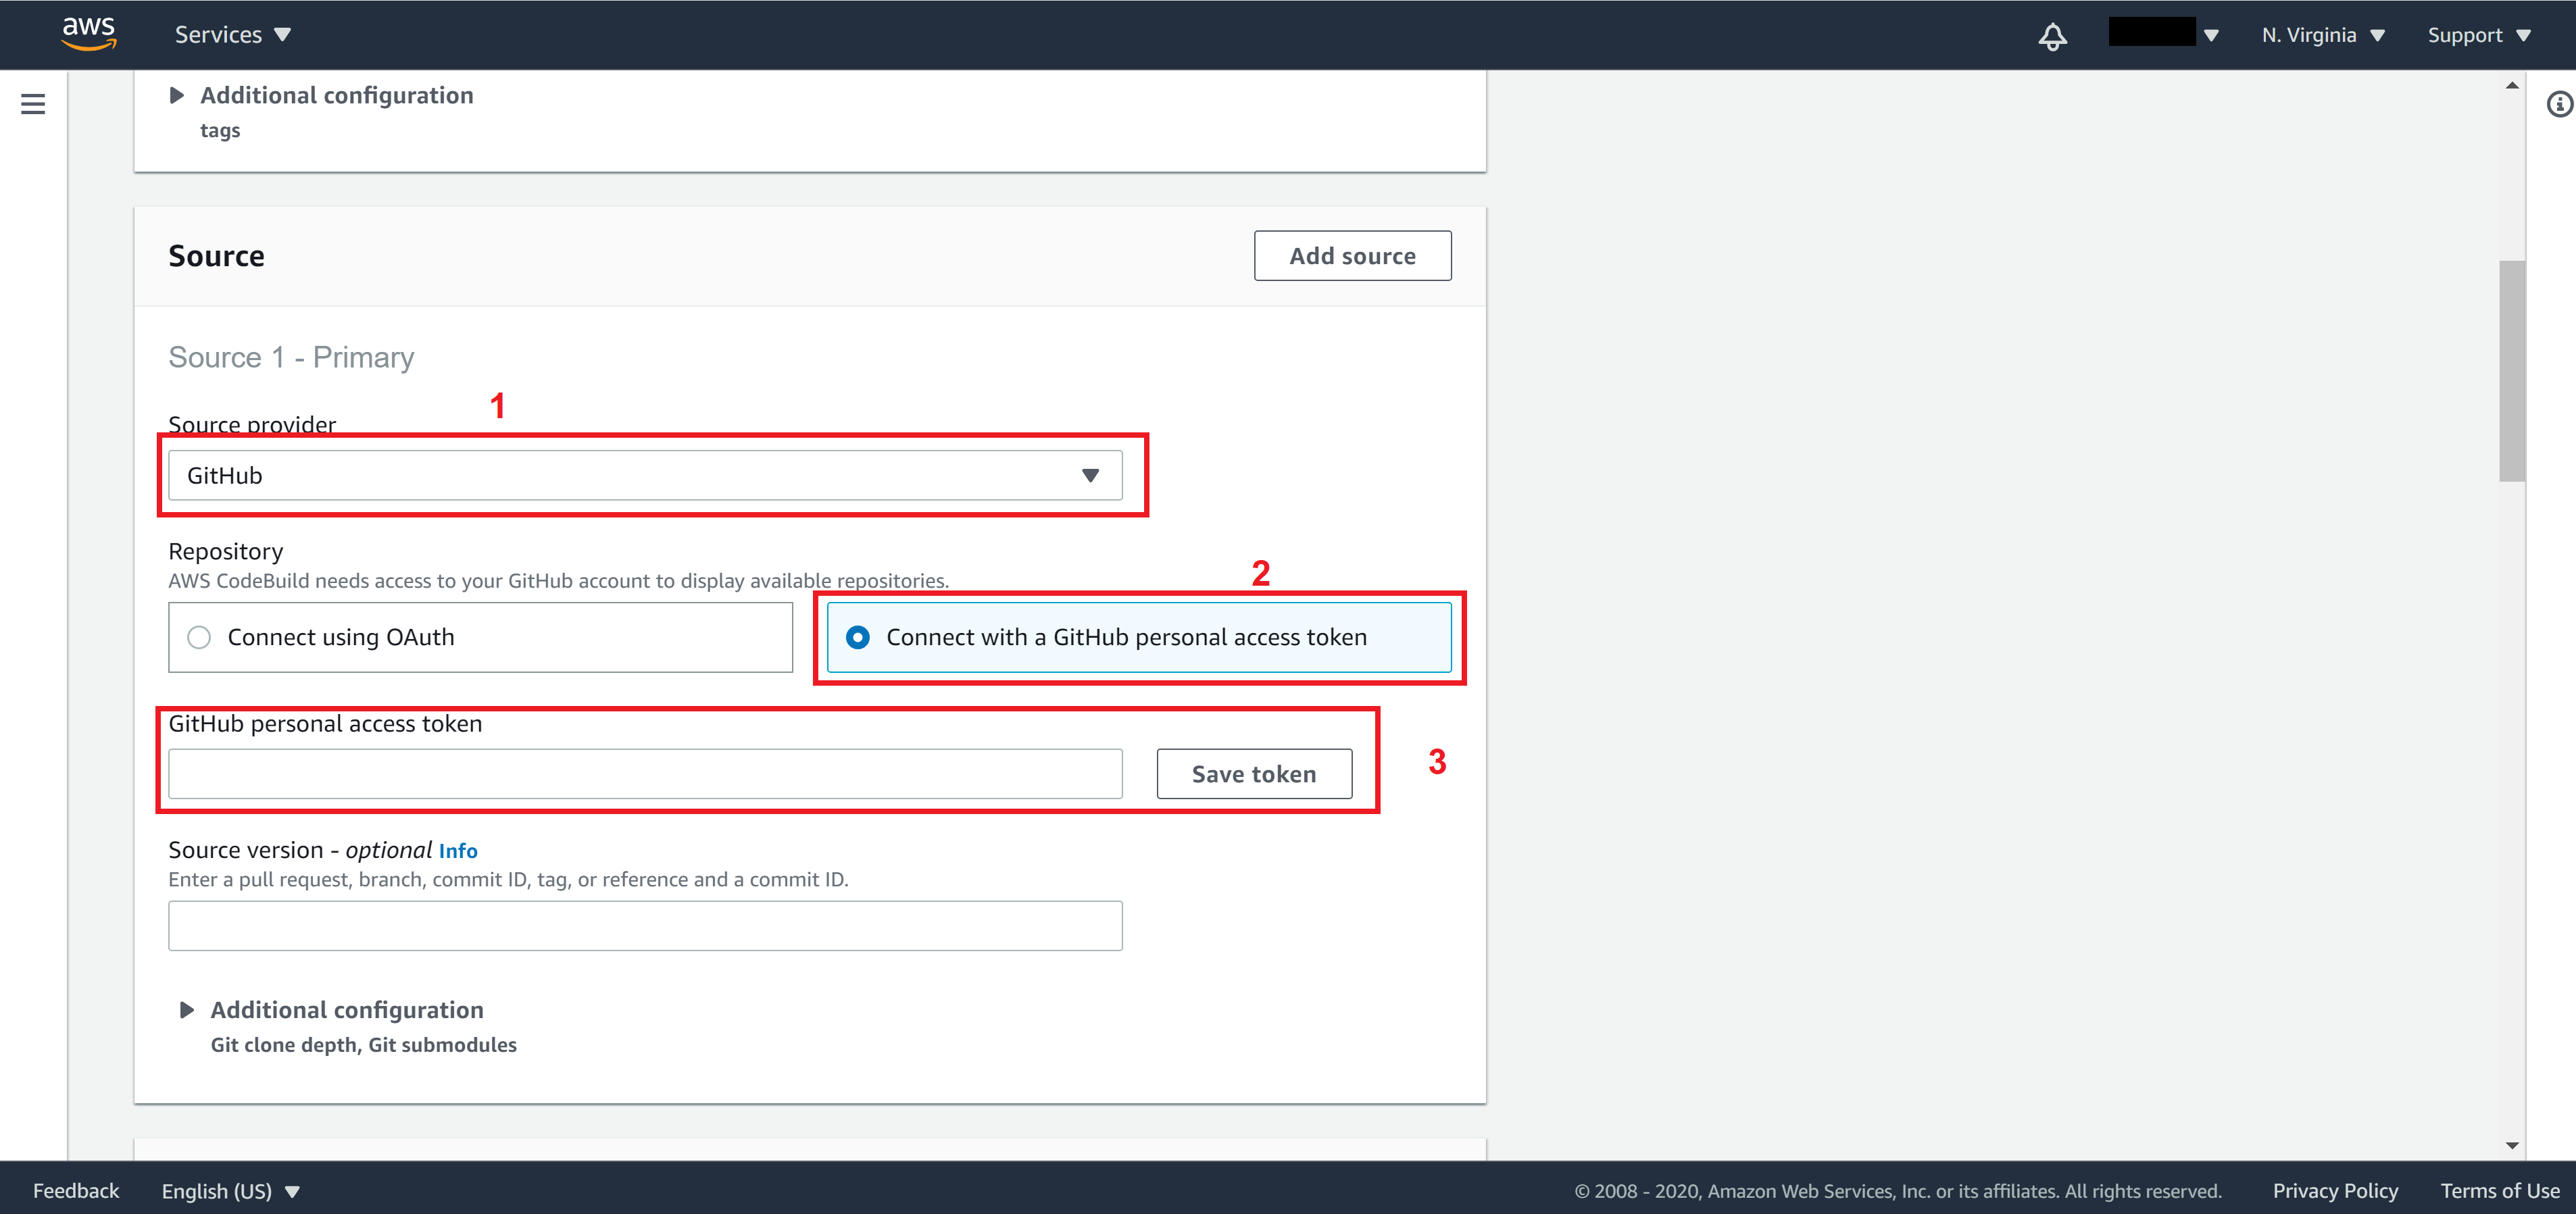
Once you click on Save token, you will be able to select your repository. Select Repository in my GitHub account and choose your repository from the GitHub repository dropdown menu.
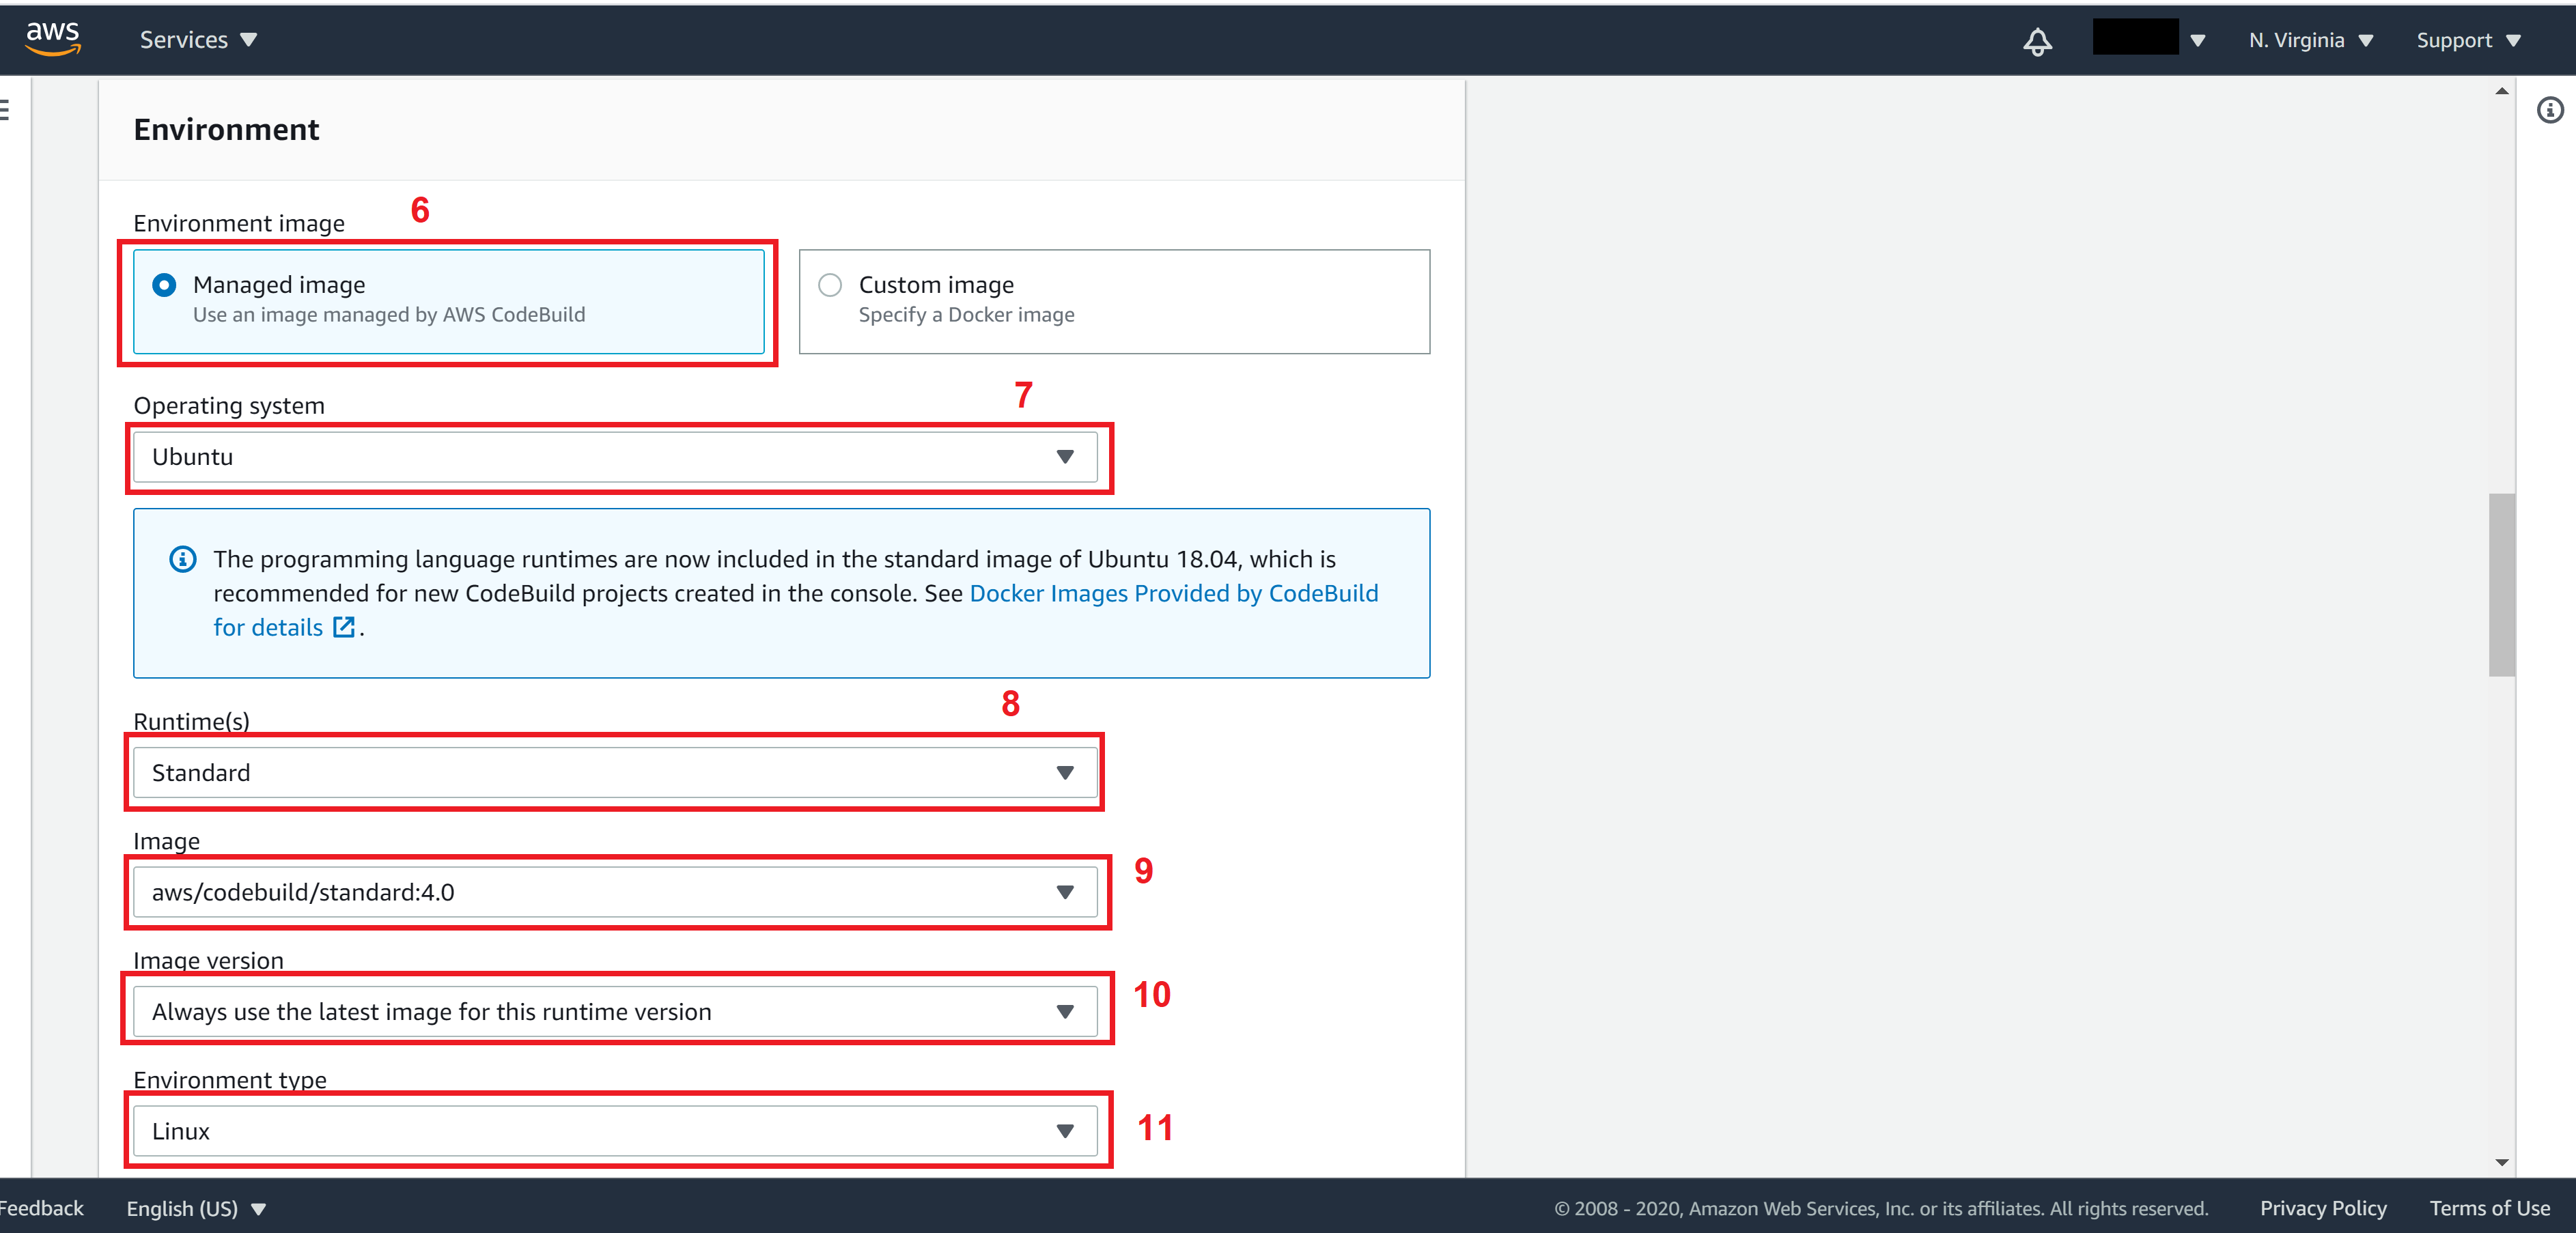
For Environment, set the following fields:
Environment image: Managed image
Operating system: Ubuntu
Runtime(s): Standard
Image: aws/codebuild/standard:4.0
Image version: Always use the latest image for this runtime version
Environment type: Linux
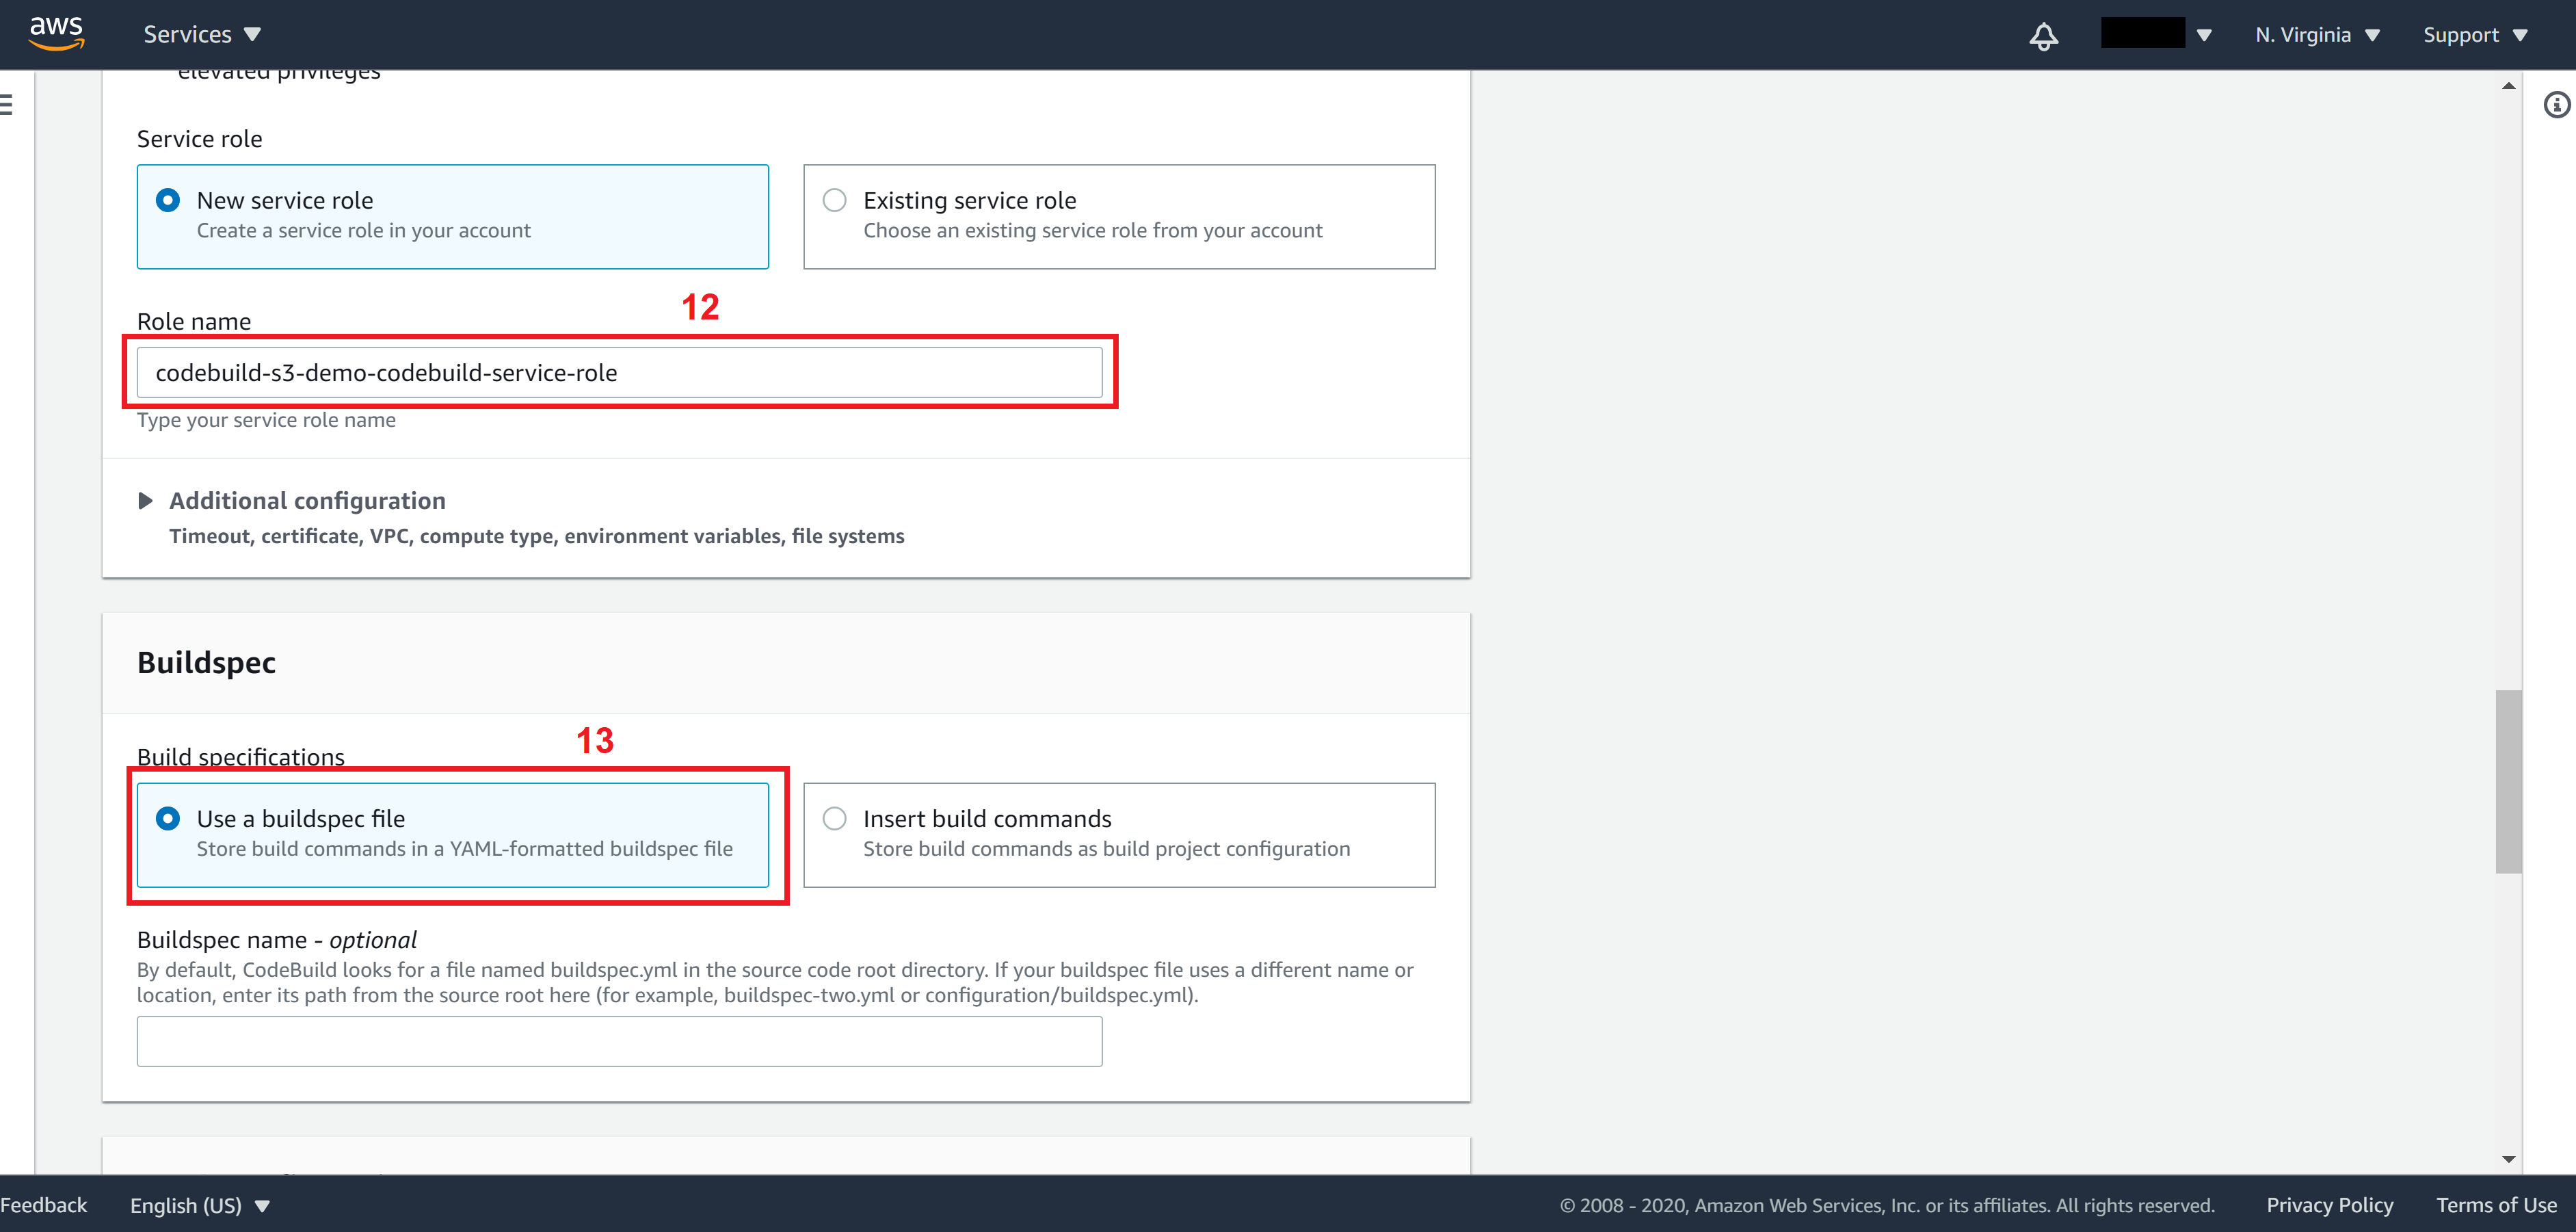
Create/Select a Role for the CodeBuild. This role should have permissions to delete objects in S3 Bucket, create objects in S3 Bucket, as well as create invalidation in CloudFront.
Note. To generate the policy needed for this role, you may use the policy generator provided by AWS, which we covered in the How to host static websites on AWS S3 tutorial.
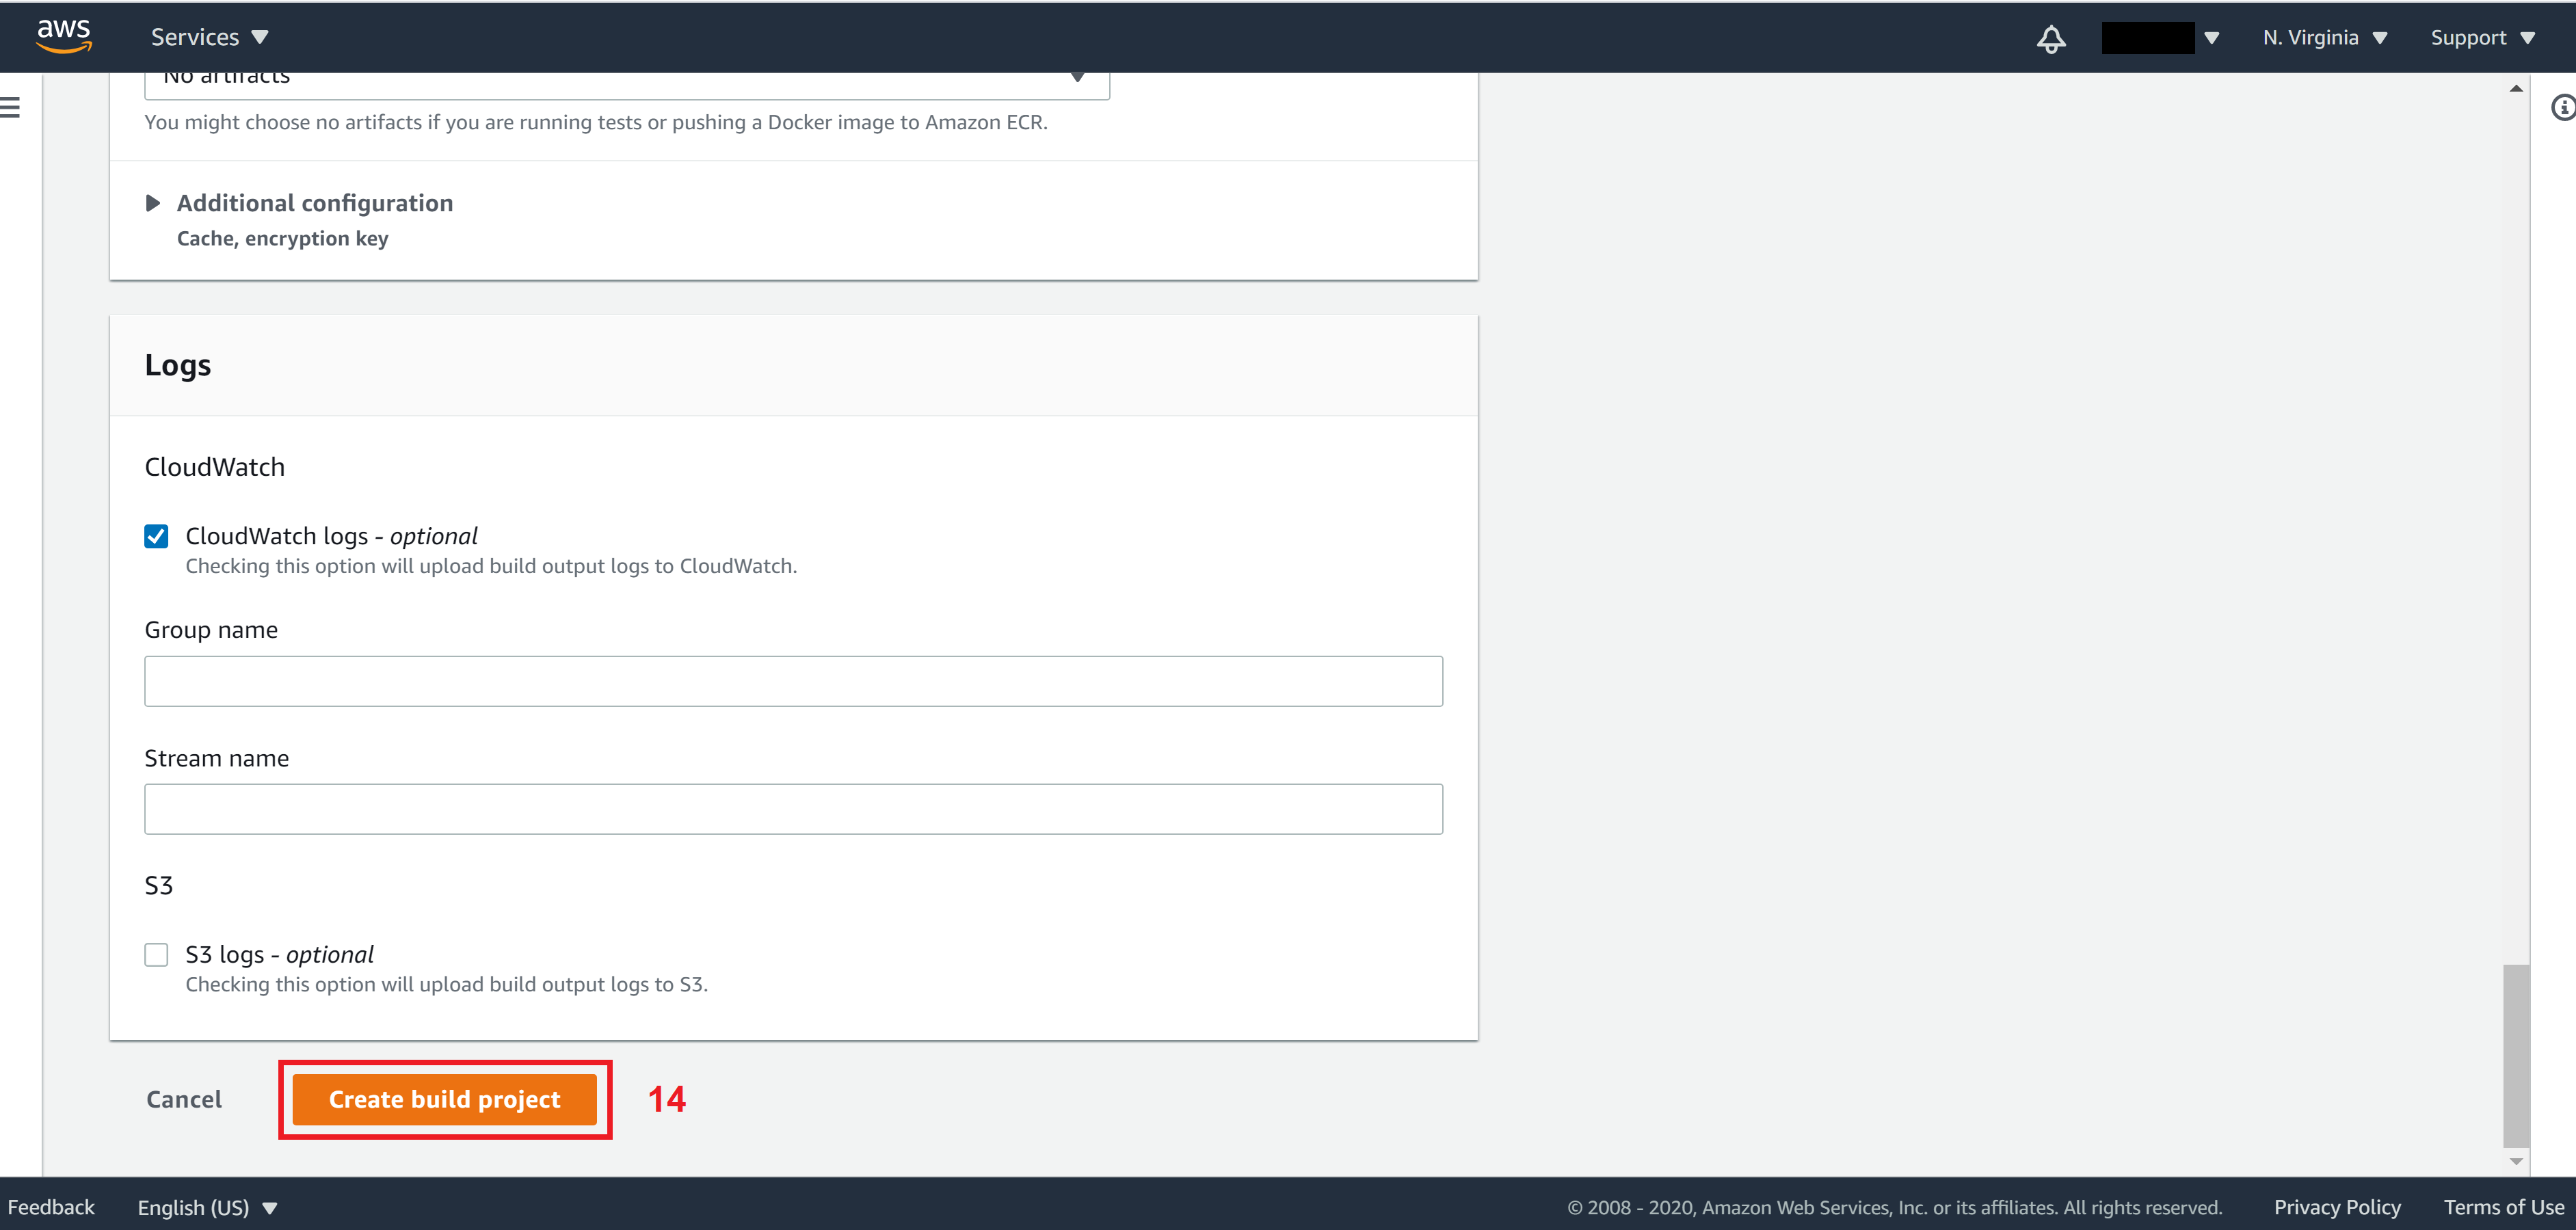
Leave everything else the same and click on Create build project
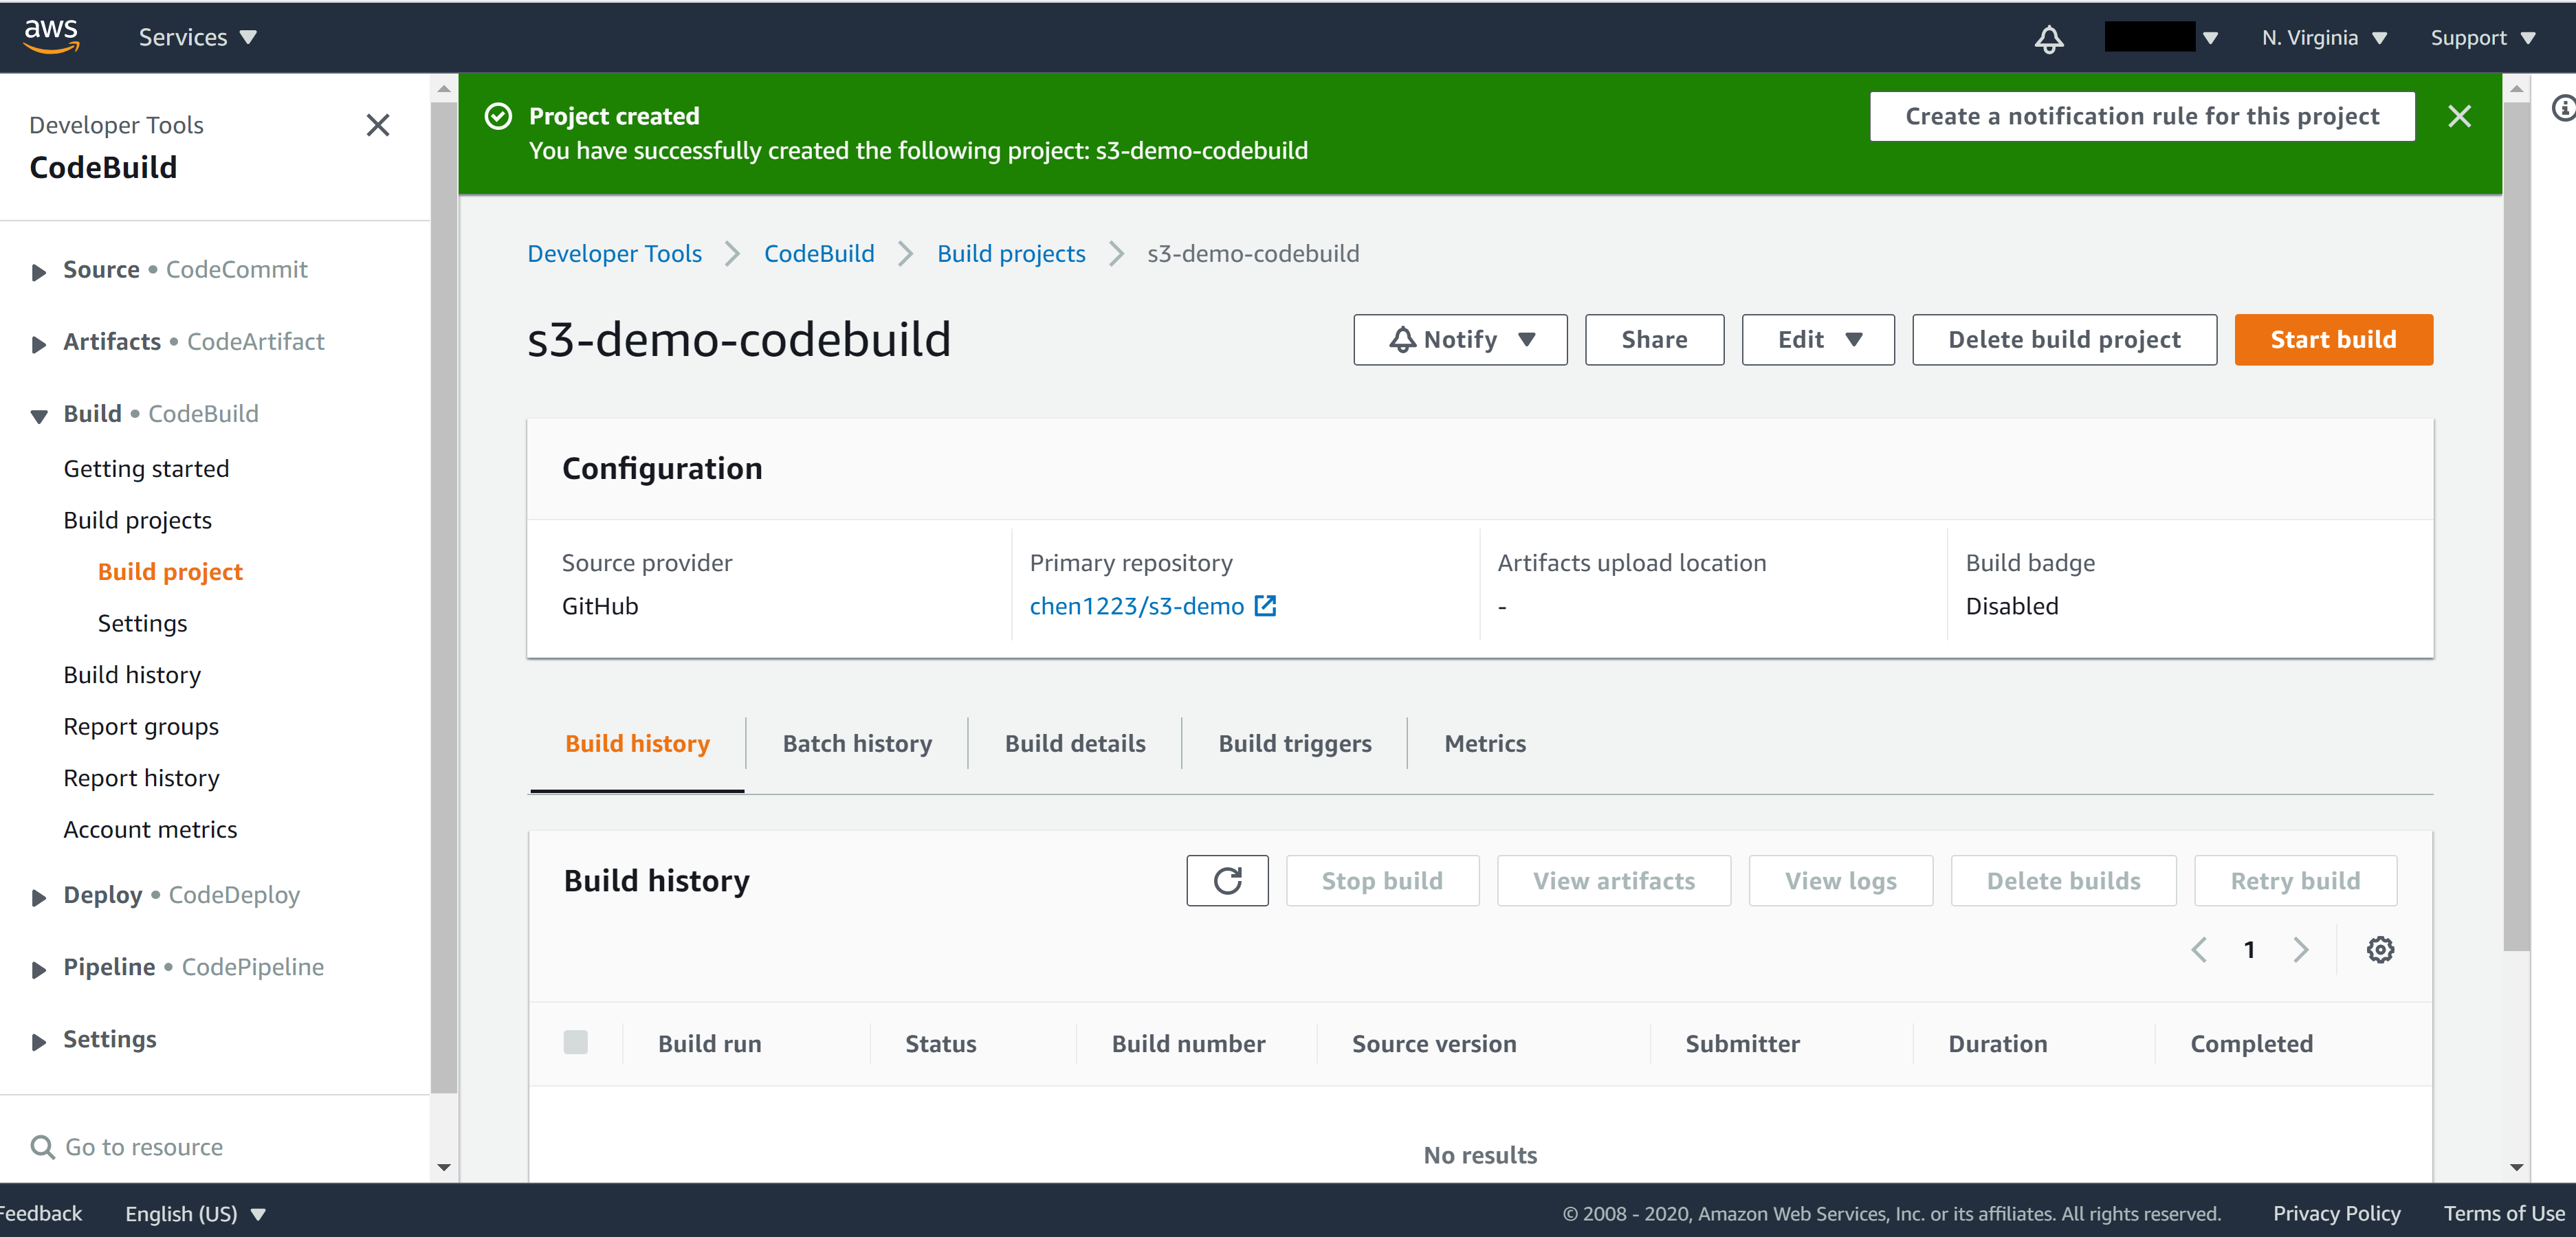
You will be able to see your newly created CodeBuild in the CodeBuild console.
Set up AWS CodePipeline
Now we have set up AWS CodeBuild, let’s set up AWS CodePipeline. In AWS CodePipeline, we can specify how often we want to trigger the build. For example trigger the build on a daily basis, or by a specific event – git push for instance.
AWS CodePipeline typically contains three stages:
- Source stage: In this stage, CodePipeline will download your source code to the build machine.
- Build stage: During the build stage, CodePipeline will feed the result of the source stage (your source code) as input into the CodeBuild you associated with. That’s why during the install phase of CodeBuild we can assume our source code has already been downloaded.
- Deploy stage: During the deploy stage, this is normally where you ask CodePipeline to restart servers for you. But in our case, we have a serverless architecture and our file uploading process to S3 will take place in the Build stage, so we can safely skip this stage.
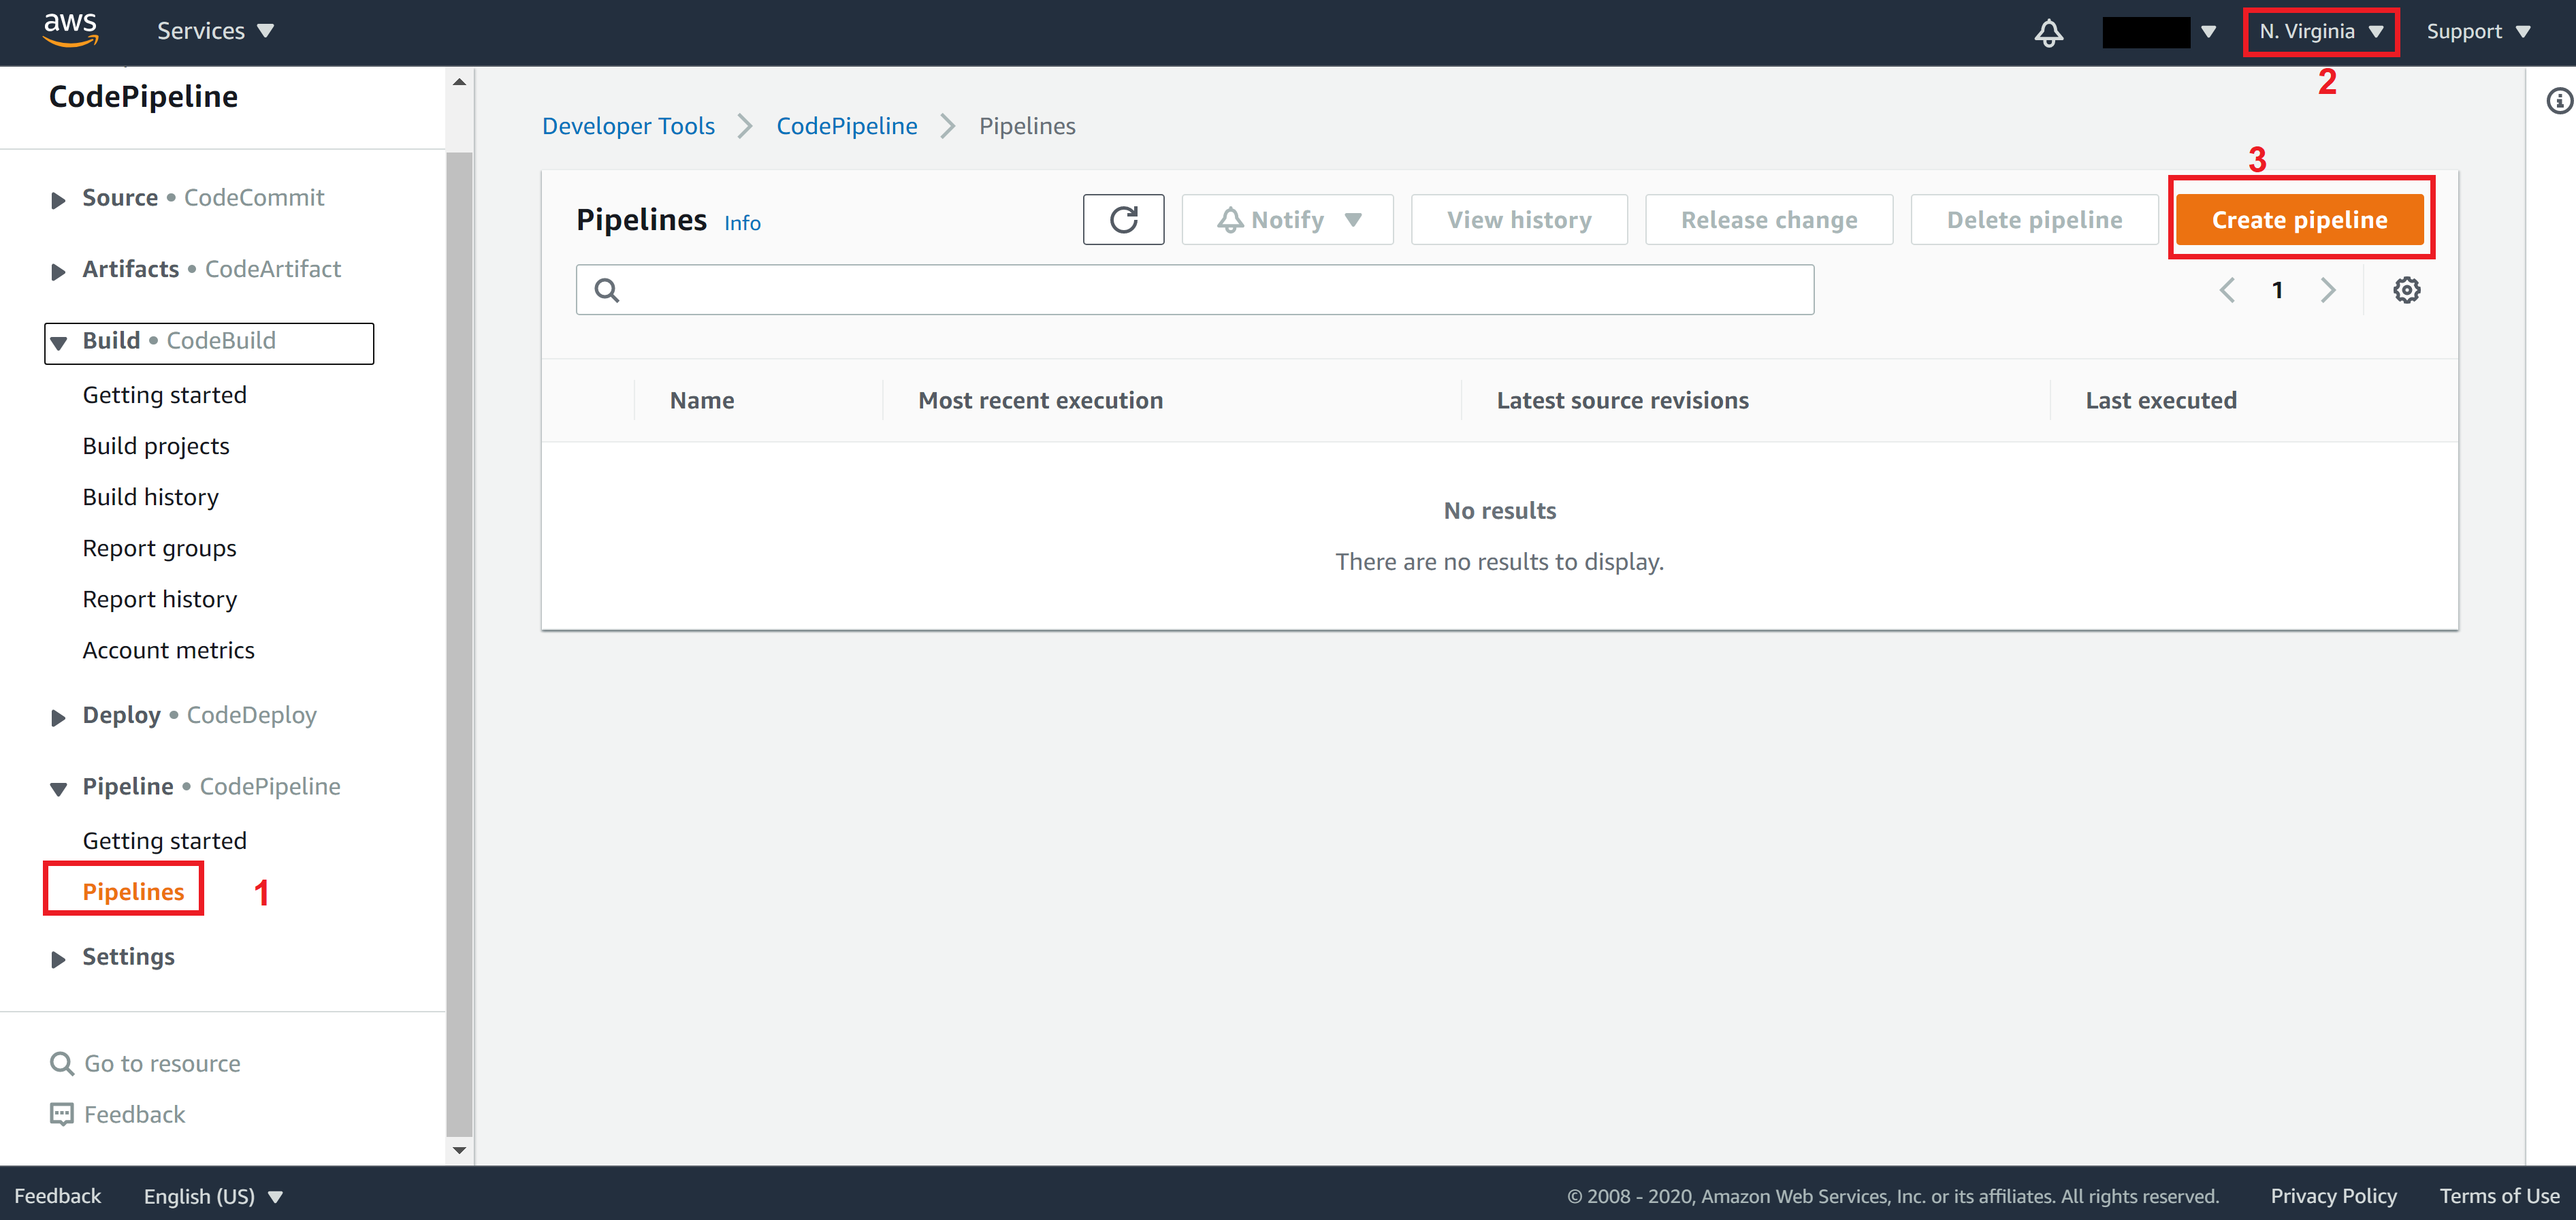
From the panel on the left, click on Pipelines to enter the CodePipeline. Or search for CodePipeline from the menu on the top left corner. Make sure the region is N. Virginia.
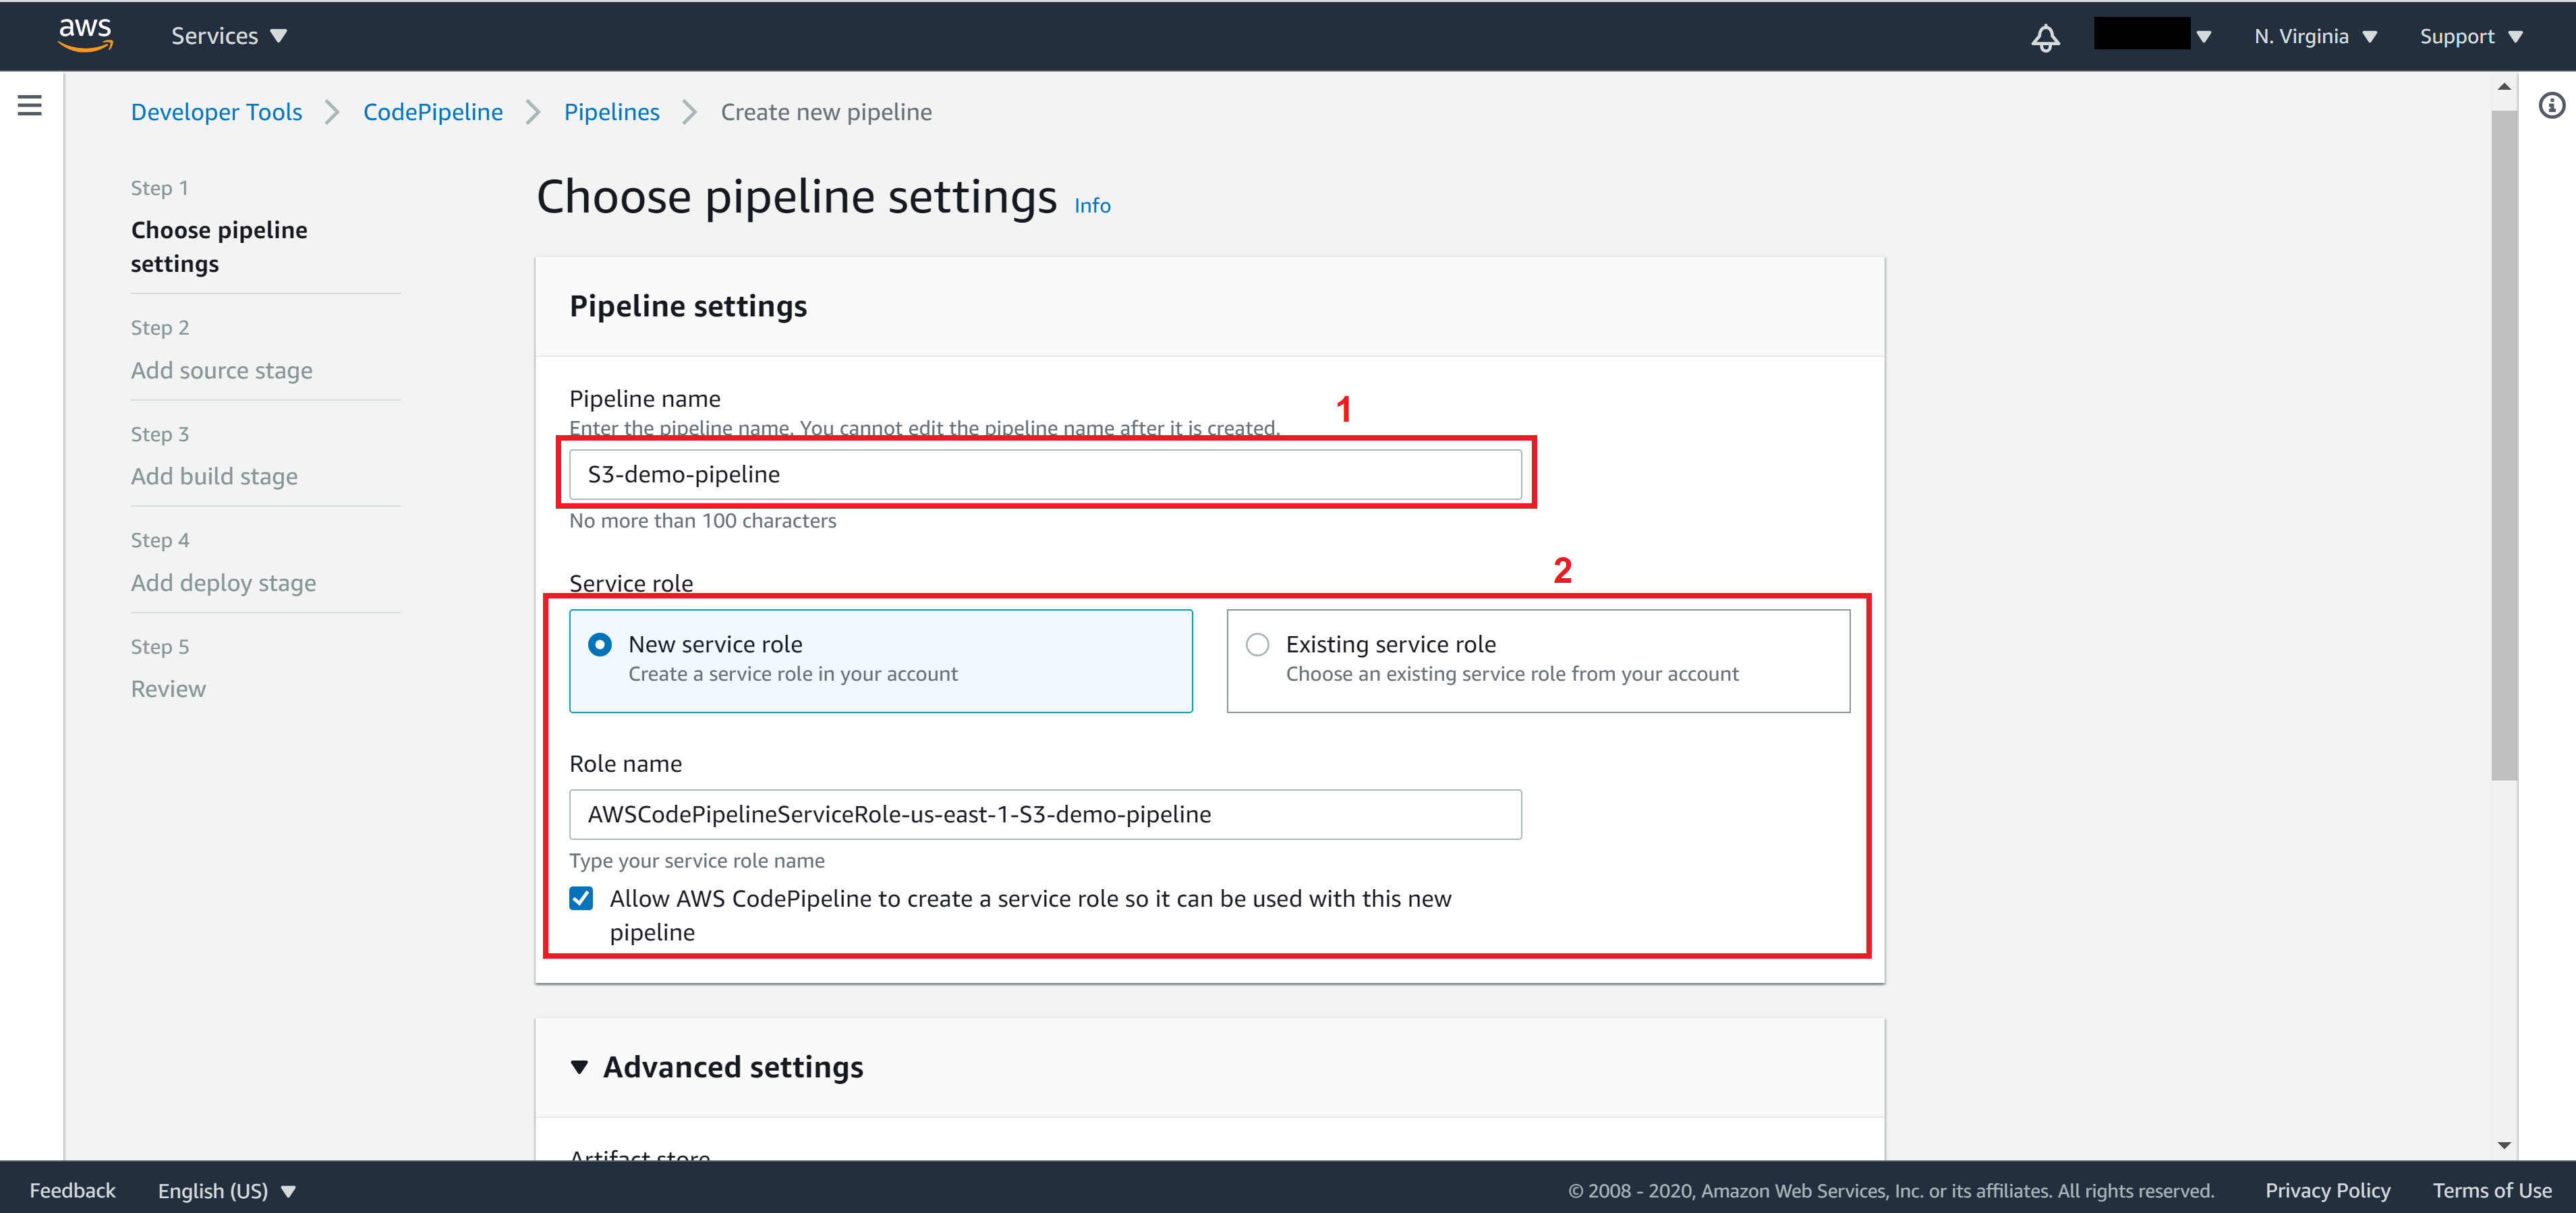
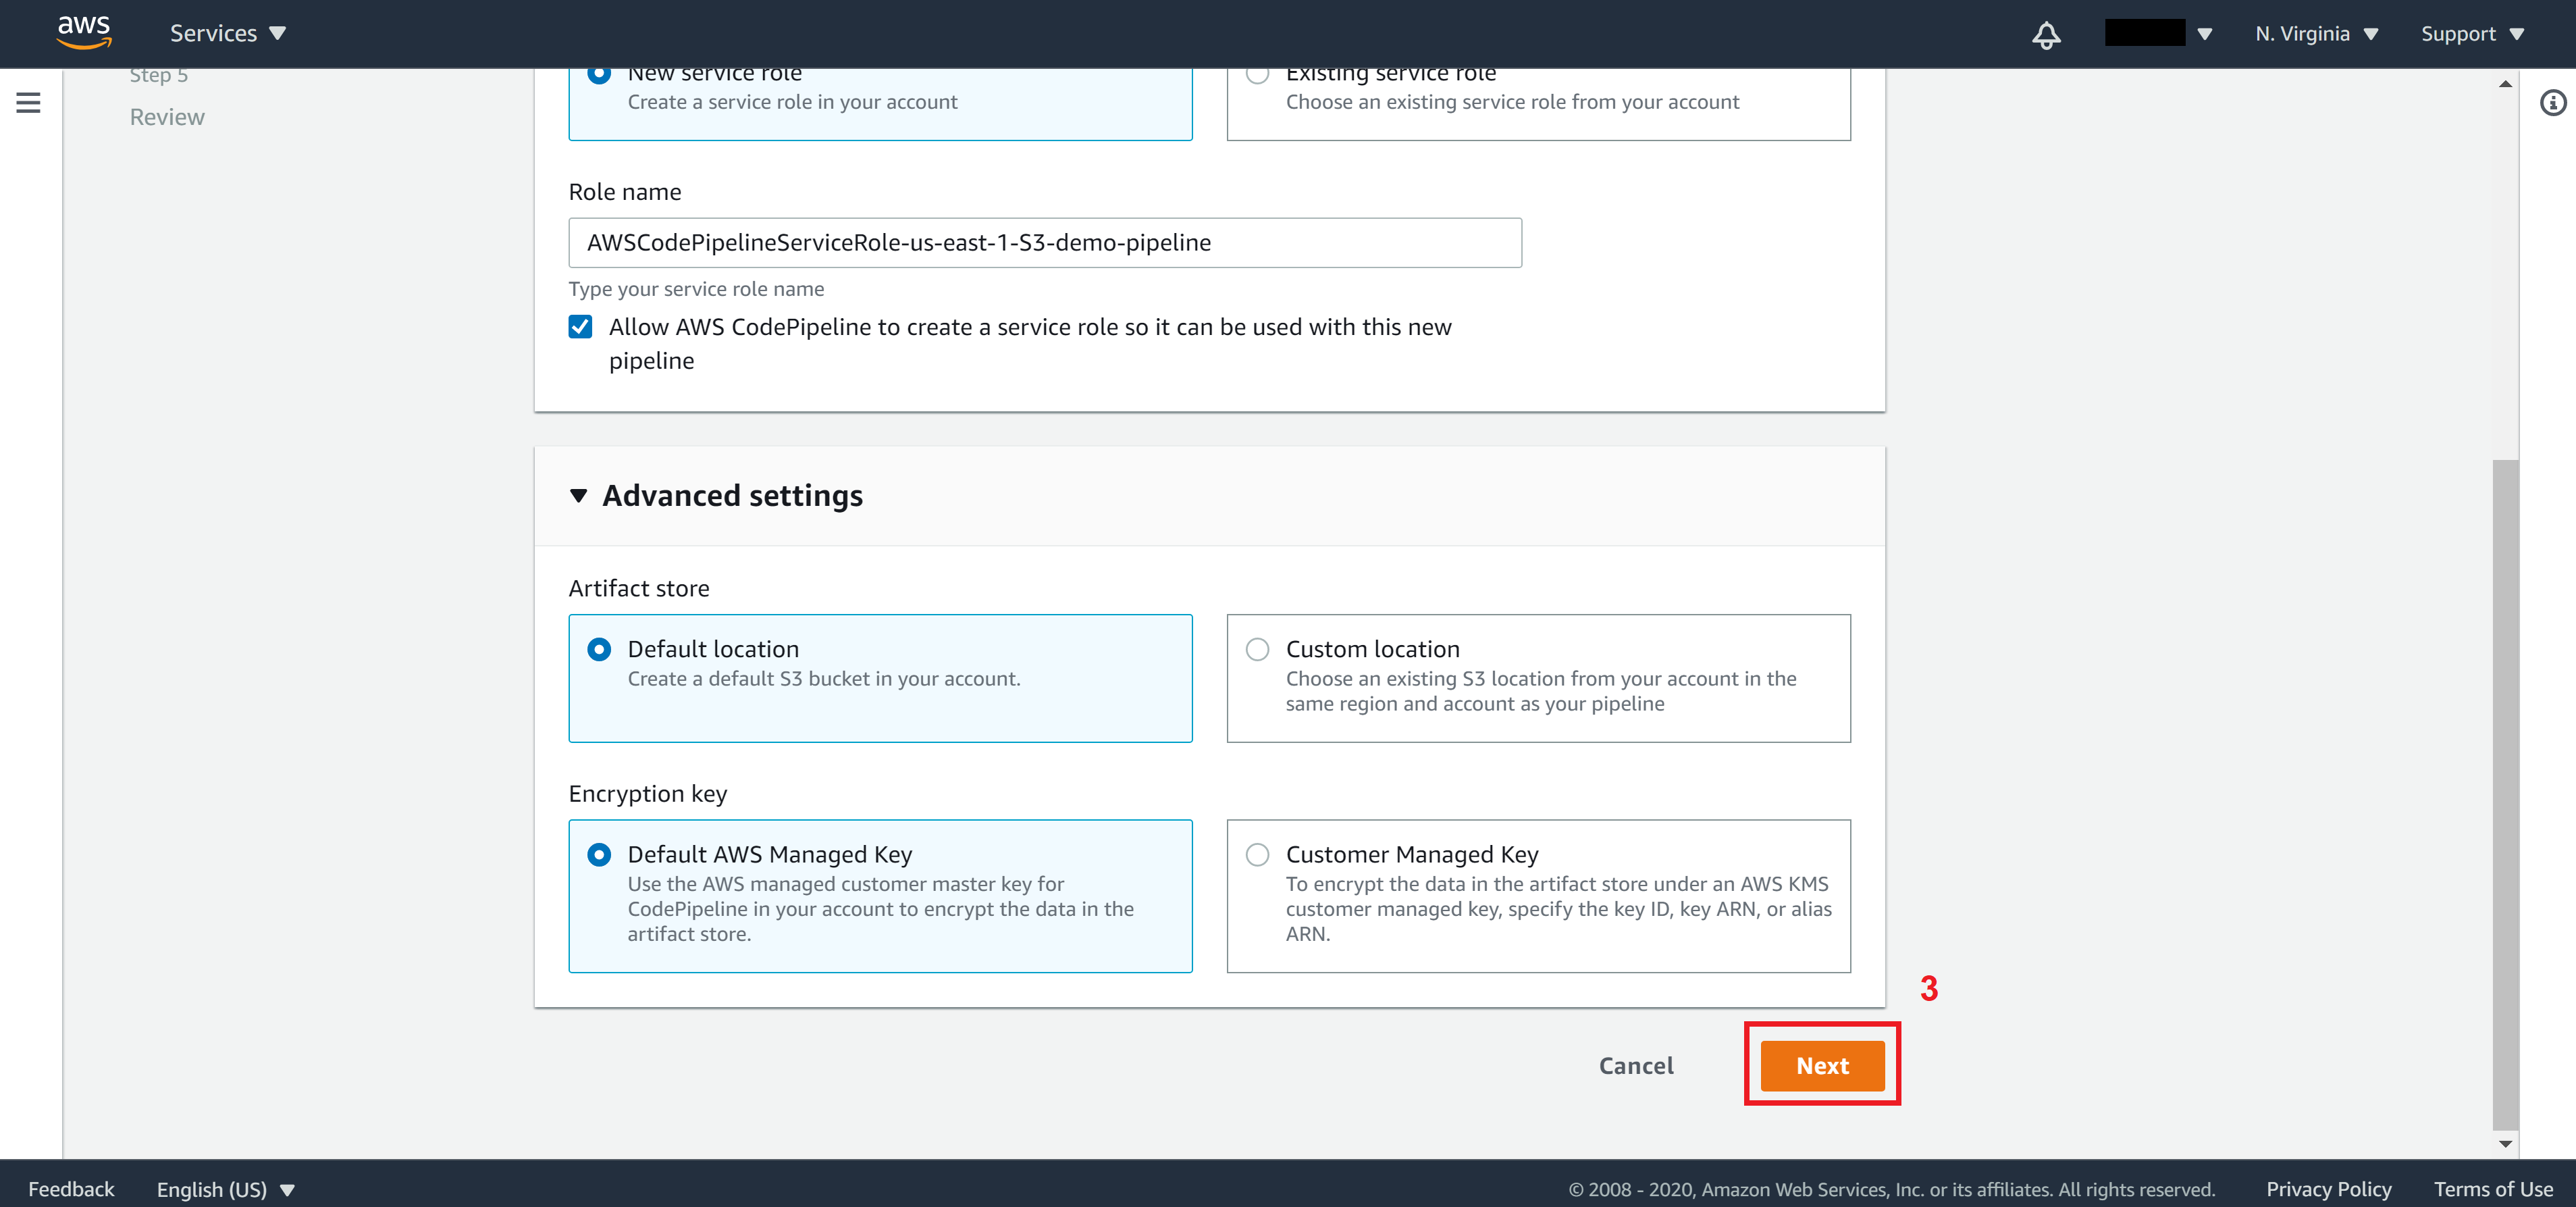
On Step 1, enter a name for Pipeline name and create/select a Service role then click on Next.
On Step 2, in the source stage, select the source provider. This step will be very similar to what you did in CodeBuild – Select where your source code will be downloaded from.
If your code is in AWS CodeCommit, then simply select CodeCommit from the Source provider dropdown. Otherwise, for all other providers, you’ll need to provide authentication first.
For GitHub, select GitHub (Version 2) and click on Connect to GitHub
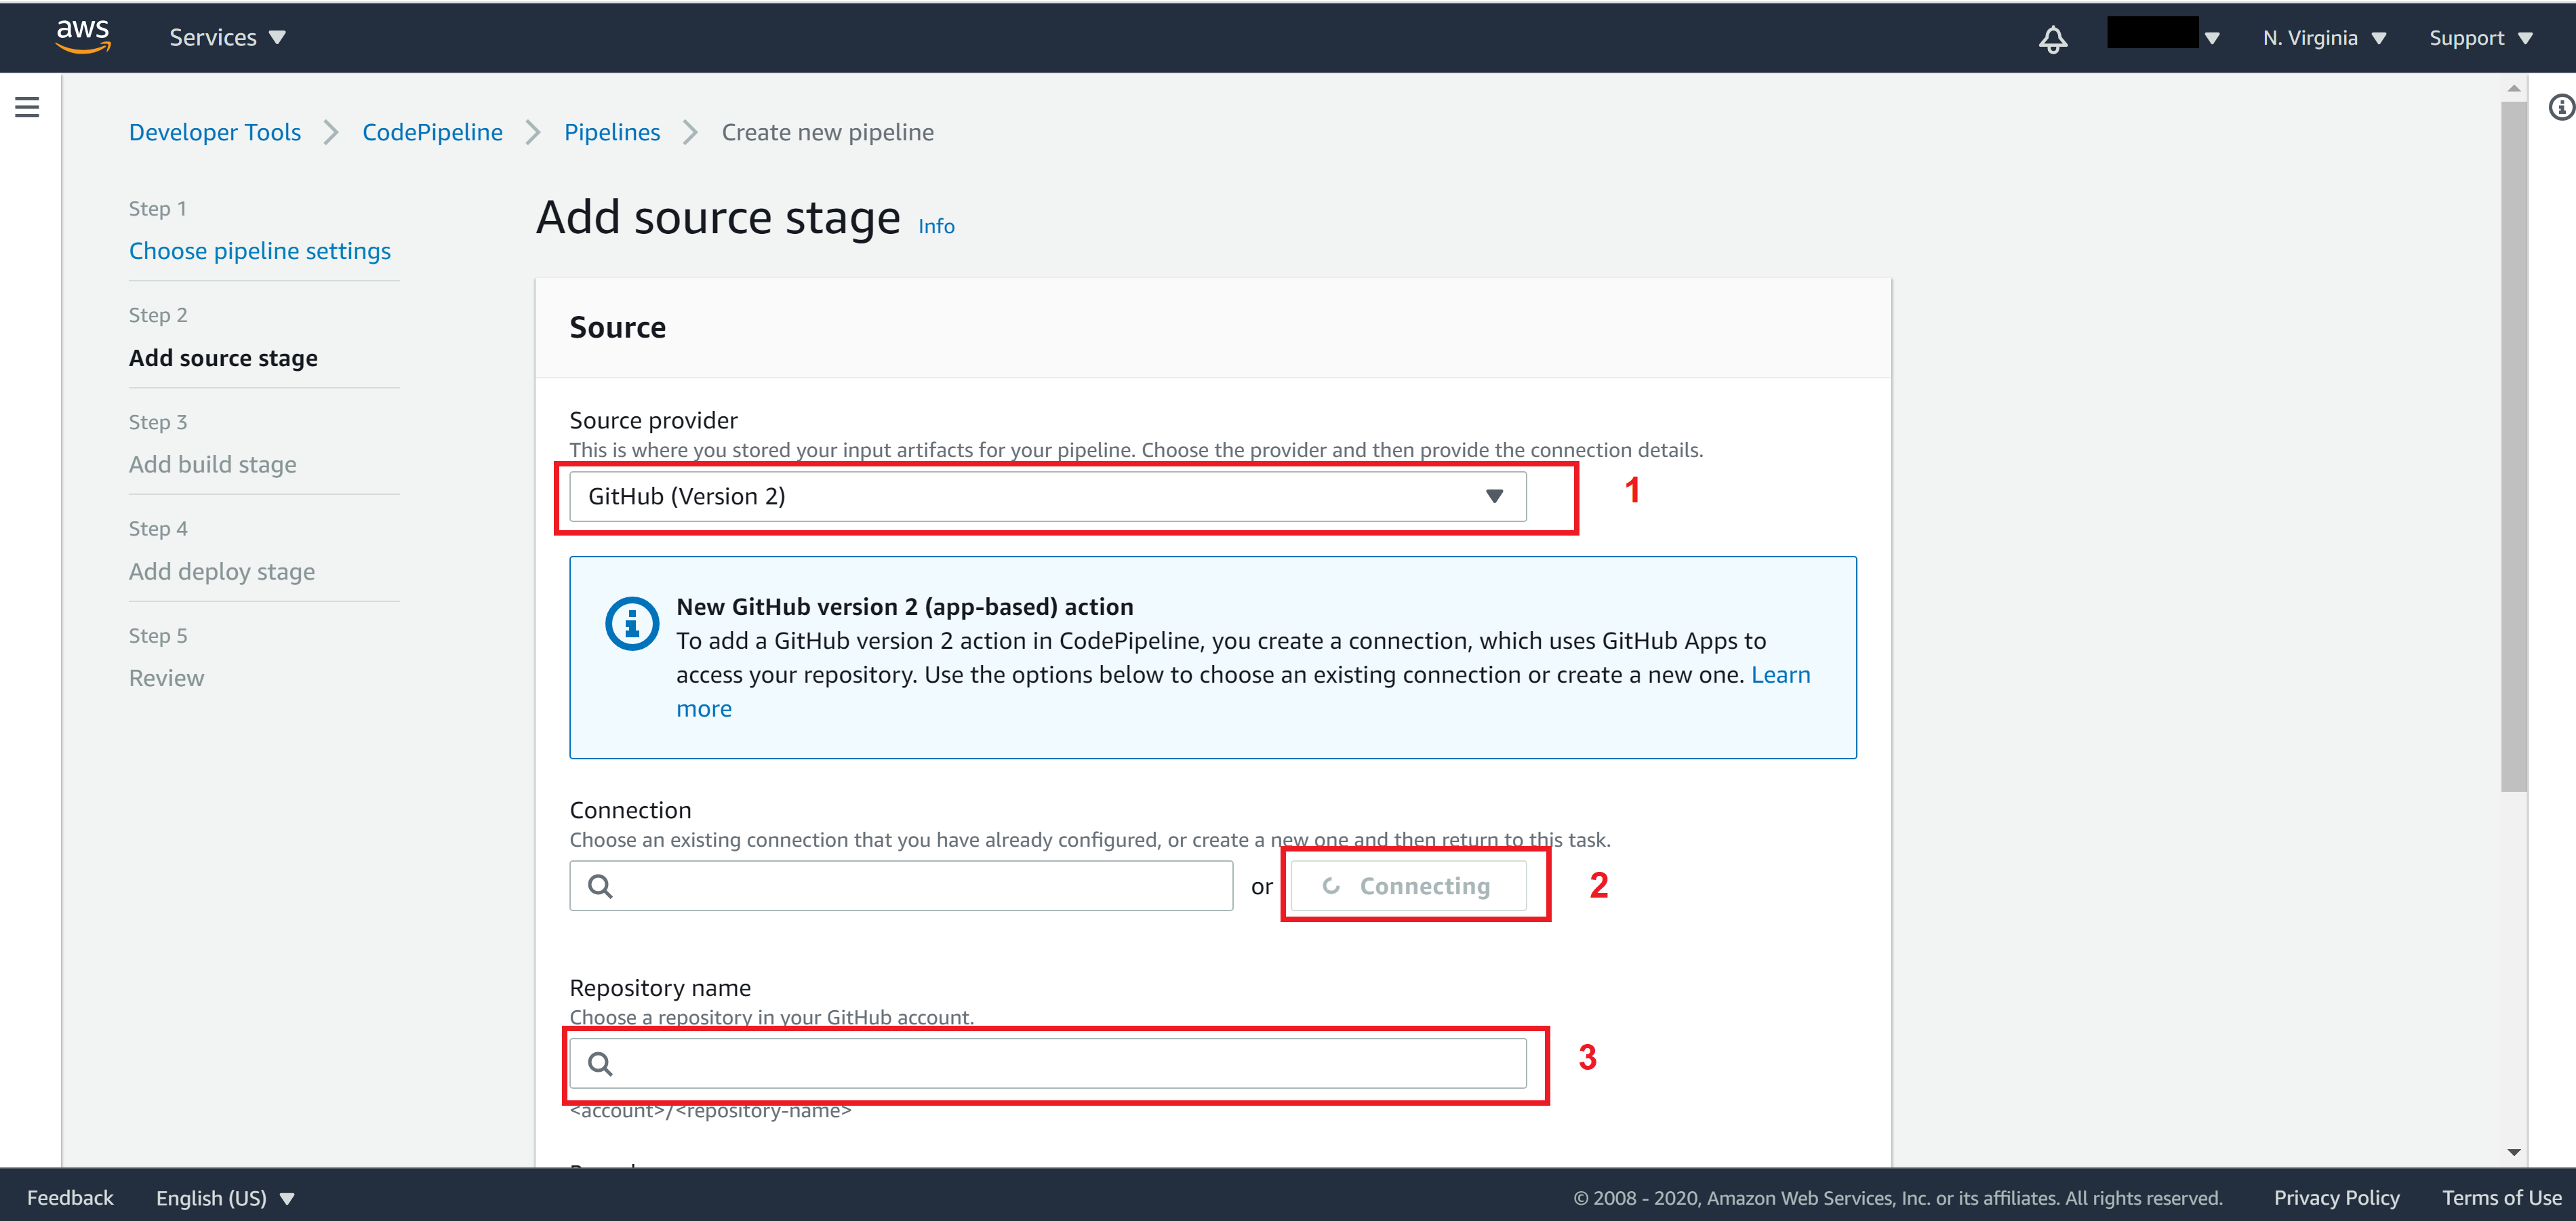
In order to allow CodePipeline to connect to our GitHub, we need to first create a GitHub App Connection.
In the popup window, specify a Connection name then click Connect to GitHub
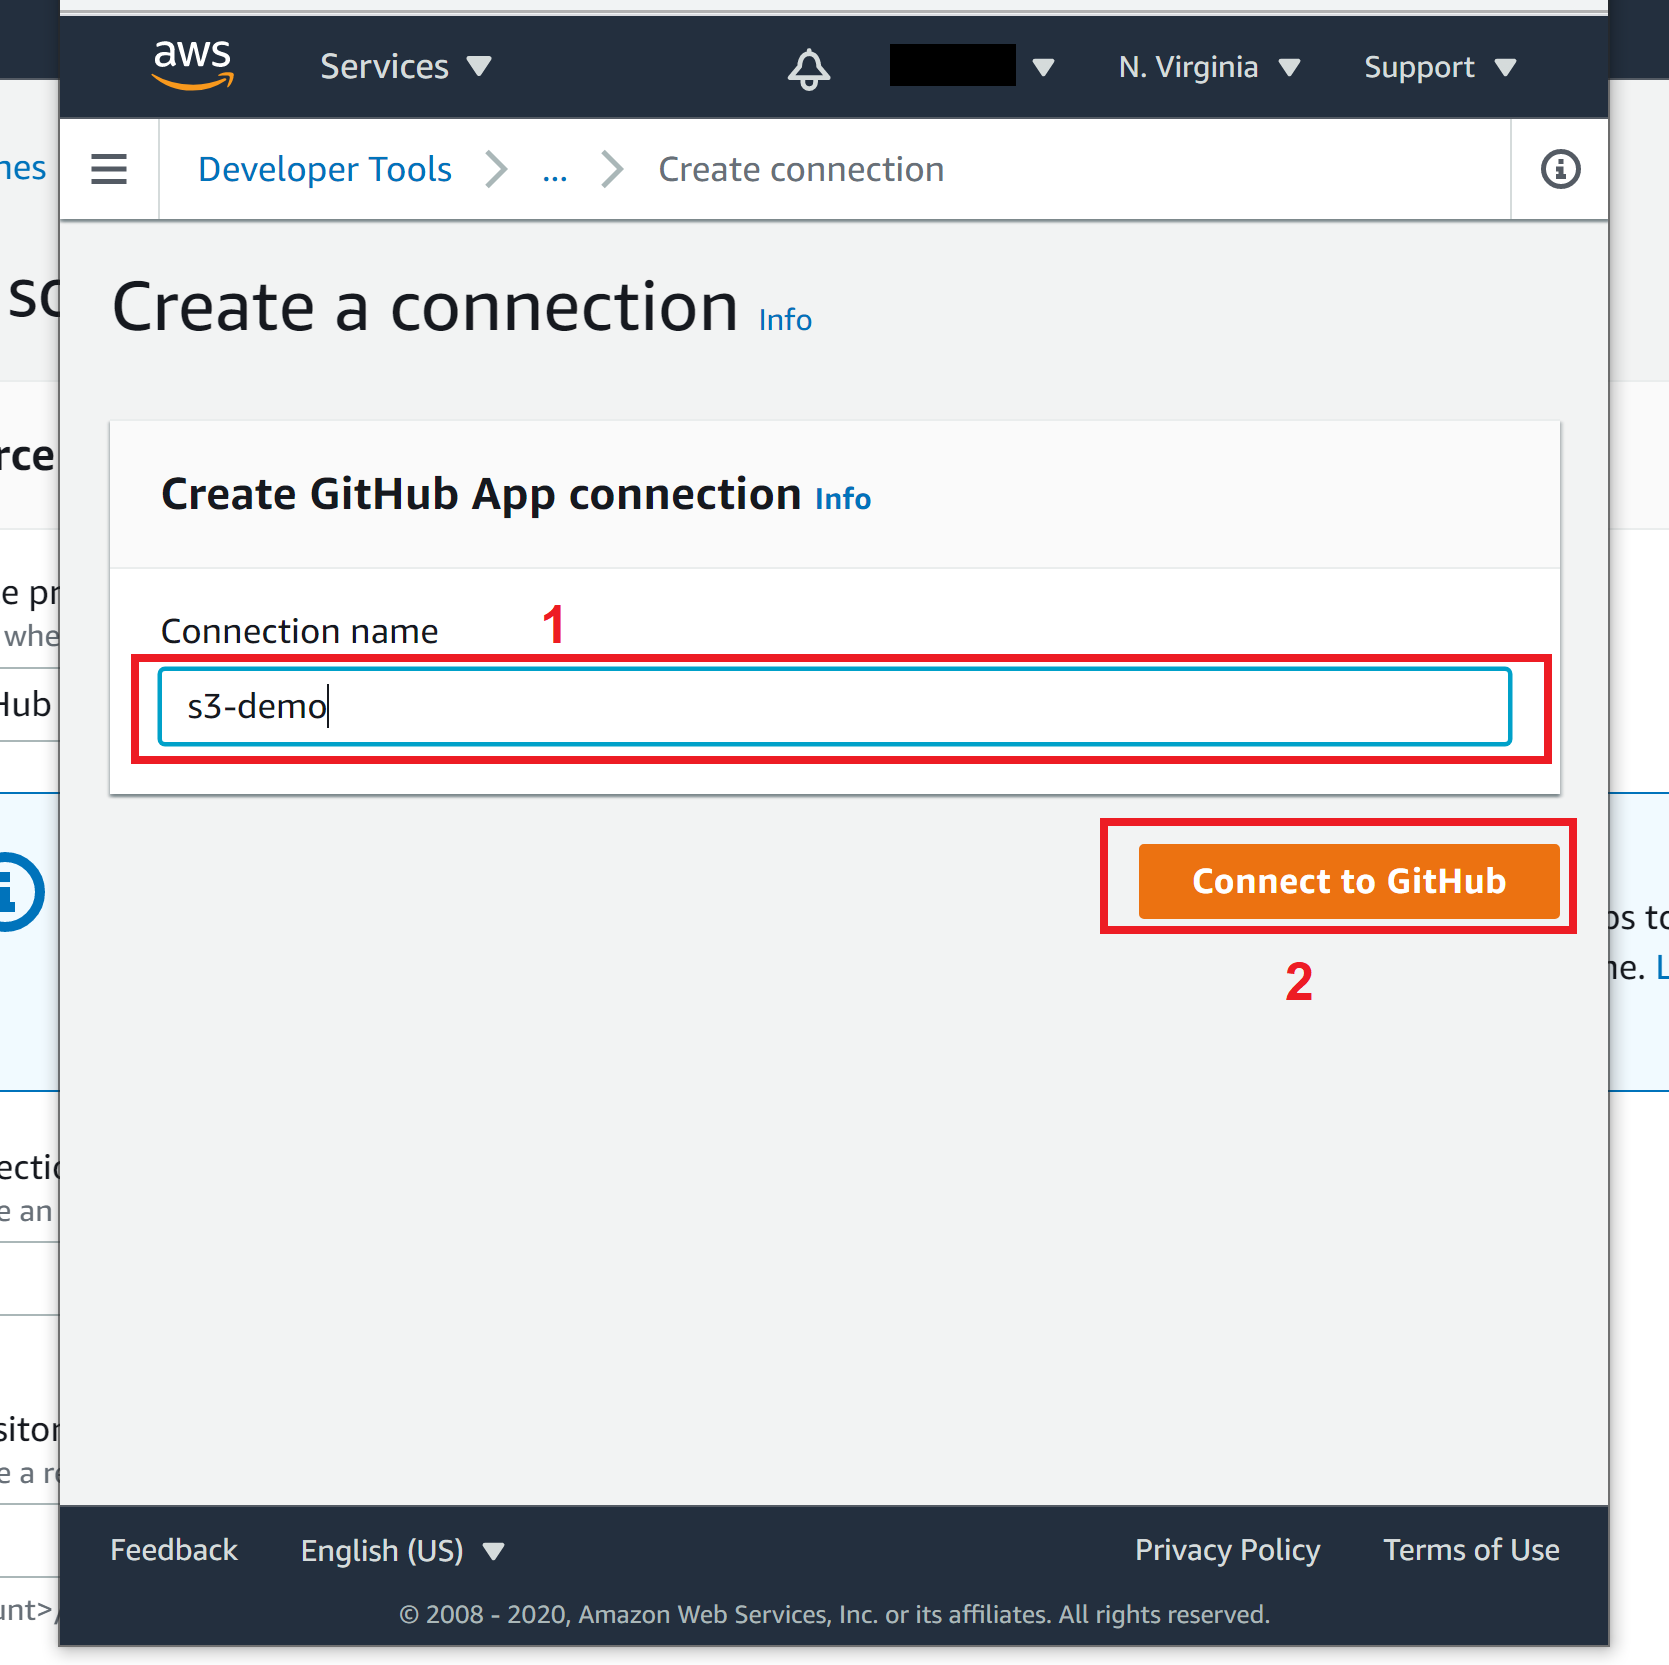
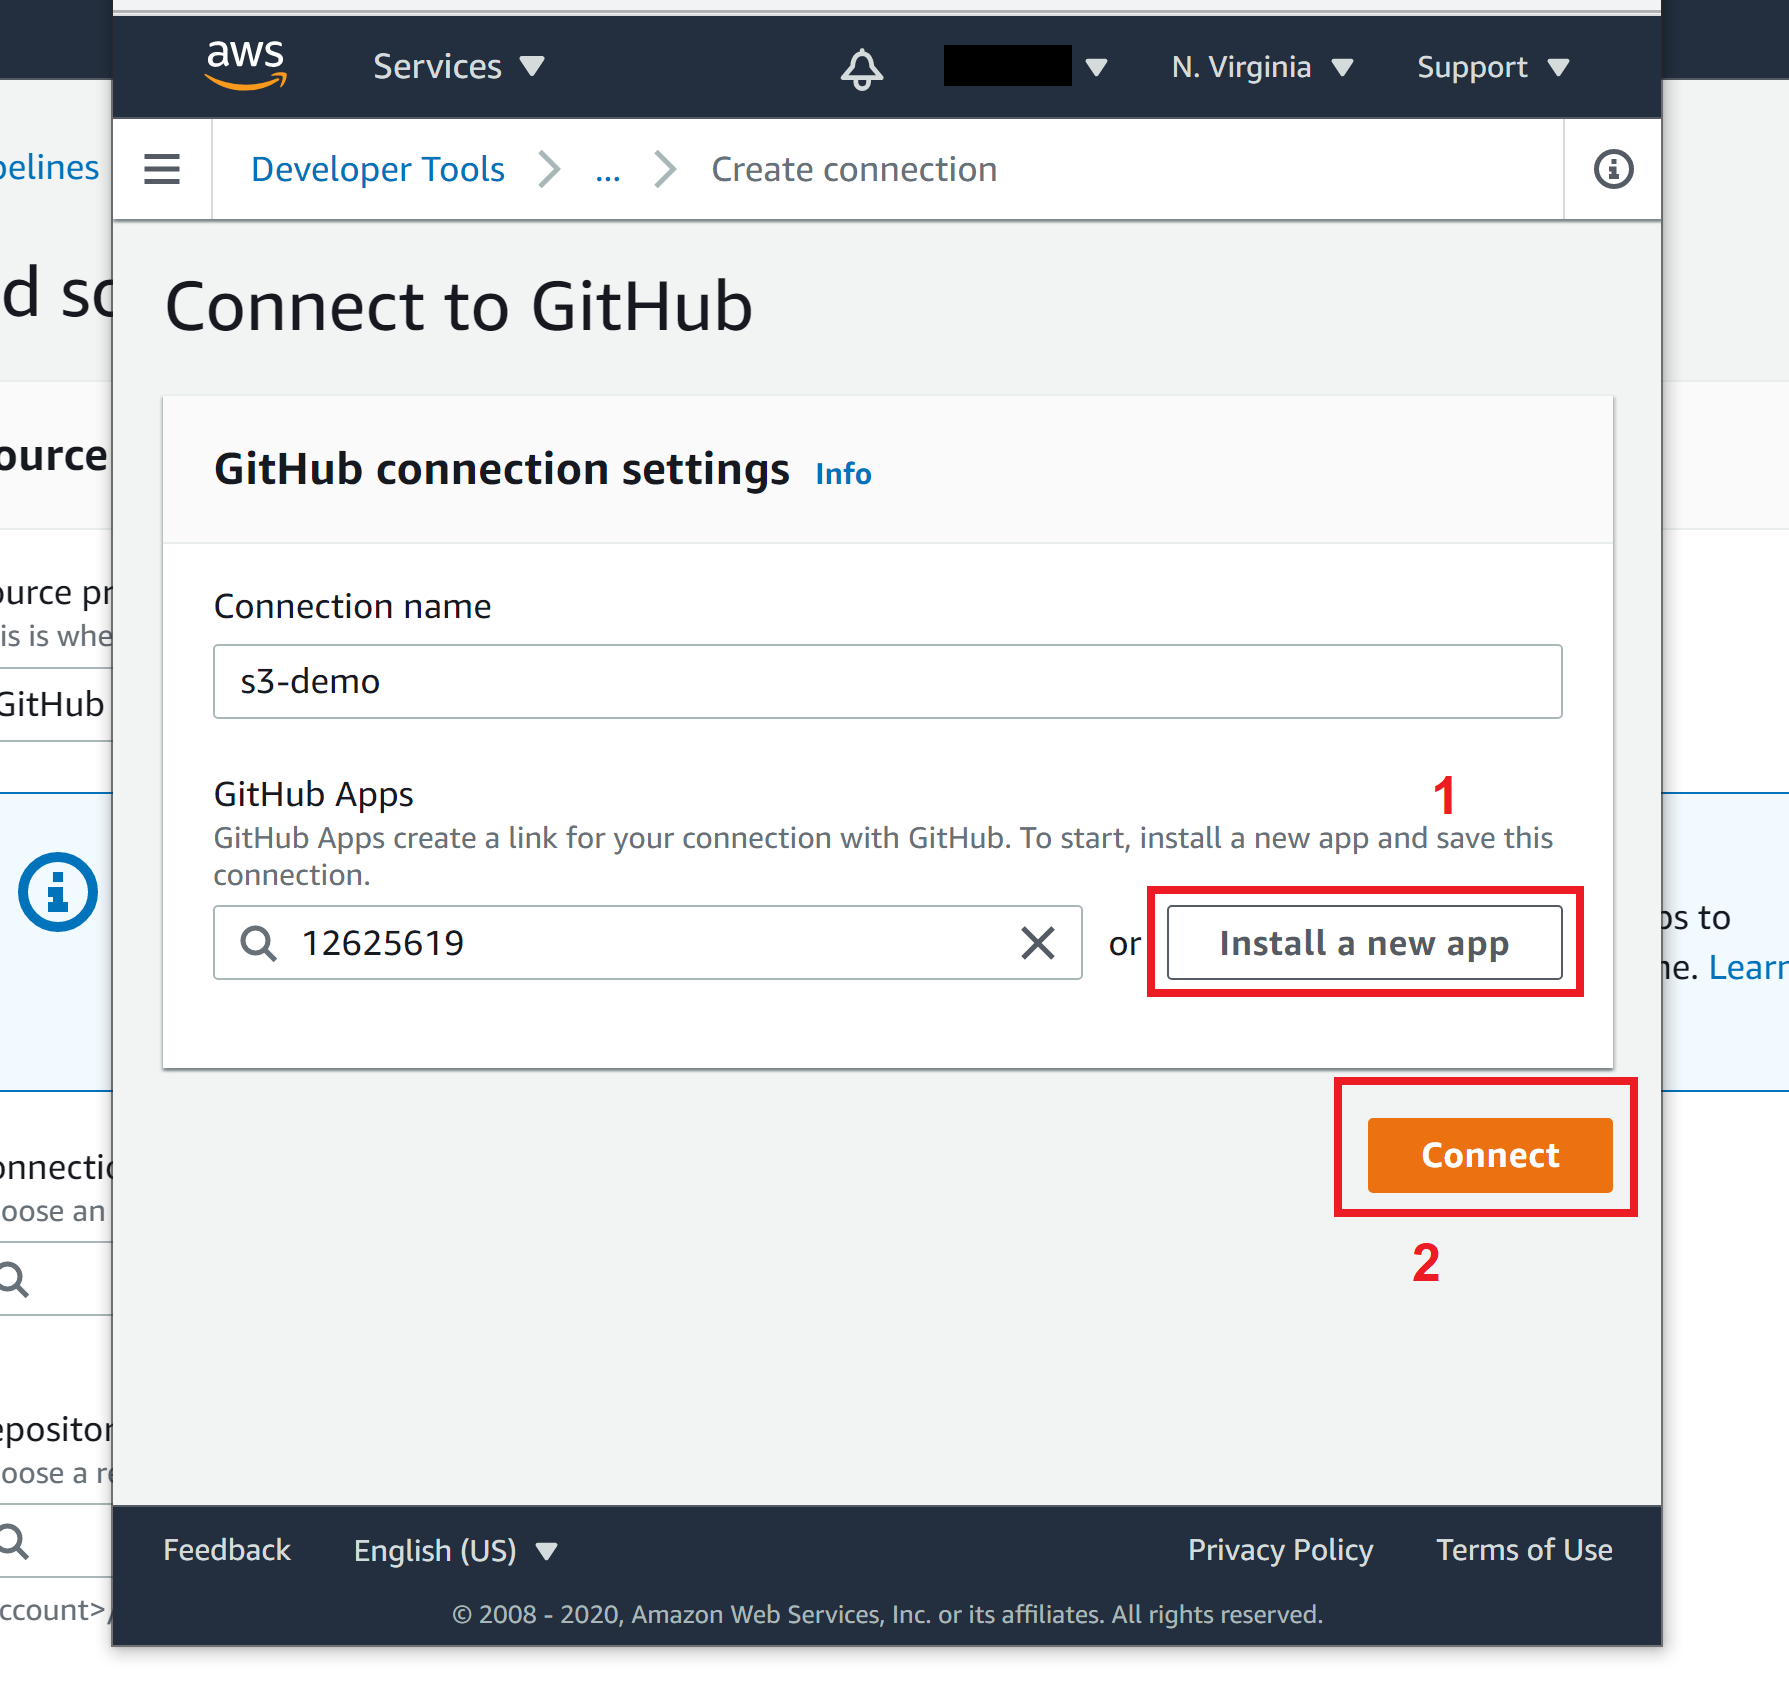
In the second popup window, allow GitHub to authenticate and when back to the popup window 1, click on Install a new app and click on Connect
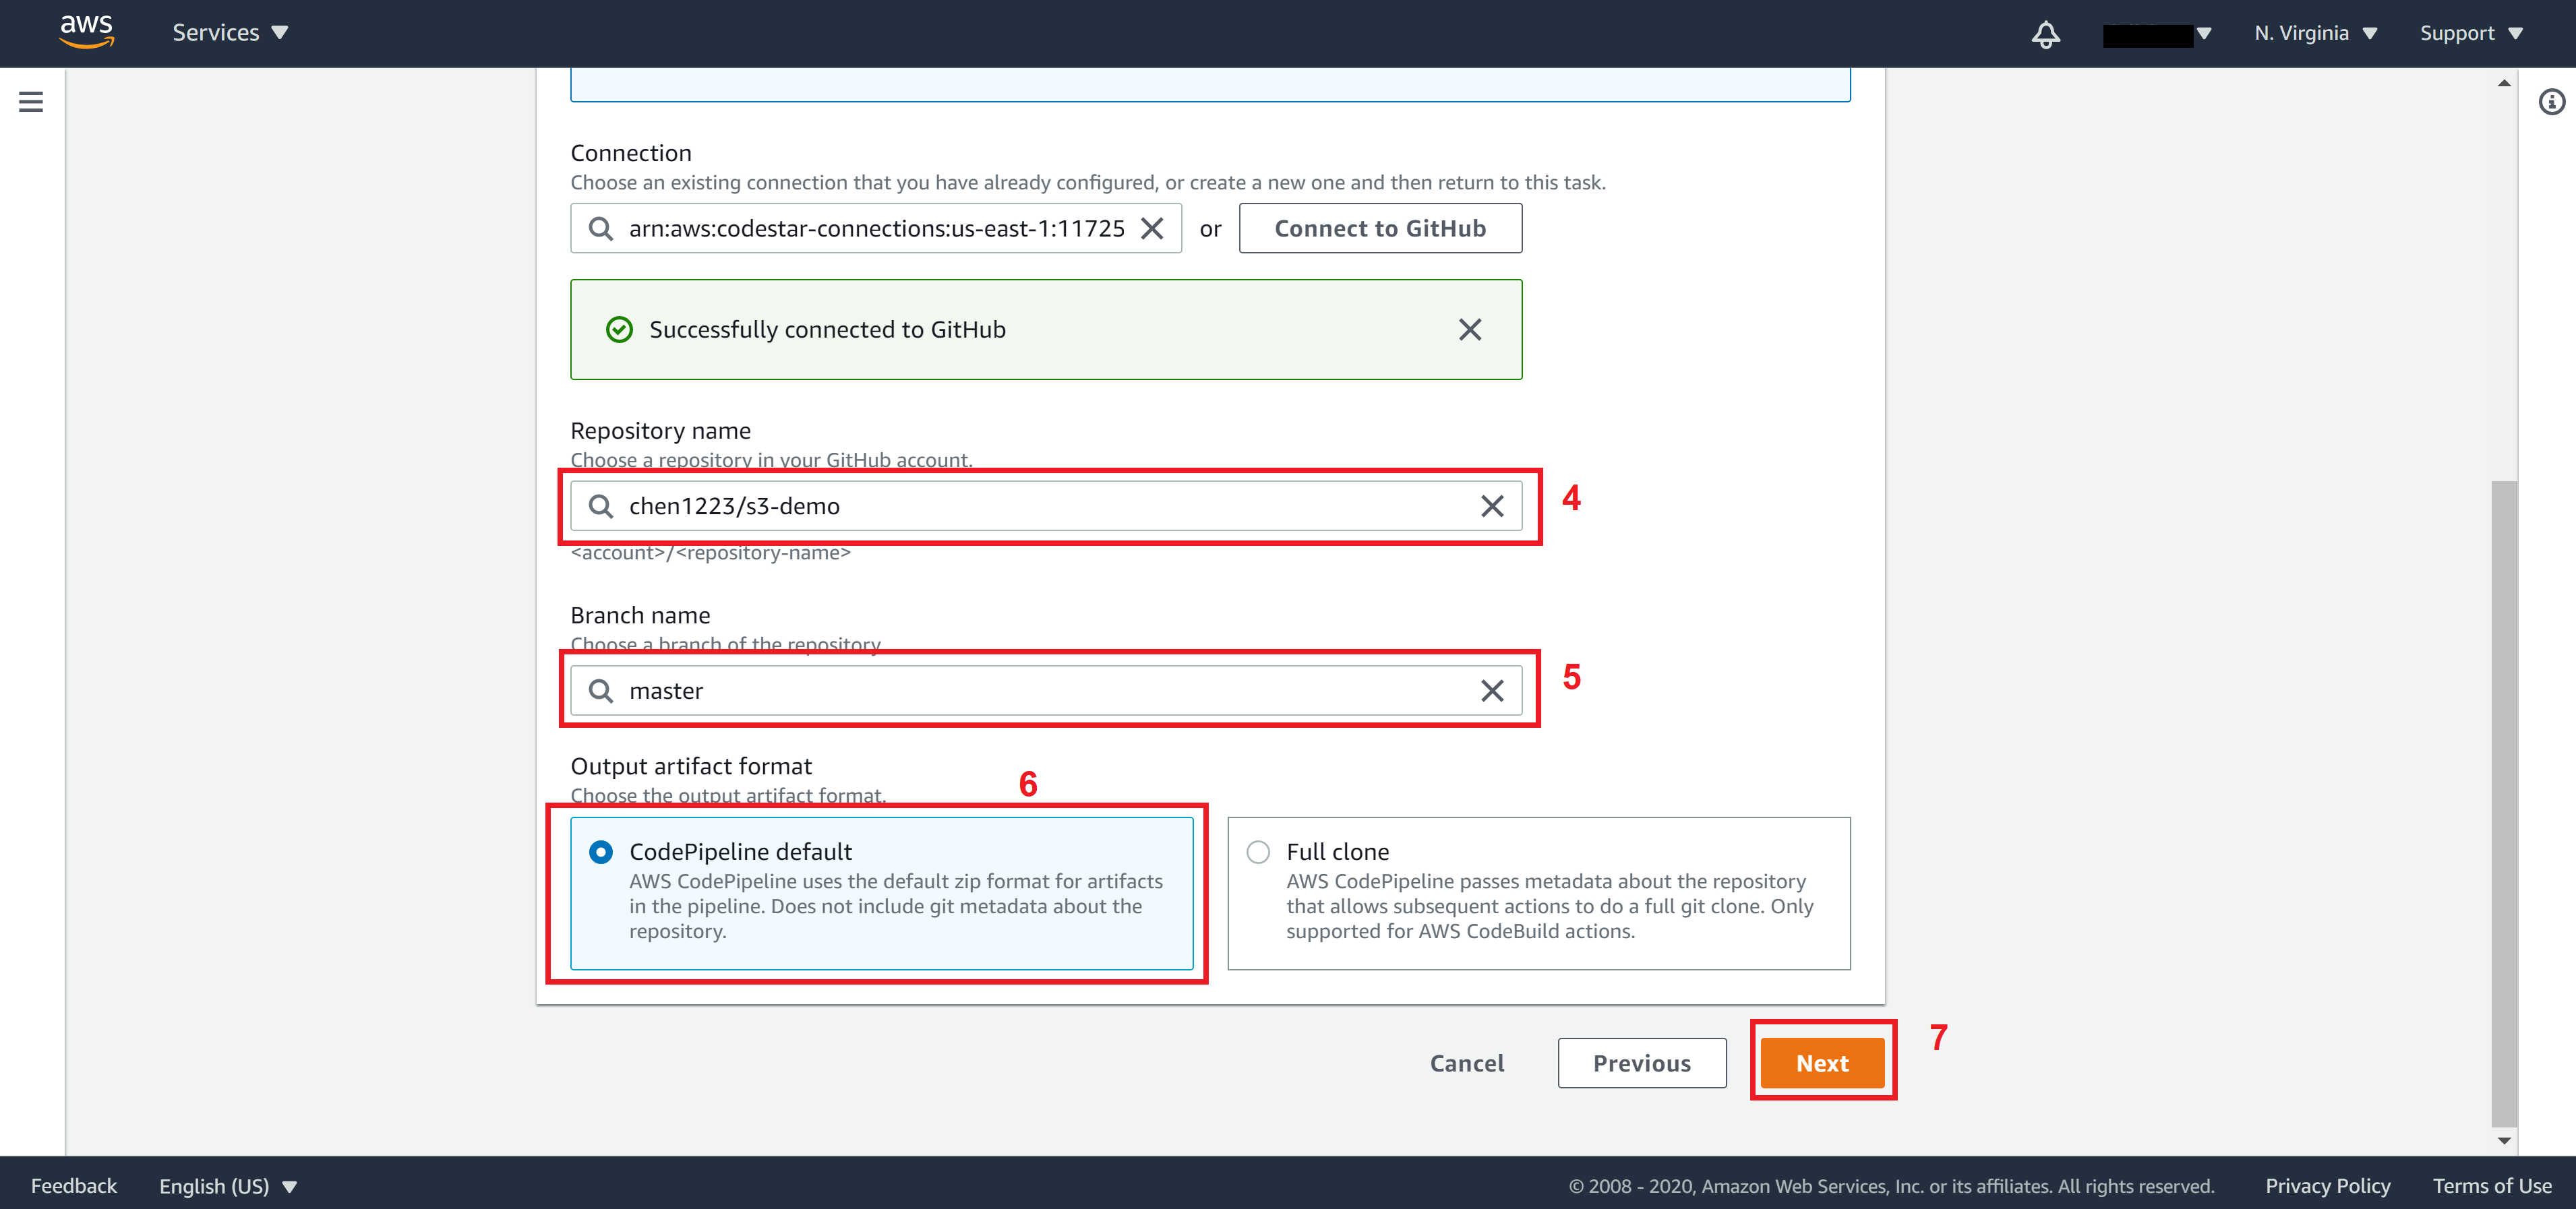
After you successfully connect to GitHub, specify your Repository name and Branch name. Choose output as CodePipeline default then click on Next.
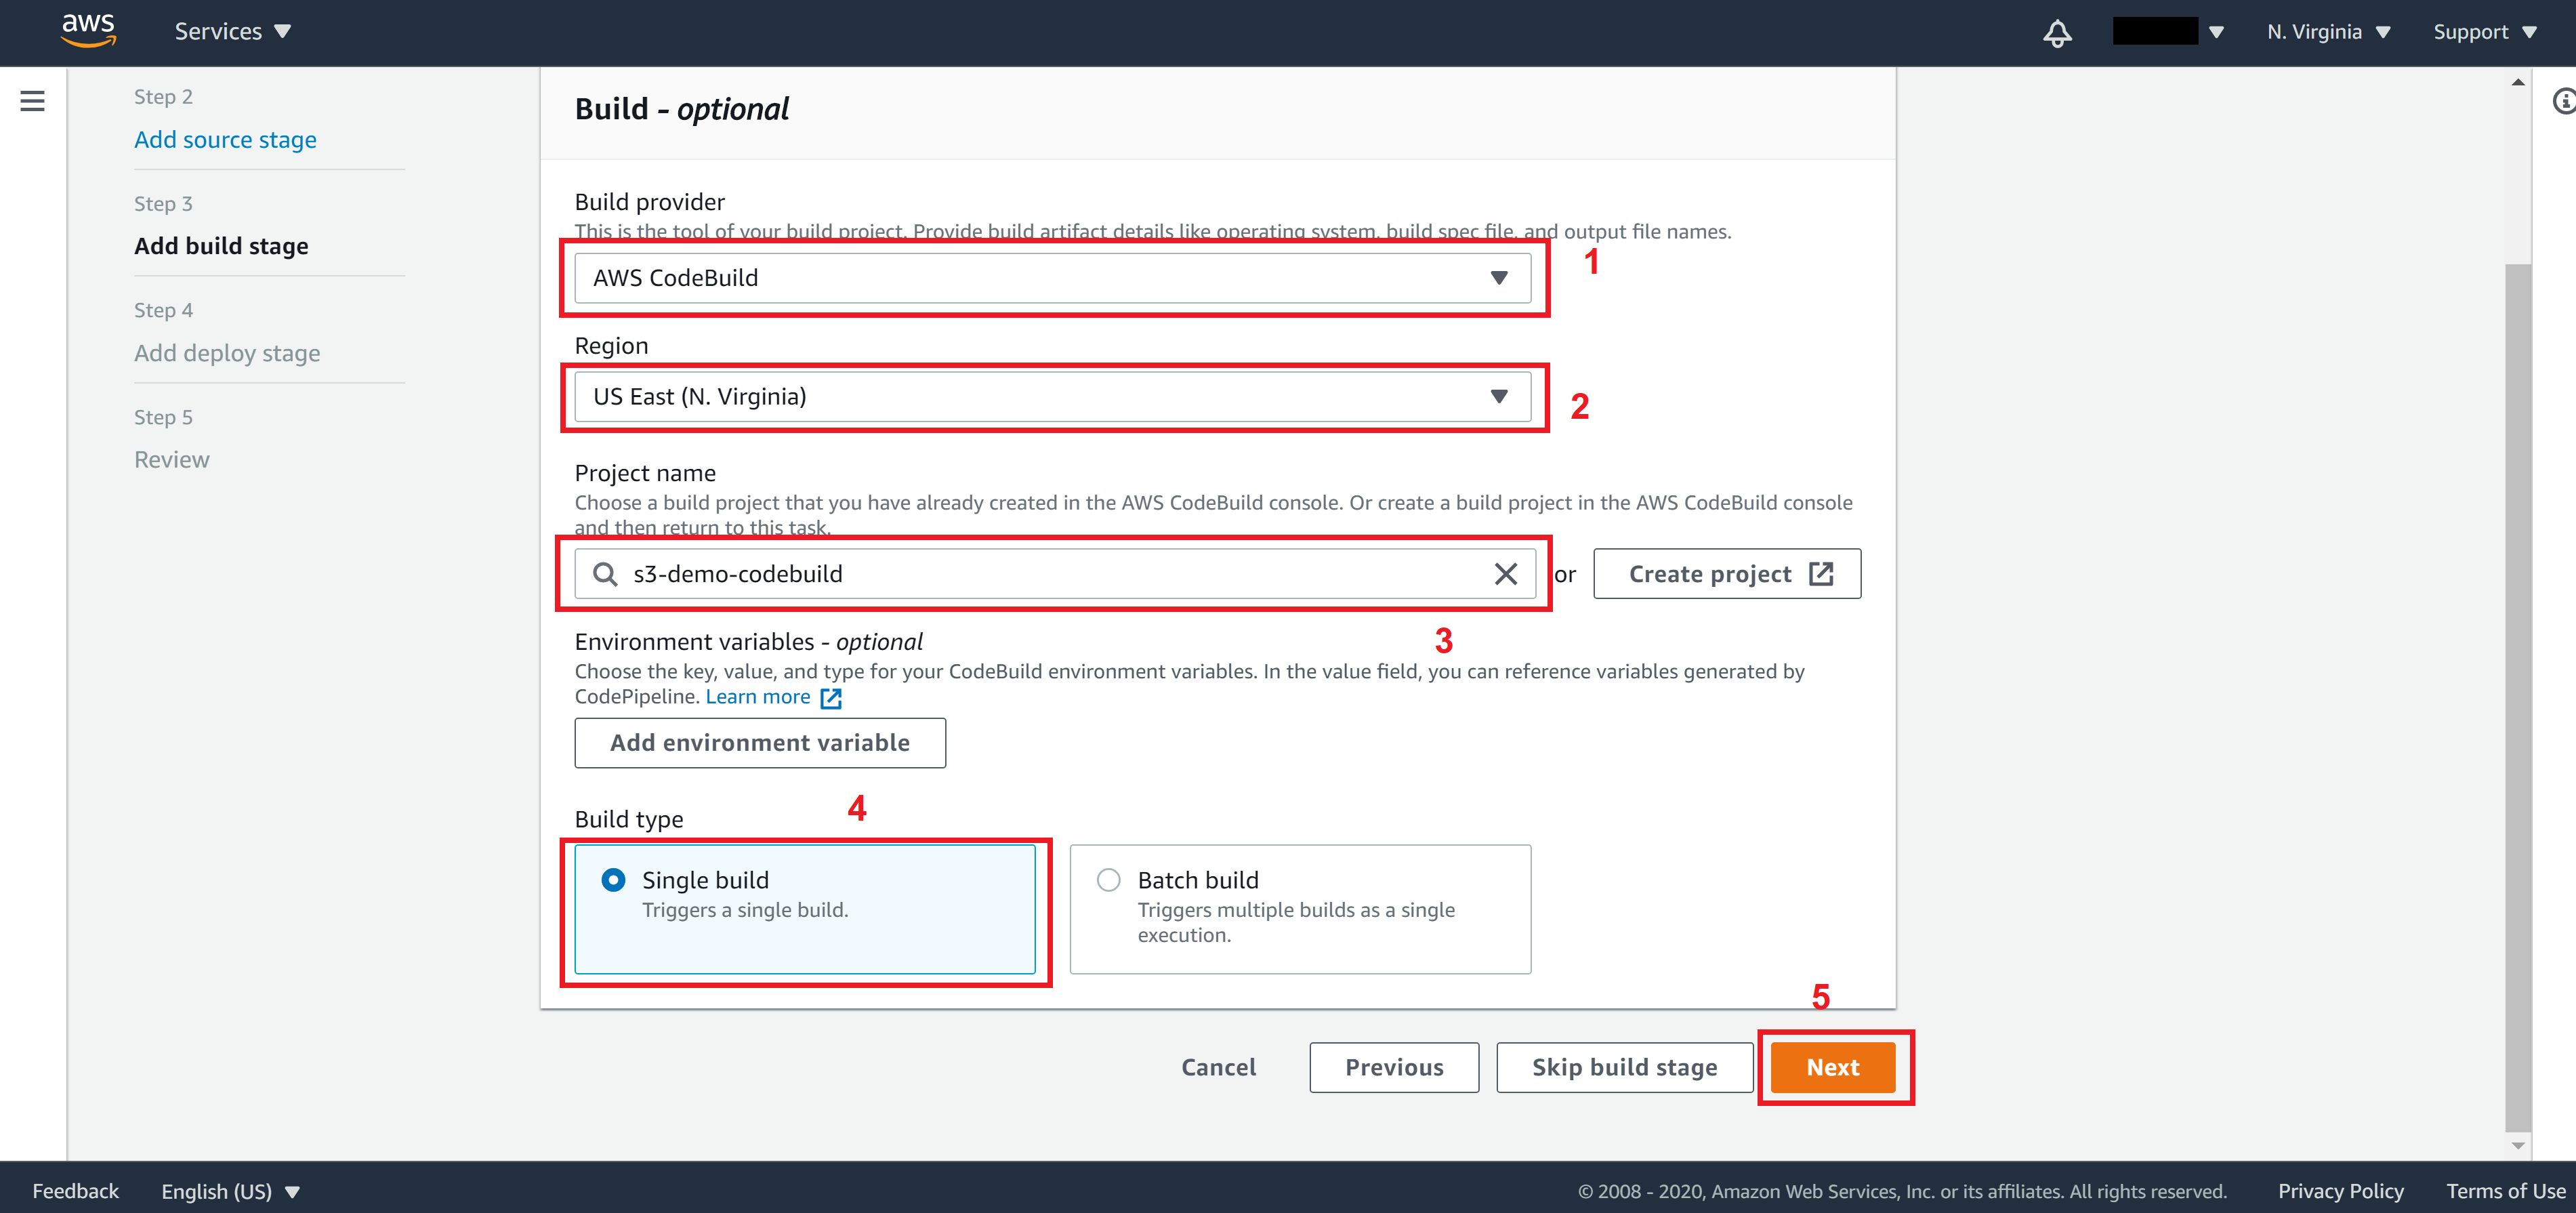
On Step 3, select AWS CodeBuild for Build provider, US East (N. Virginia) for Region and select your CodeBuild you created from the Project name dropdown menu.
For Build type, select Single build then click on Next.
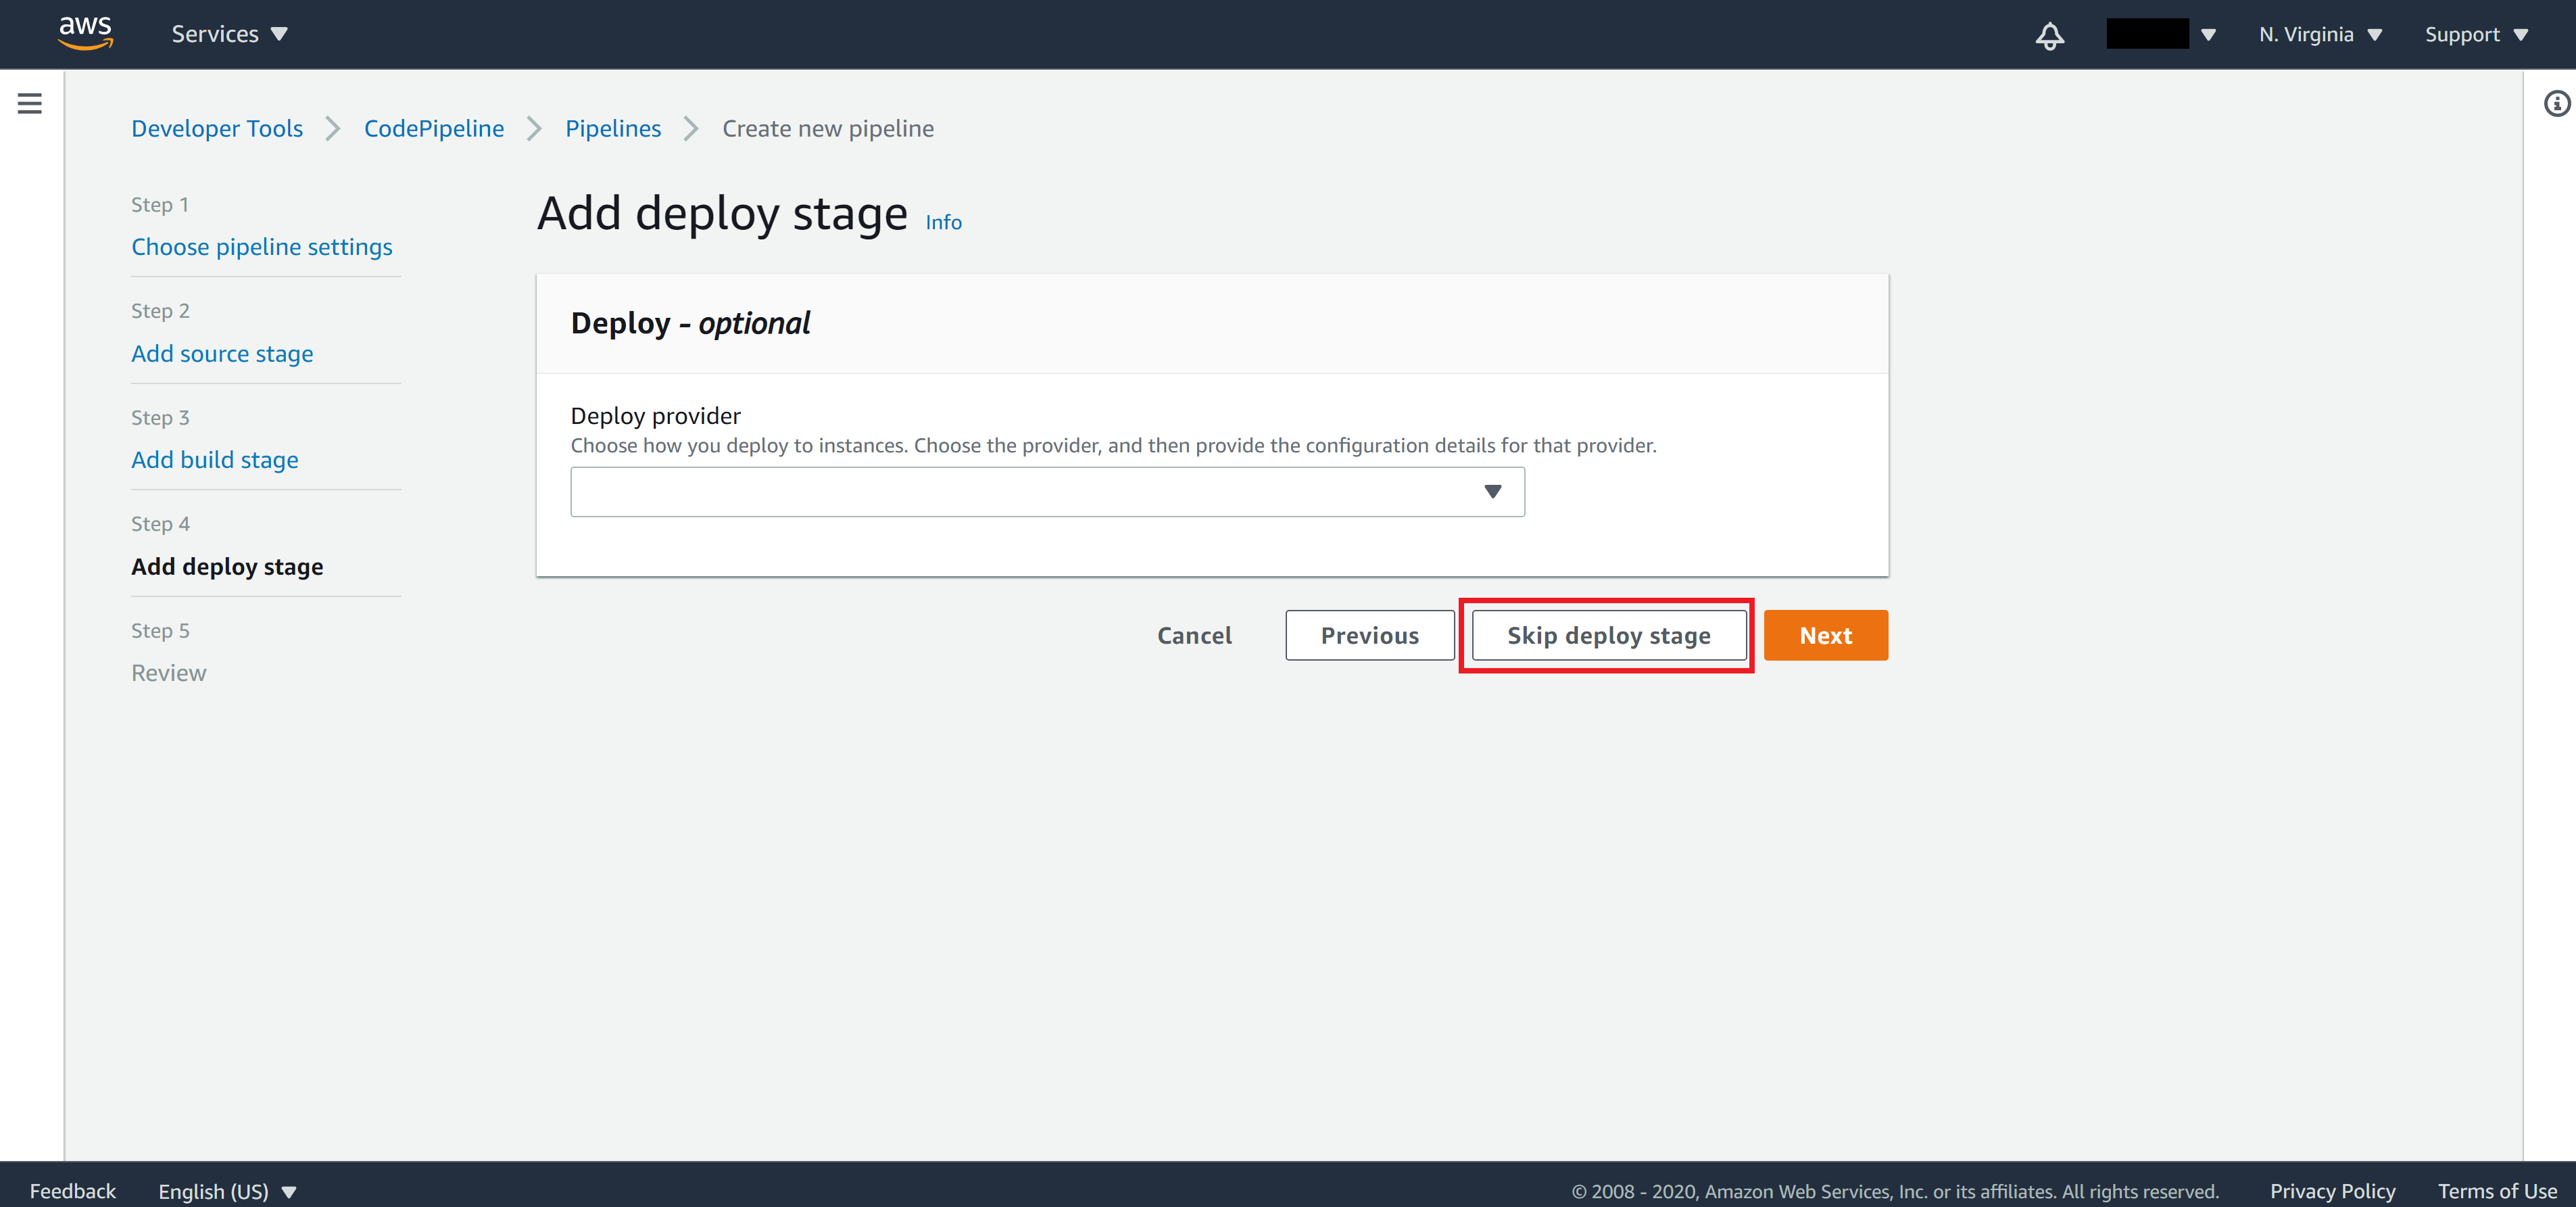
On Step 4, click on Skip deploy stage since we don’t need a deploy stage in our case.
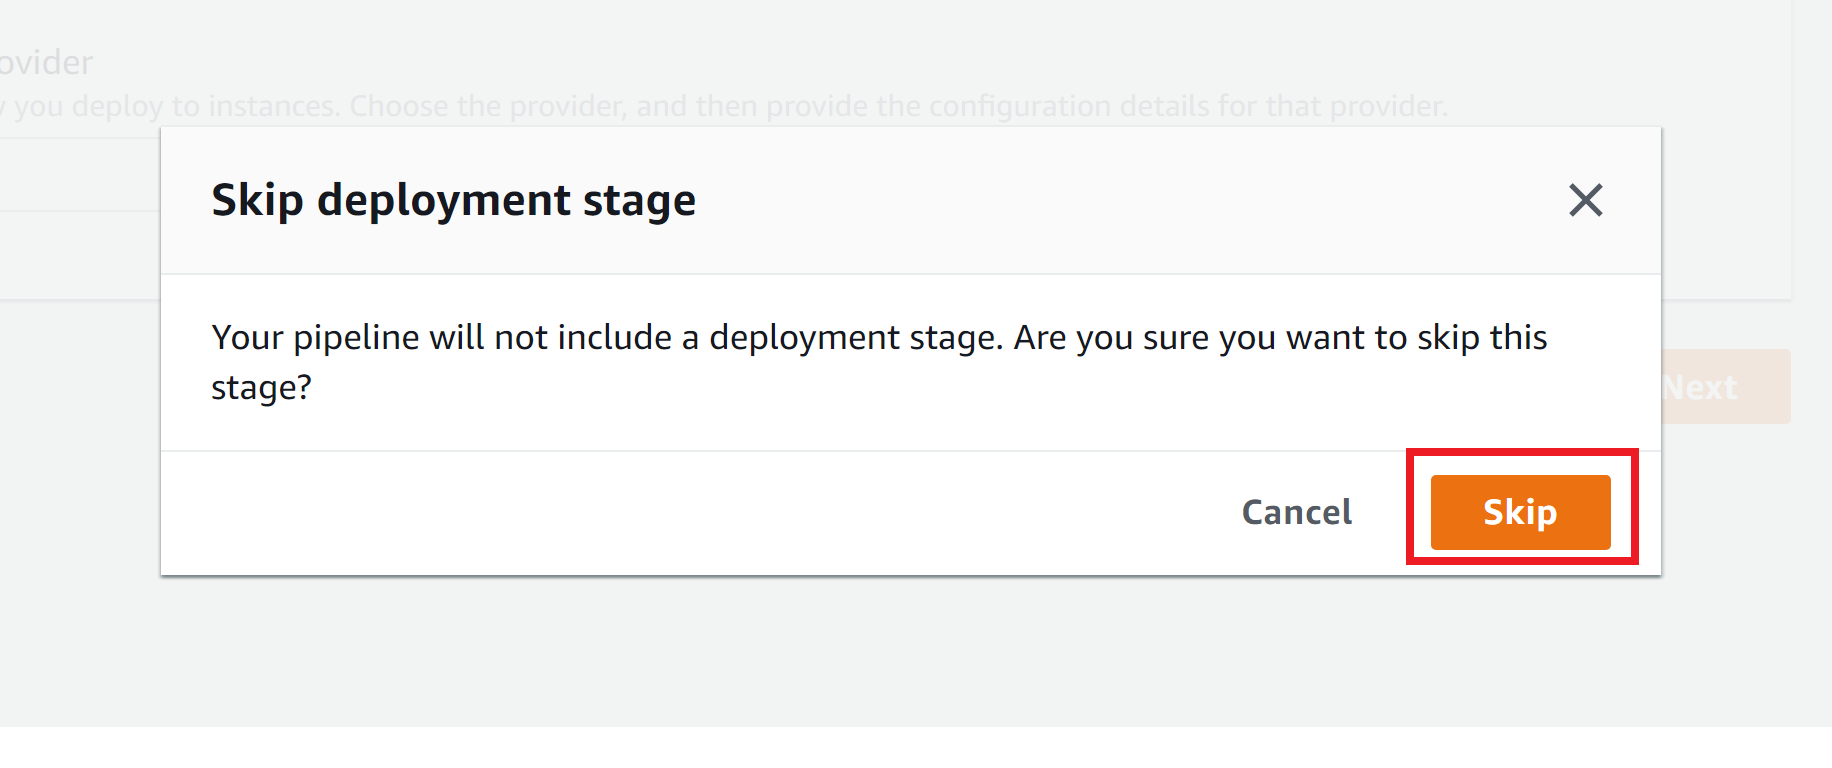
Click on Skip to confirm skip deployment stage
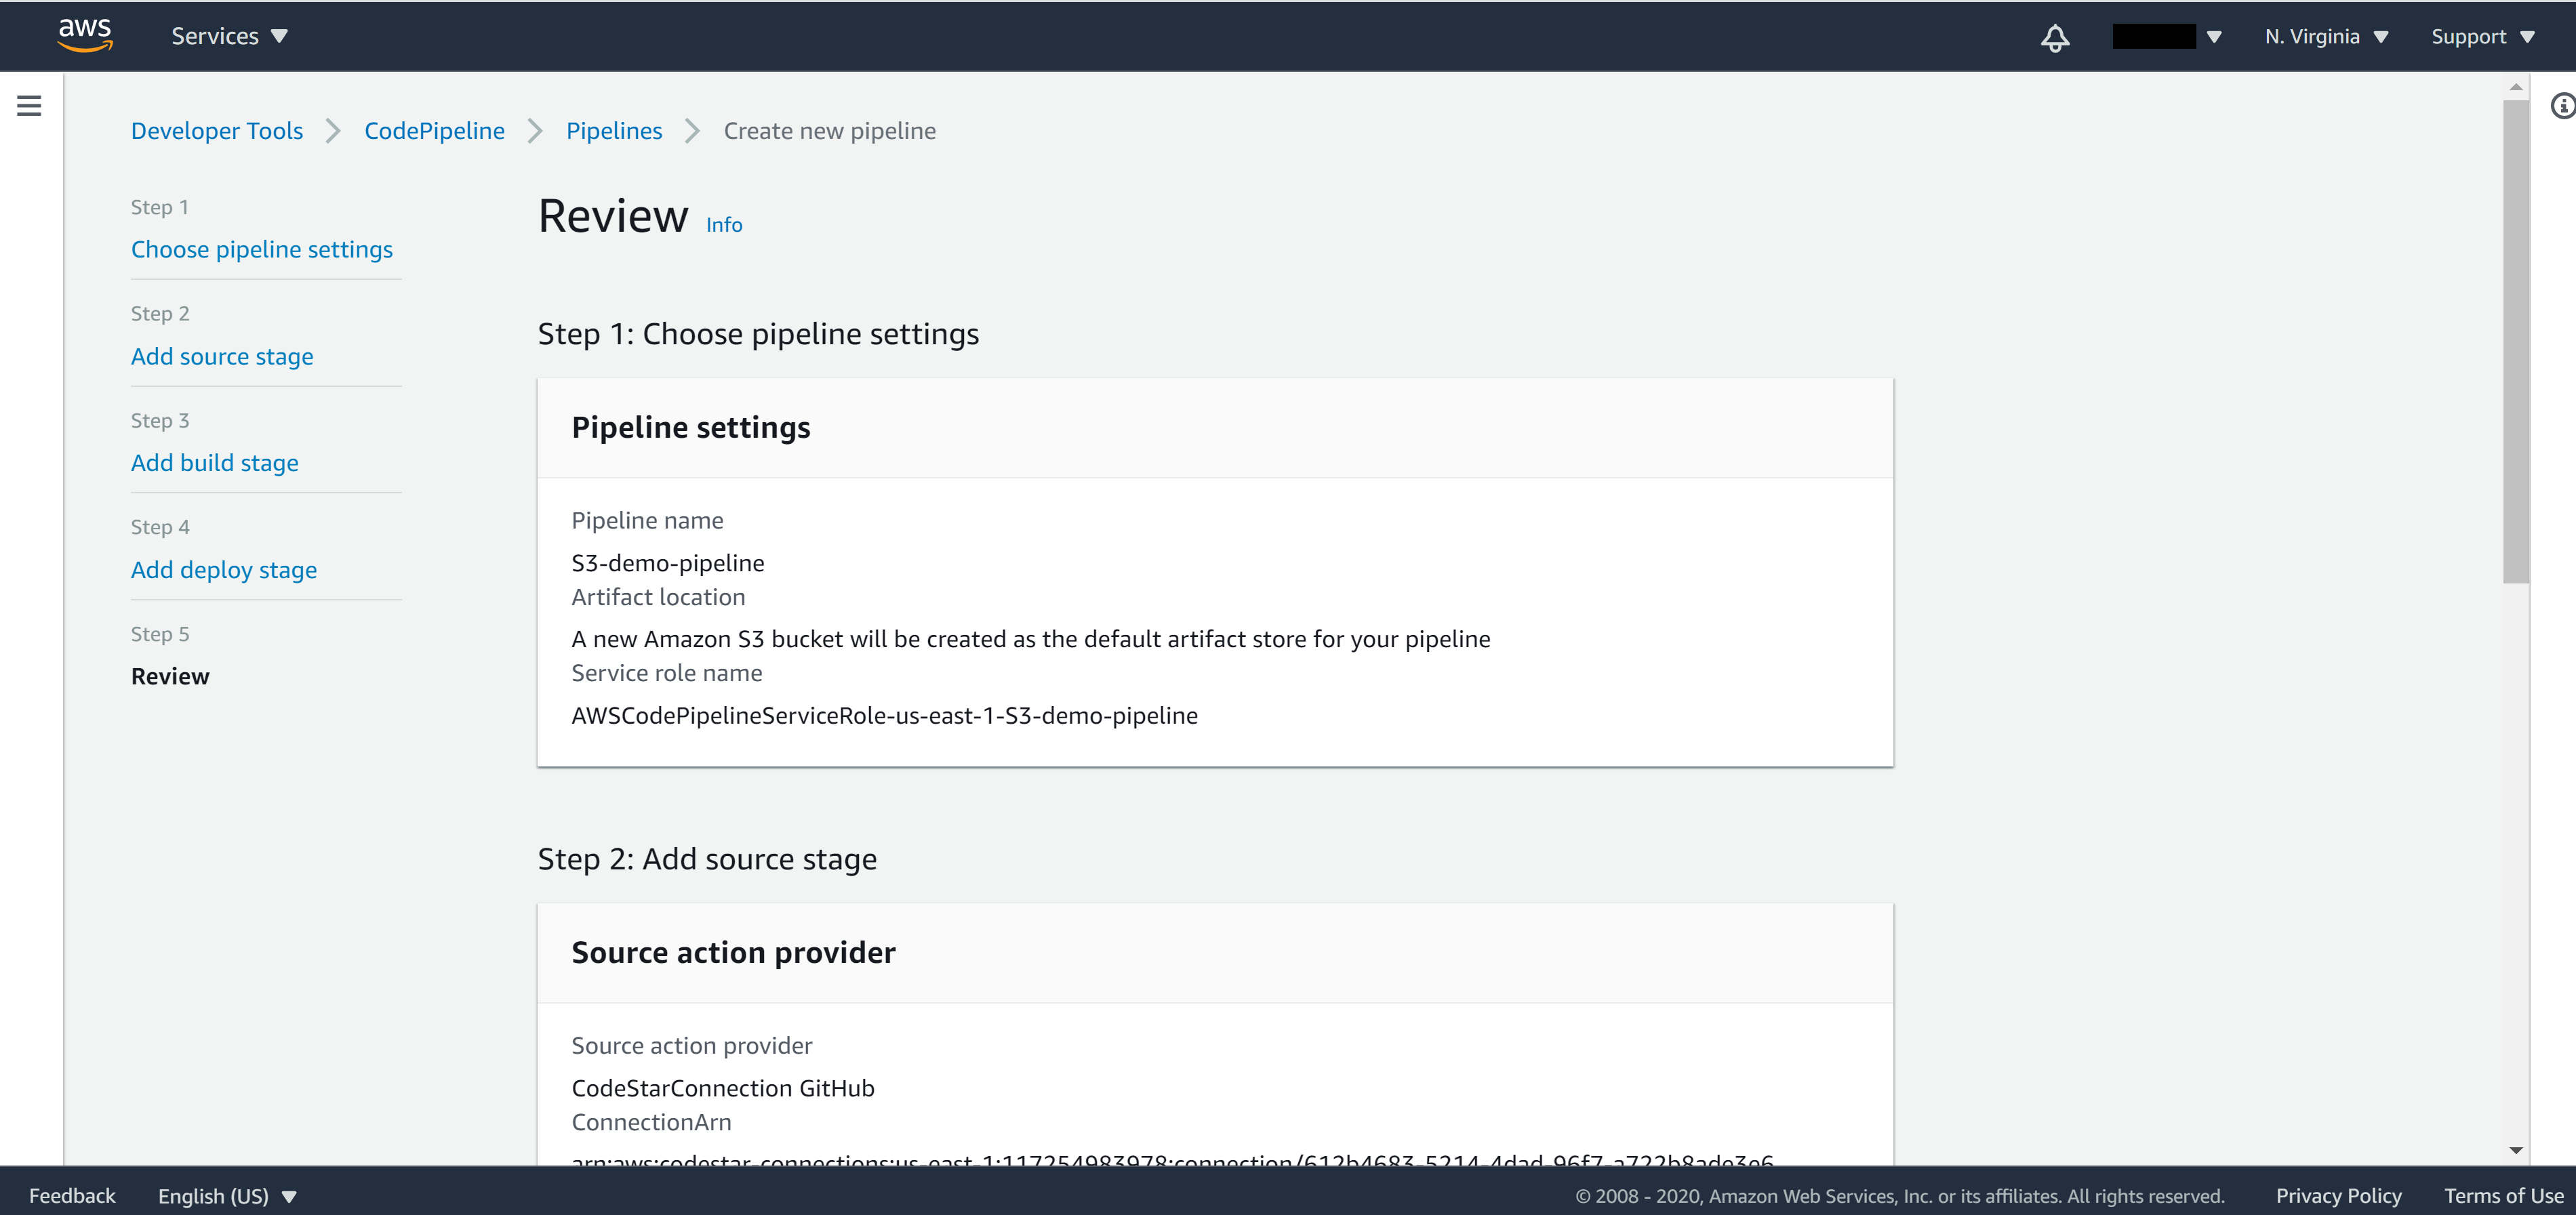
On Step 5, make sure everything is correct then click on Create pipeline
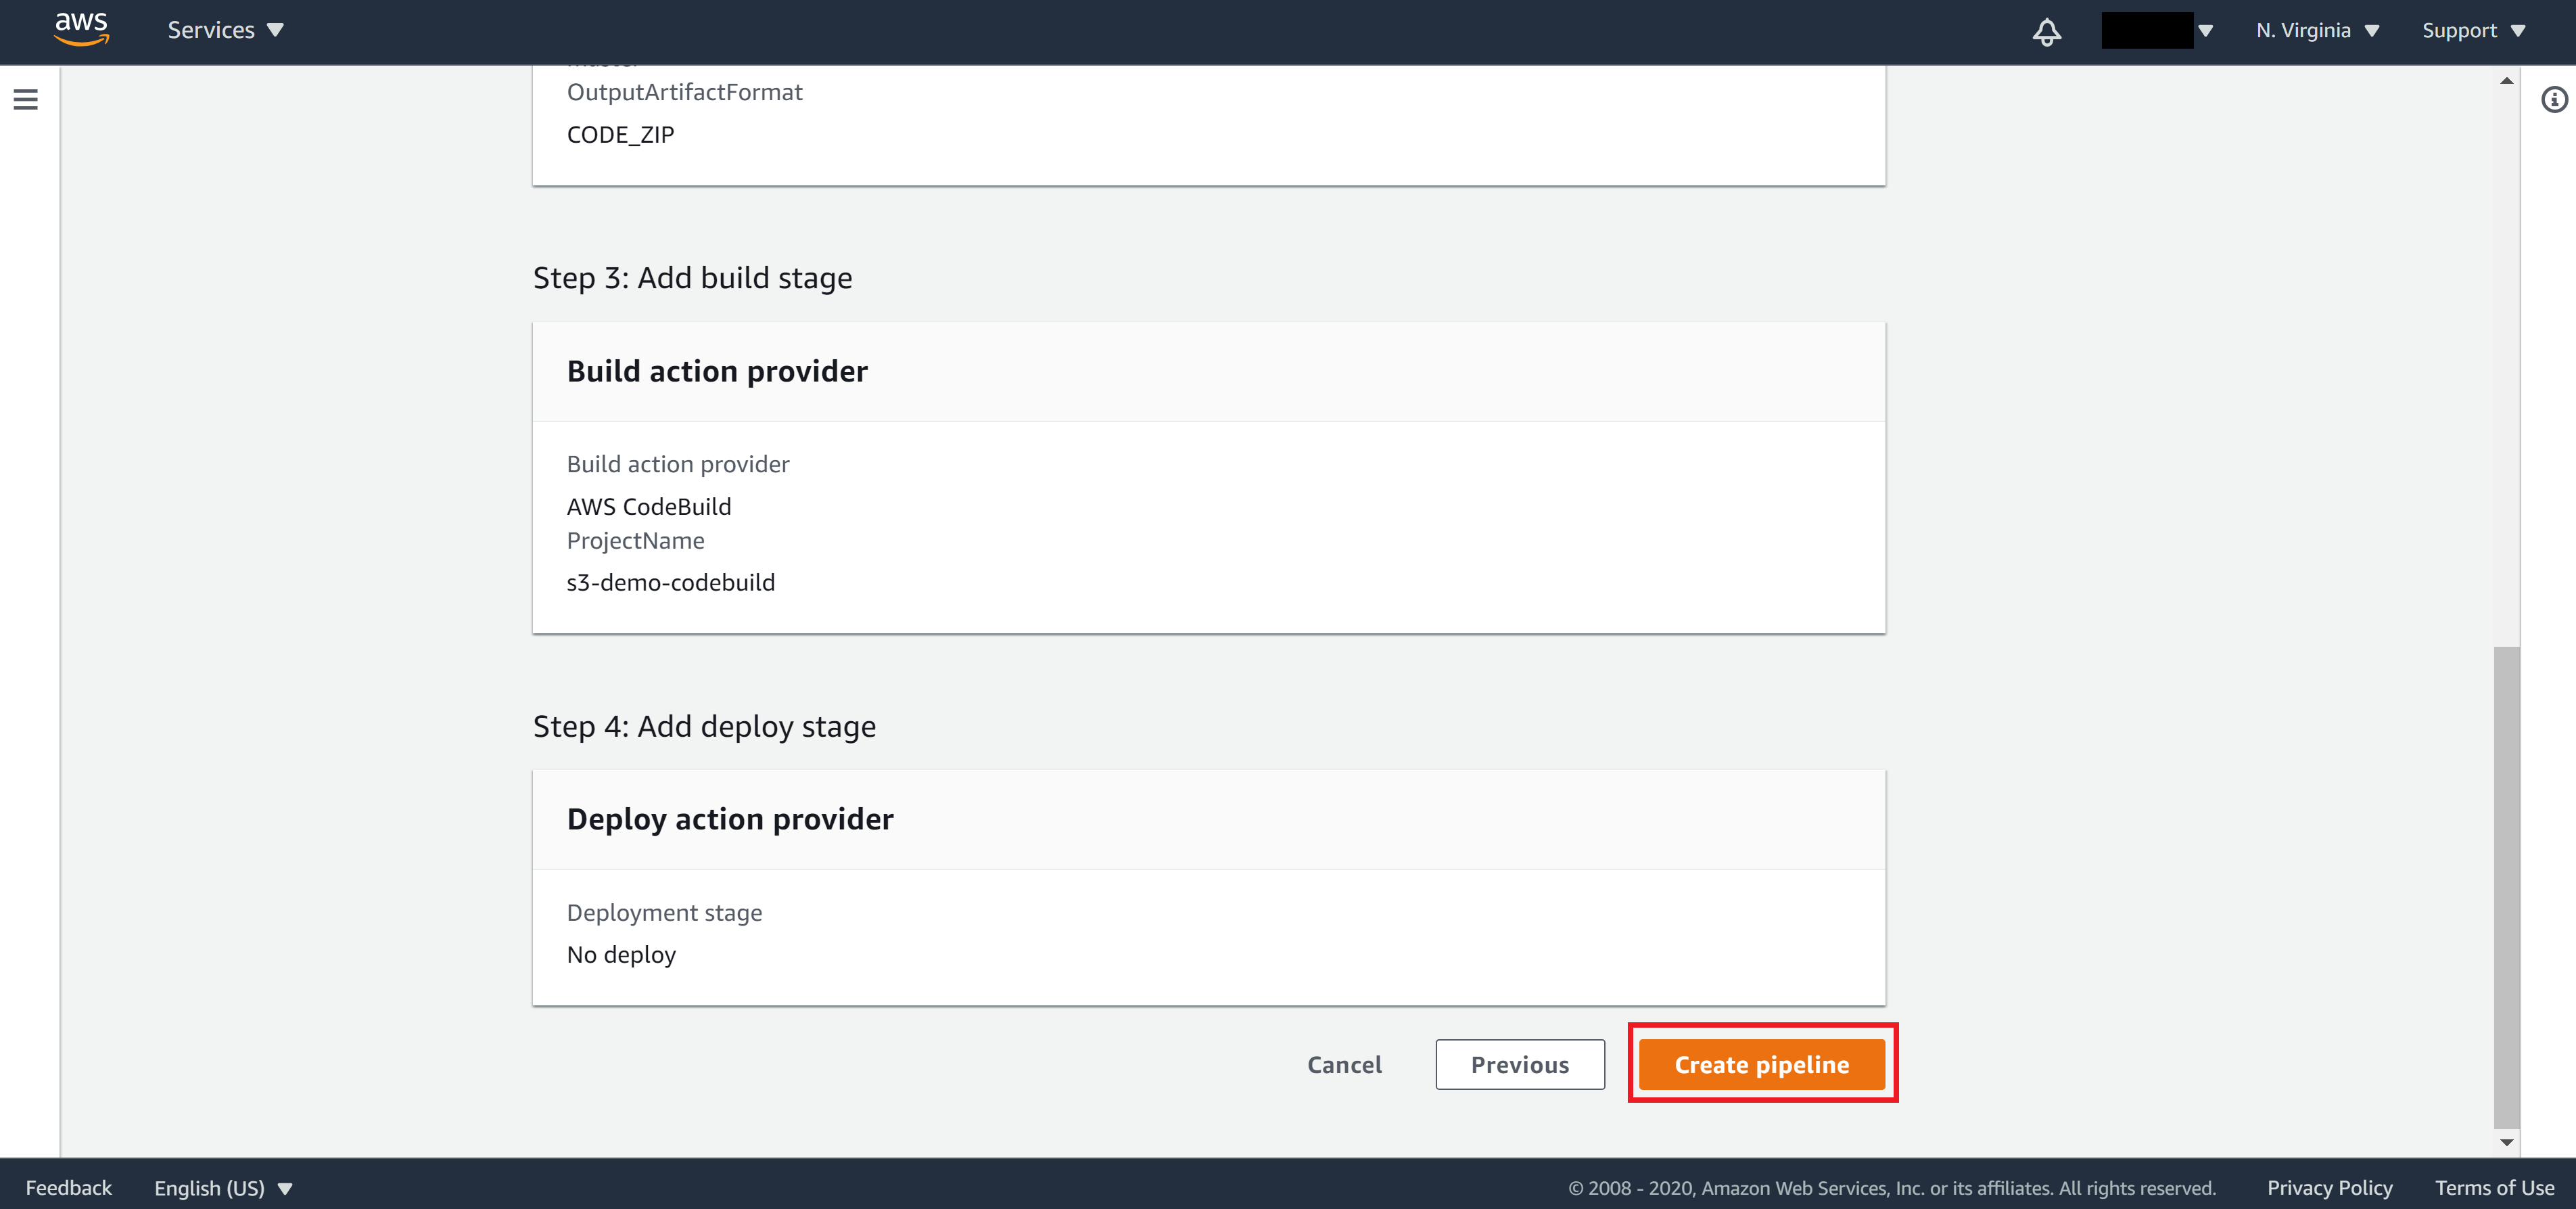
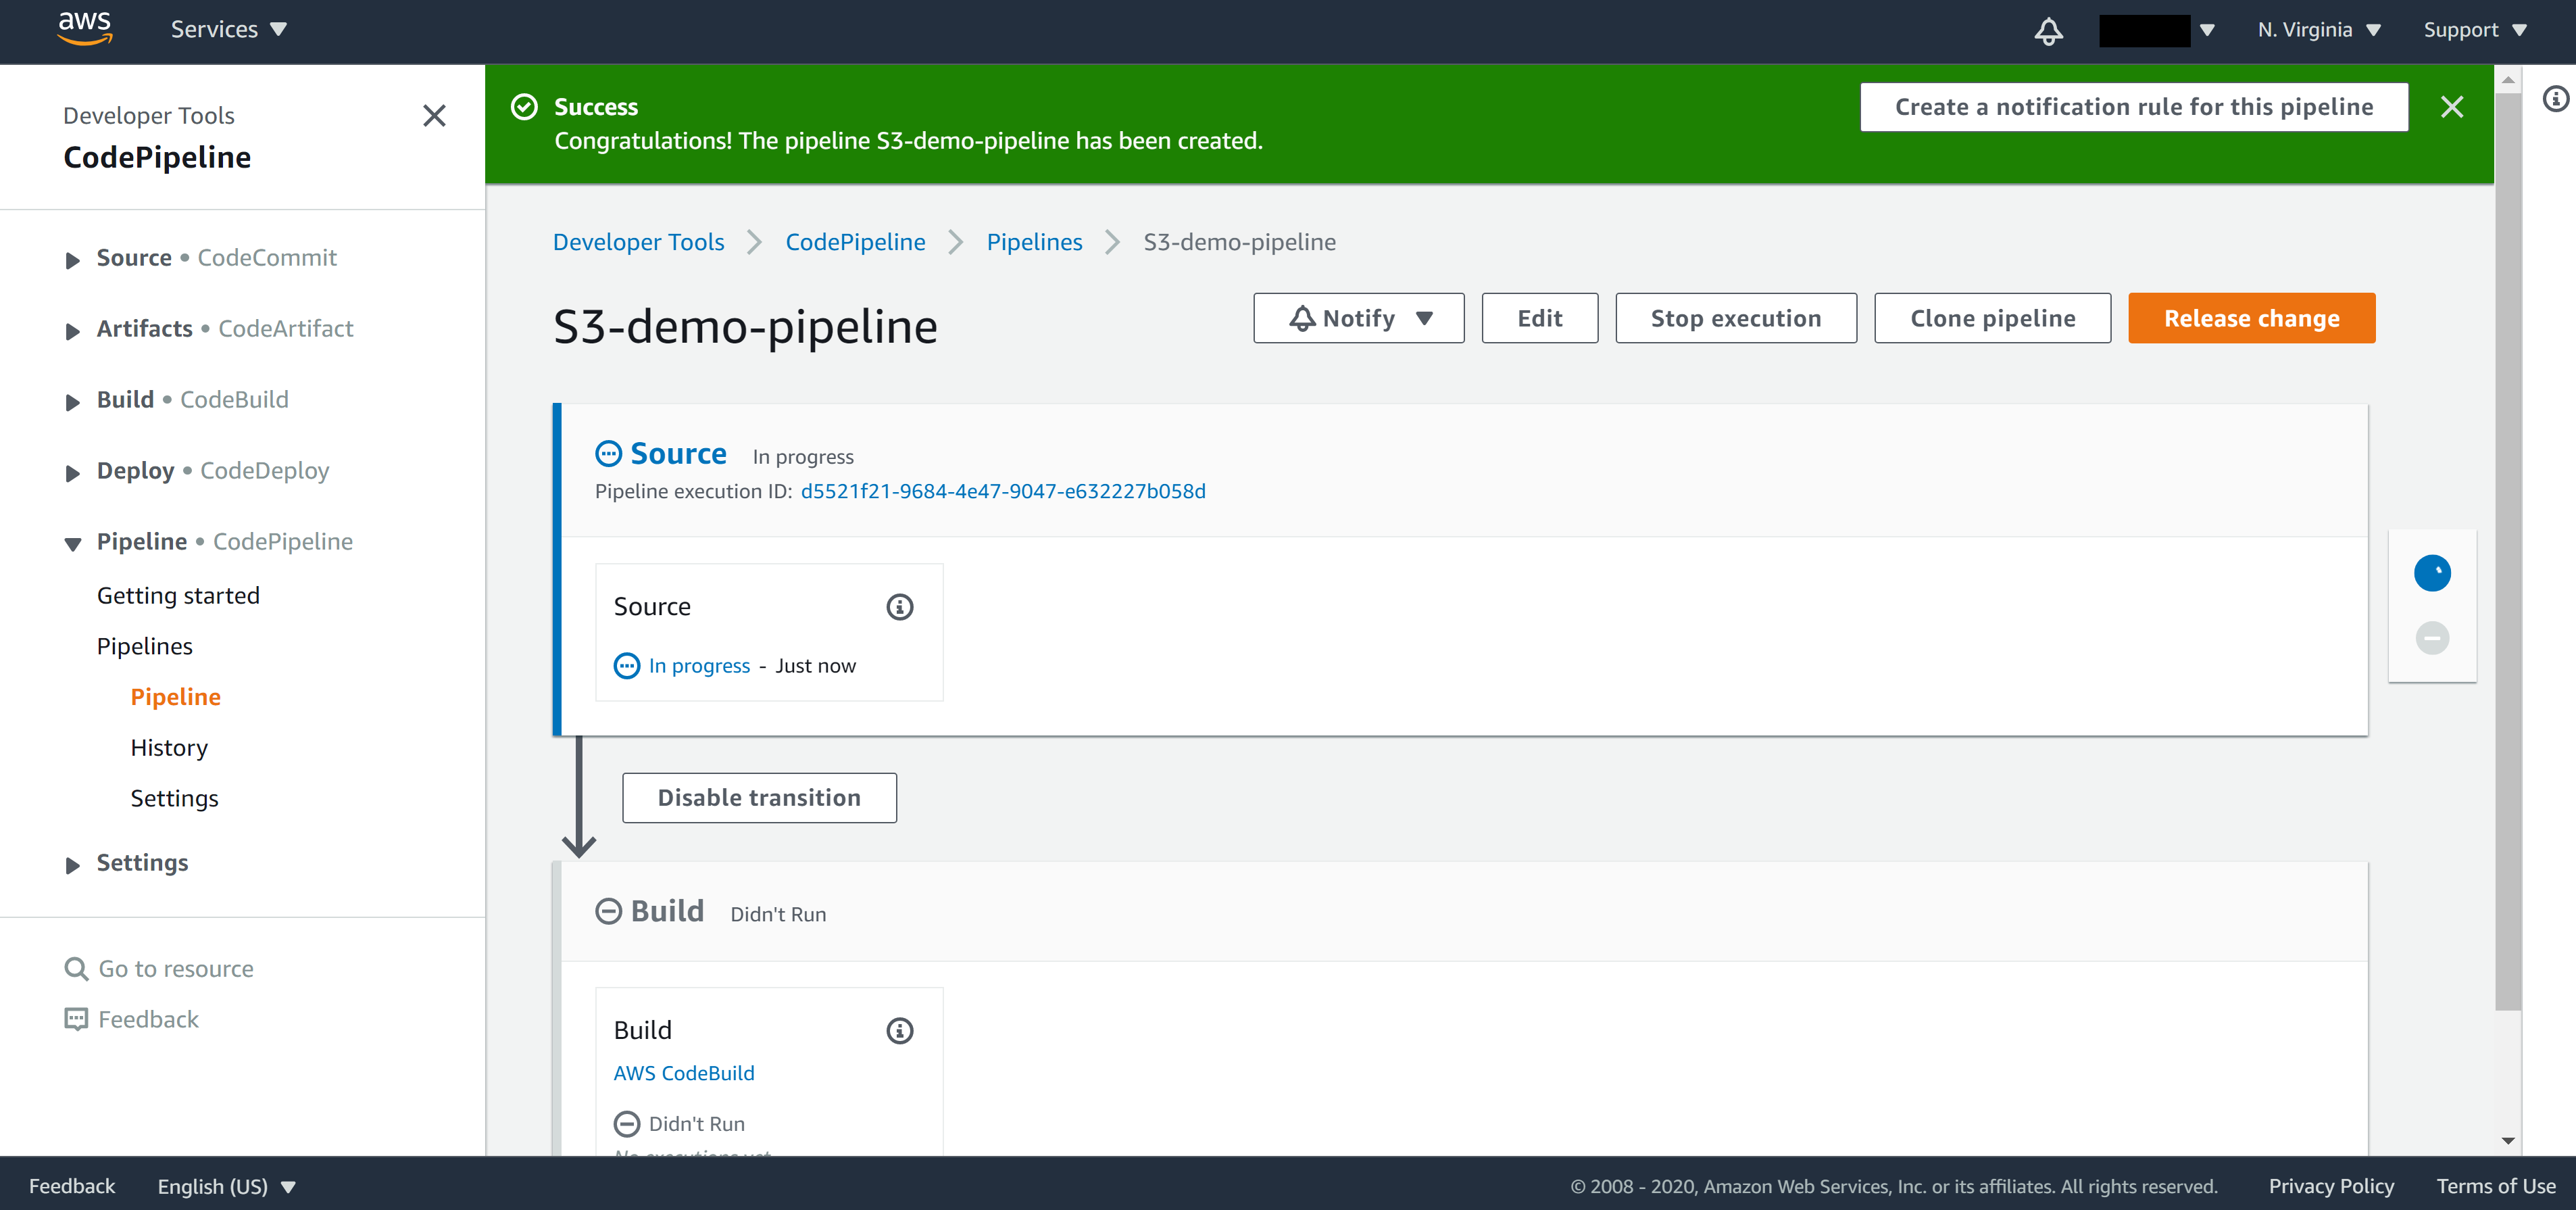
Once your pipeline creation is successful, it will start to build the first build automatically.
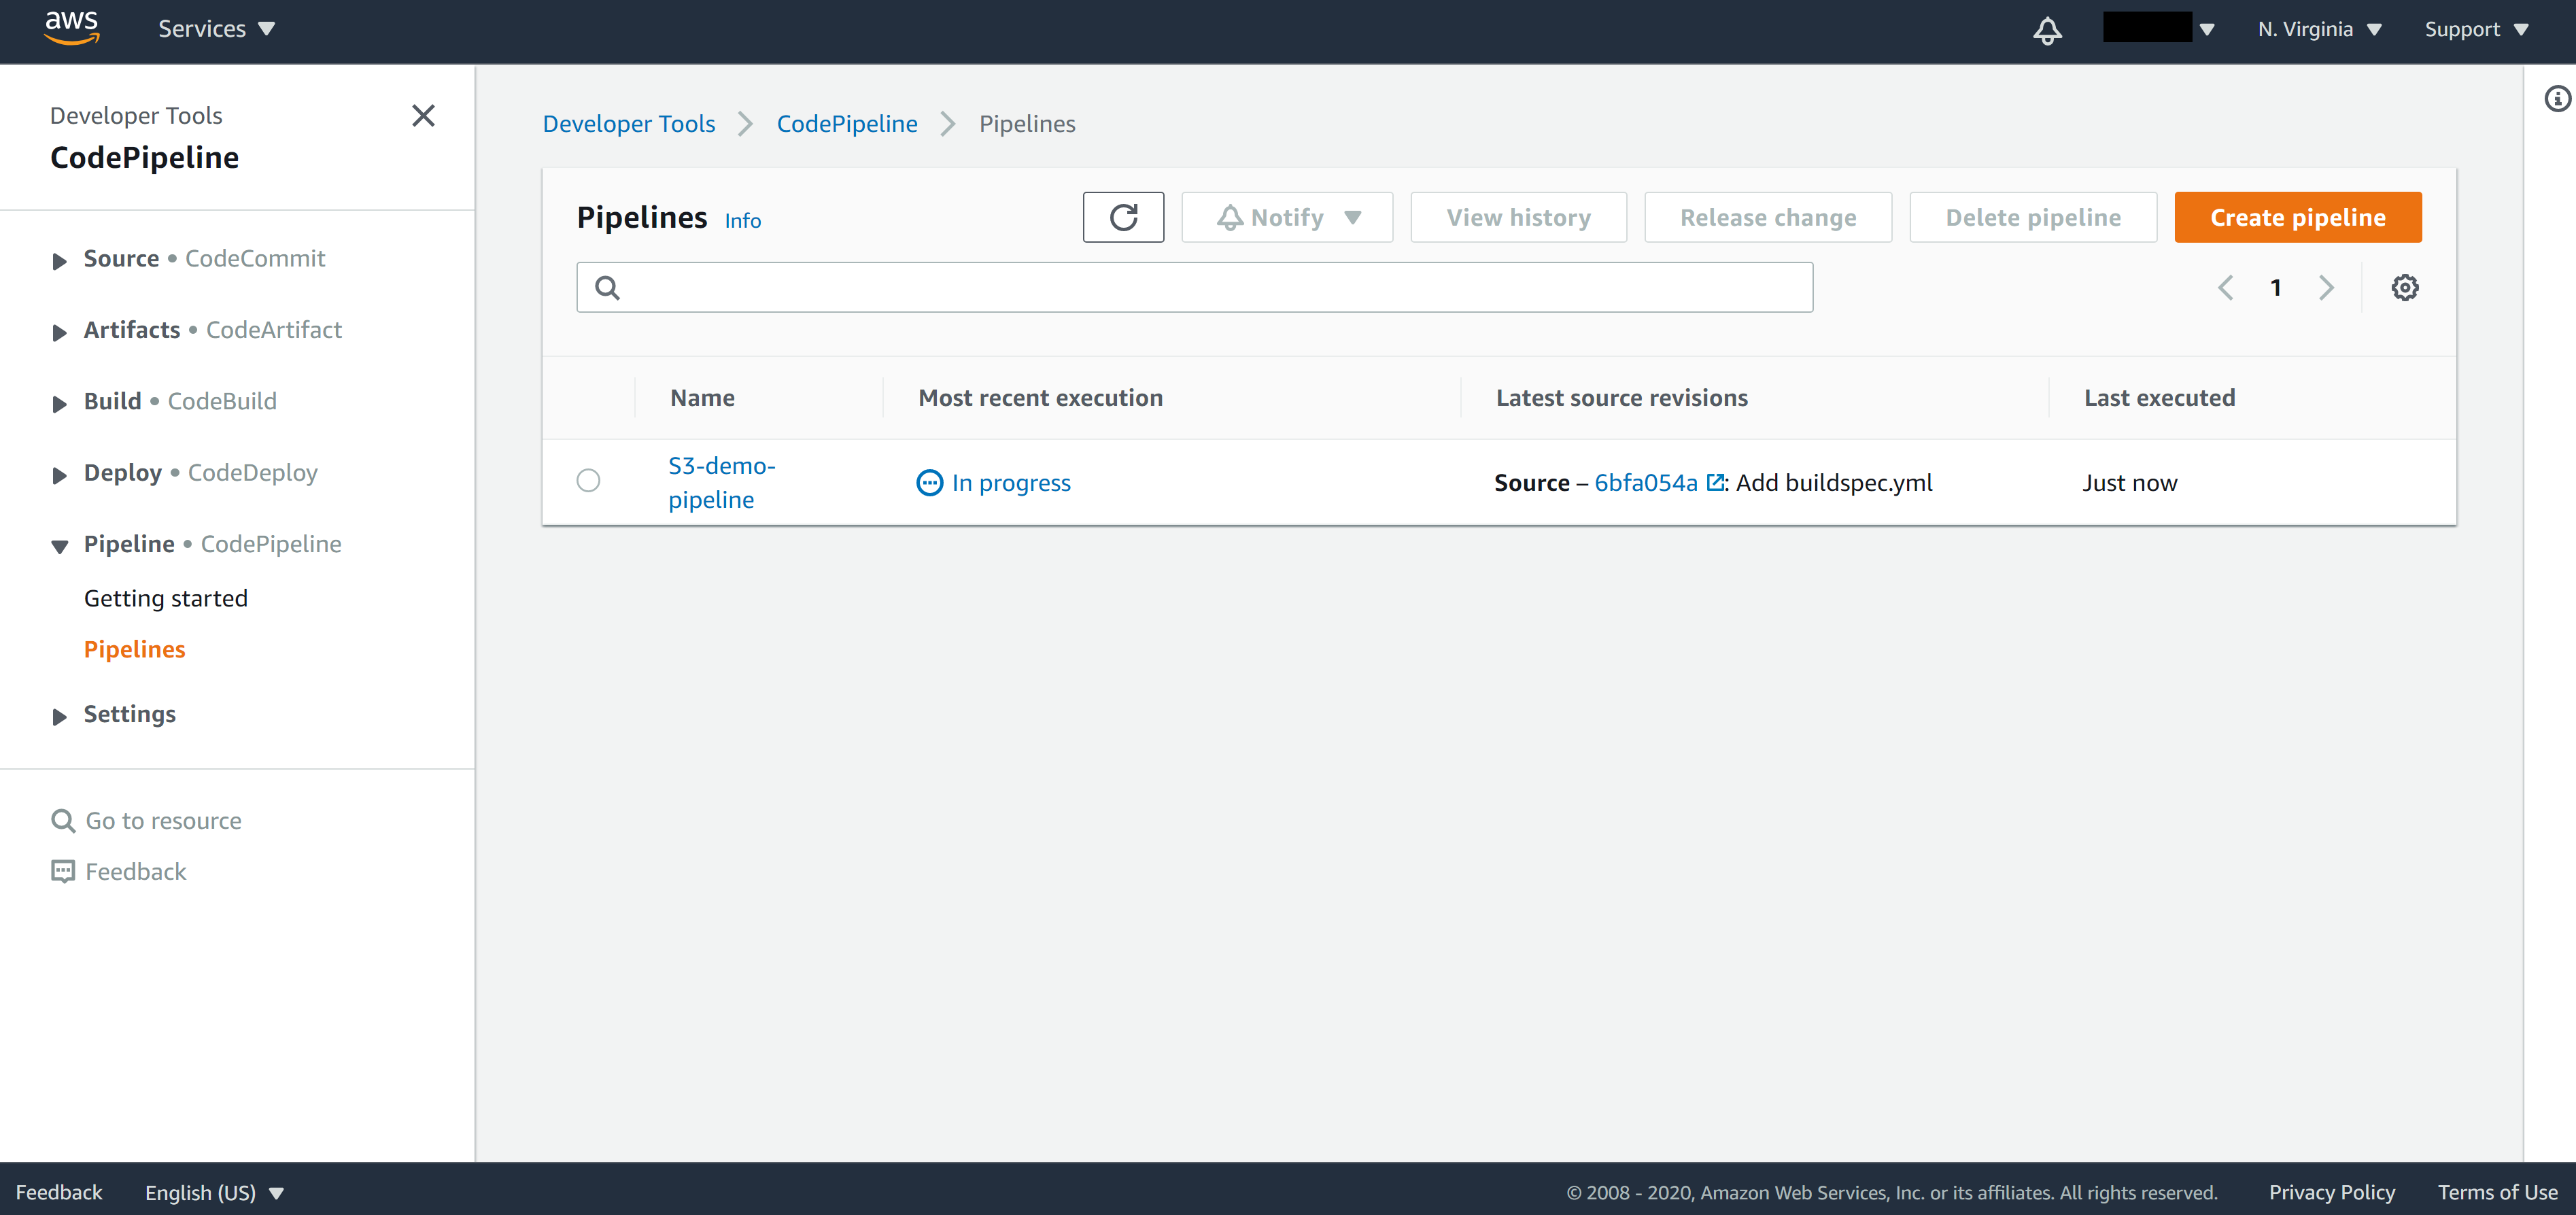
If you commit a git push, you will see the CodePipeline pick ups the changes and starts to build right away.
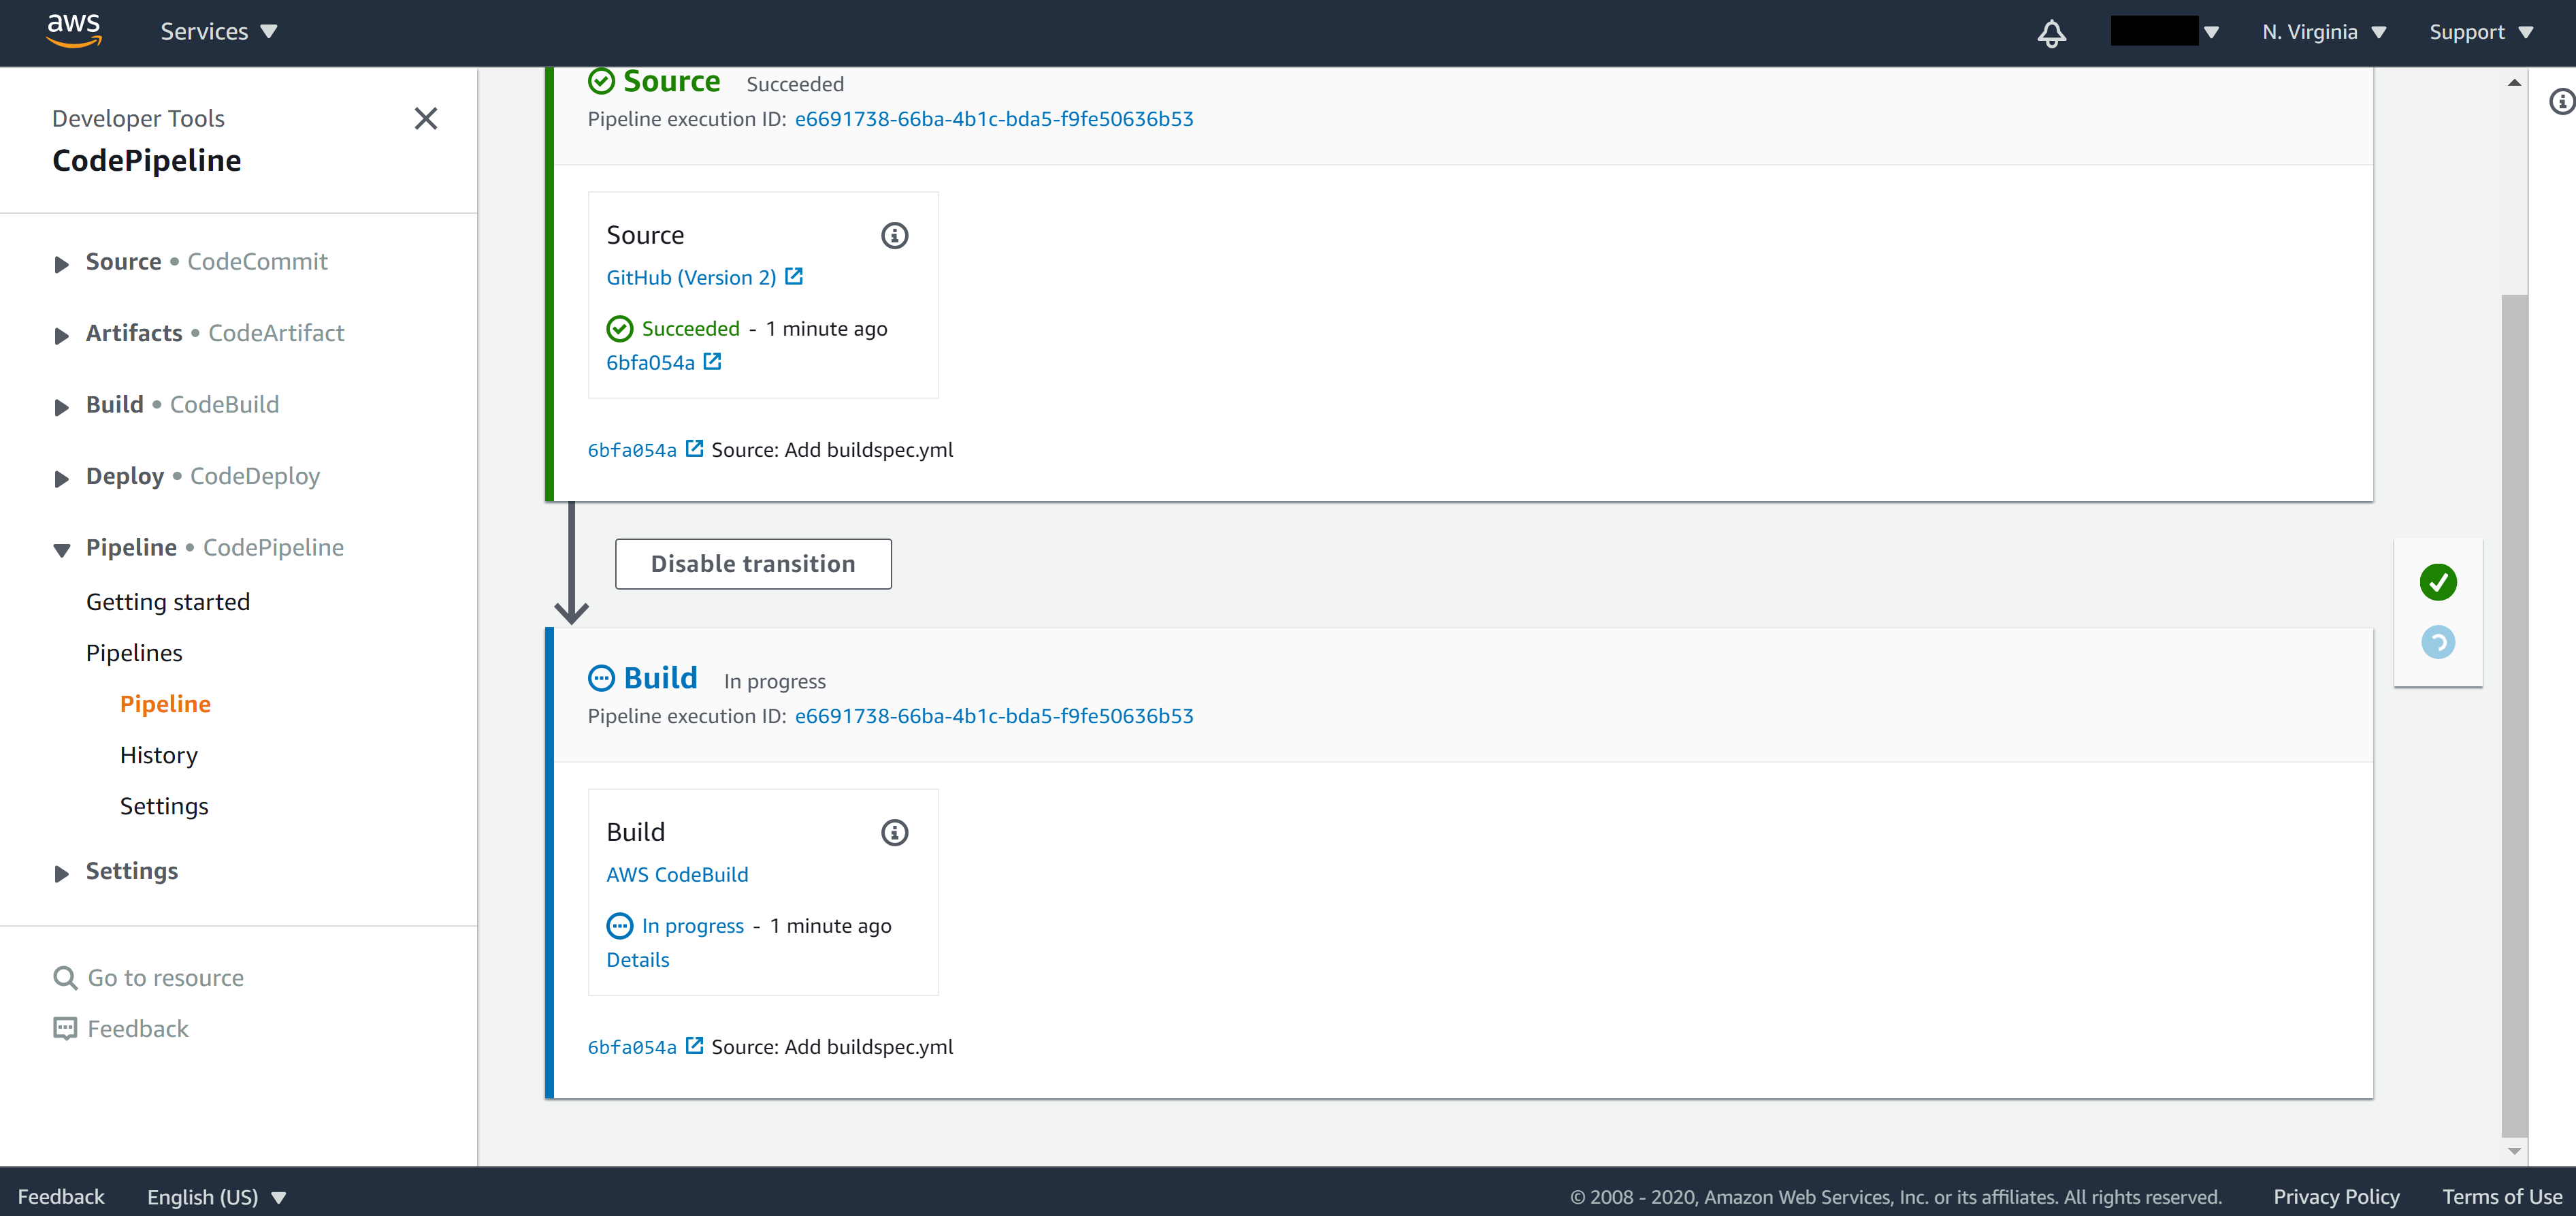
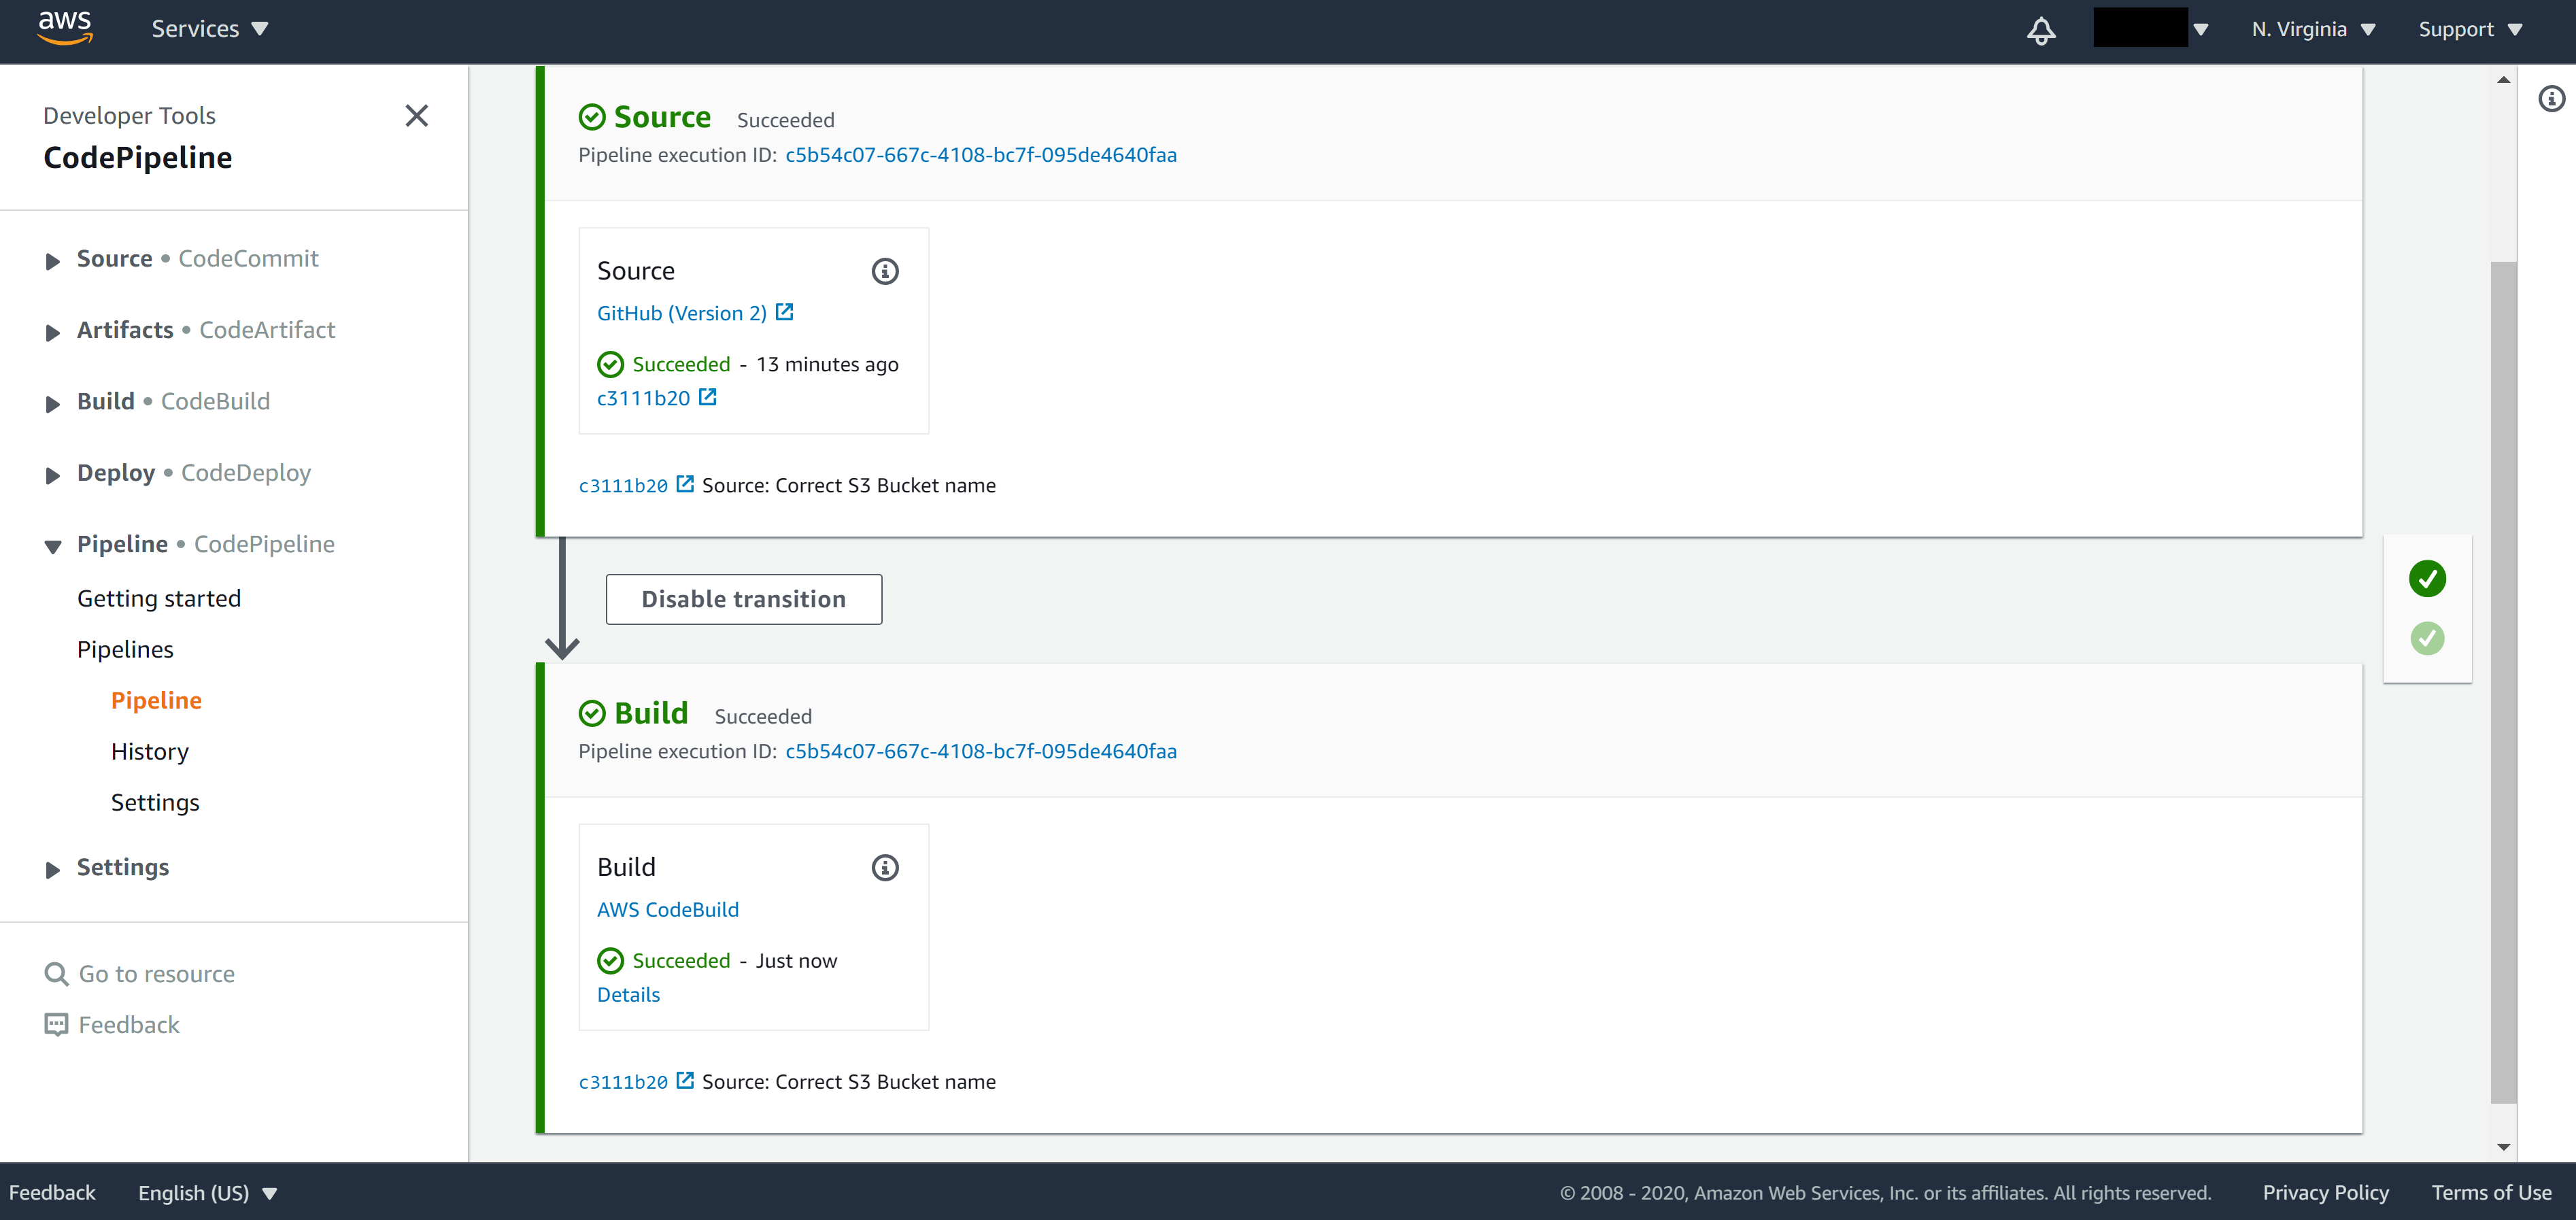
If you click the CodePipeline, you can see current status. Which stage has finished and which stage it’s currently in.
From the panel on the left, you can navigate back to CodeBuild and to check the build log. Click on Tail logs to follow the build log at realtime.
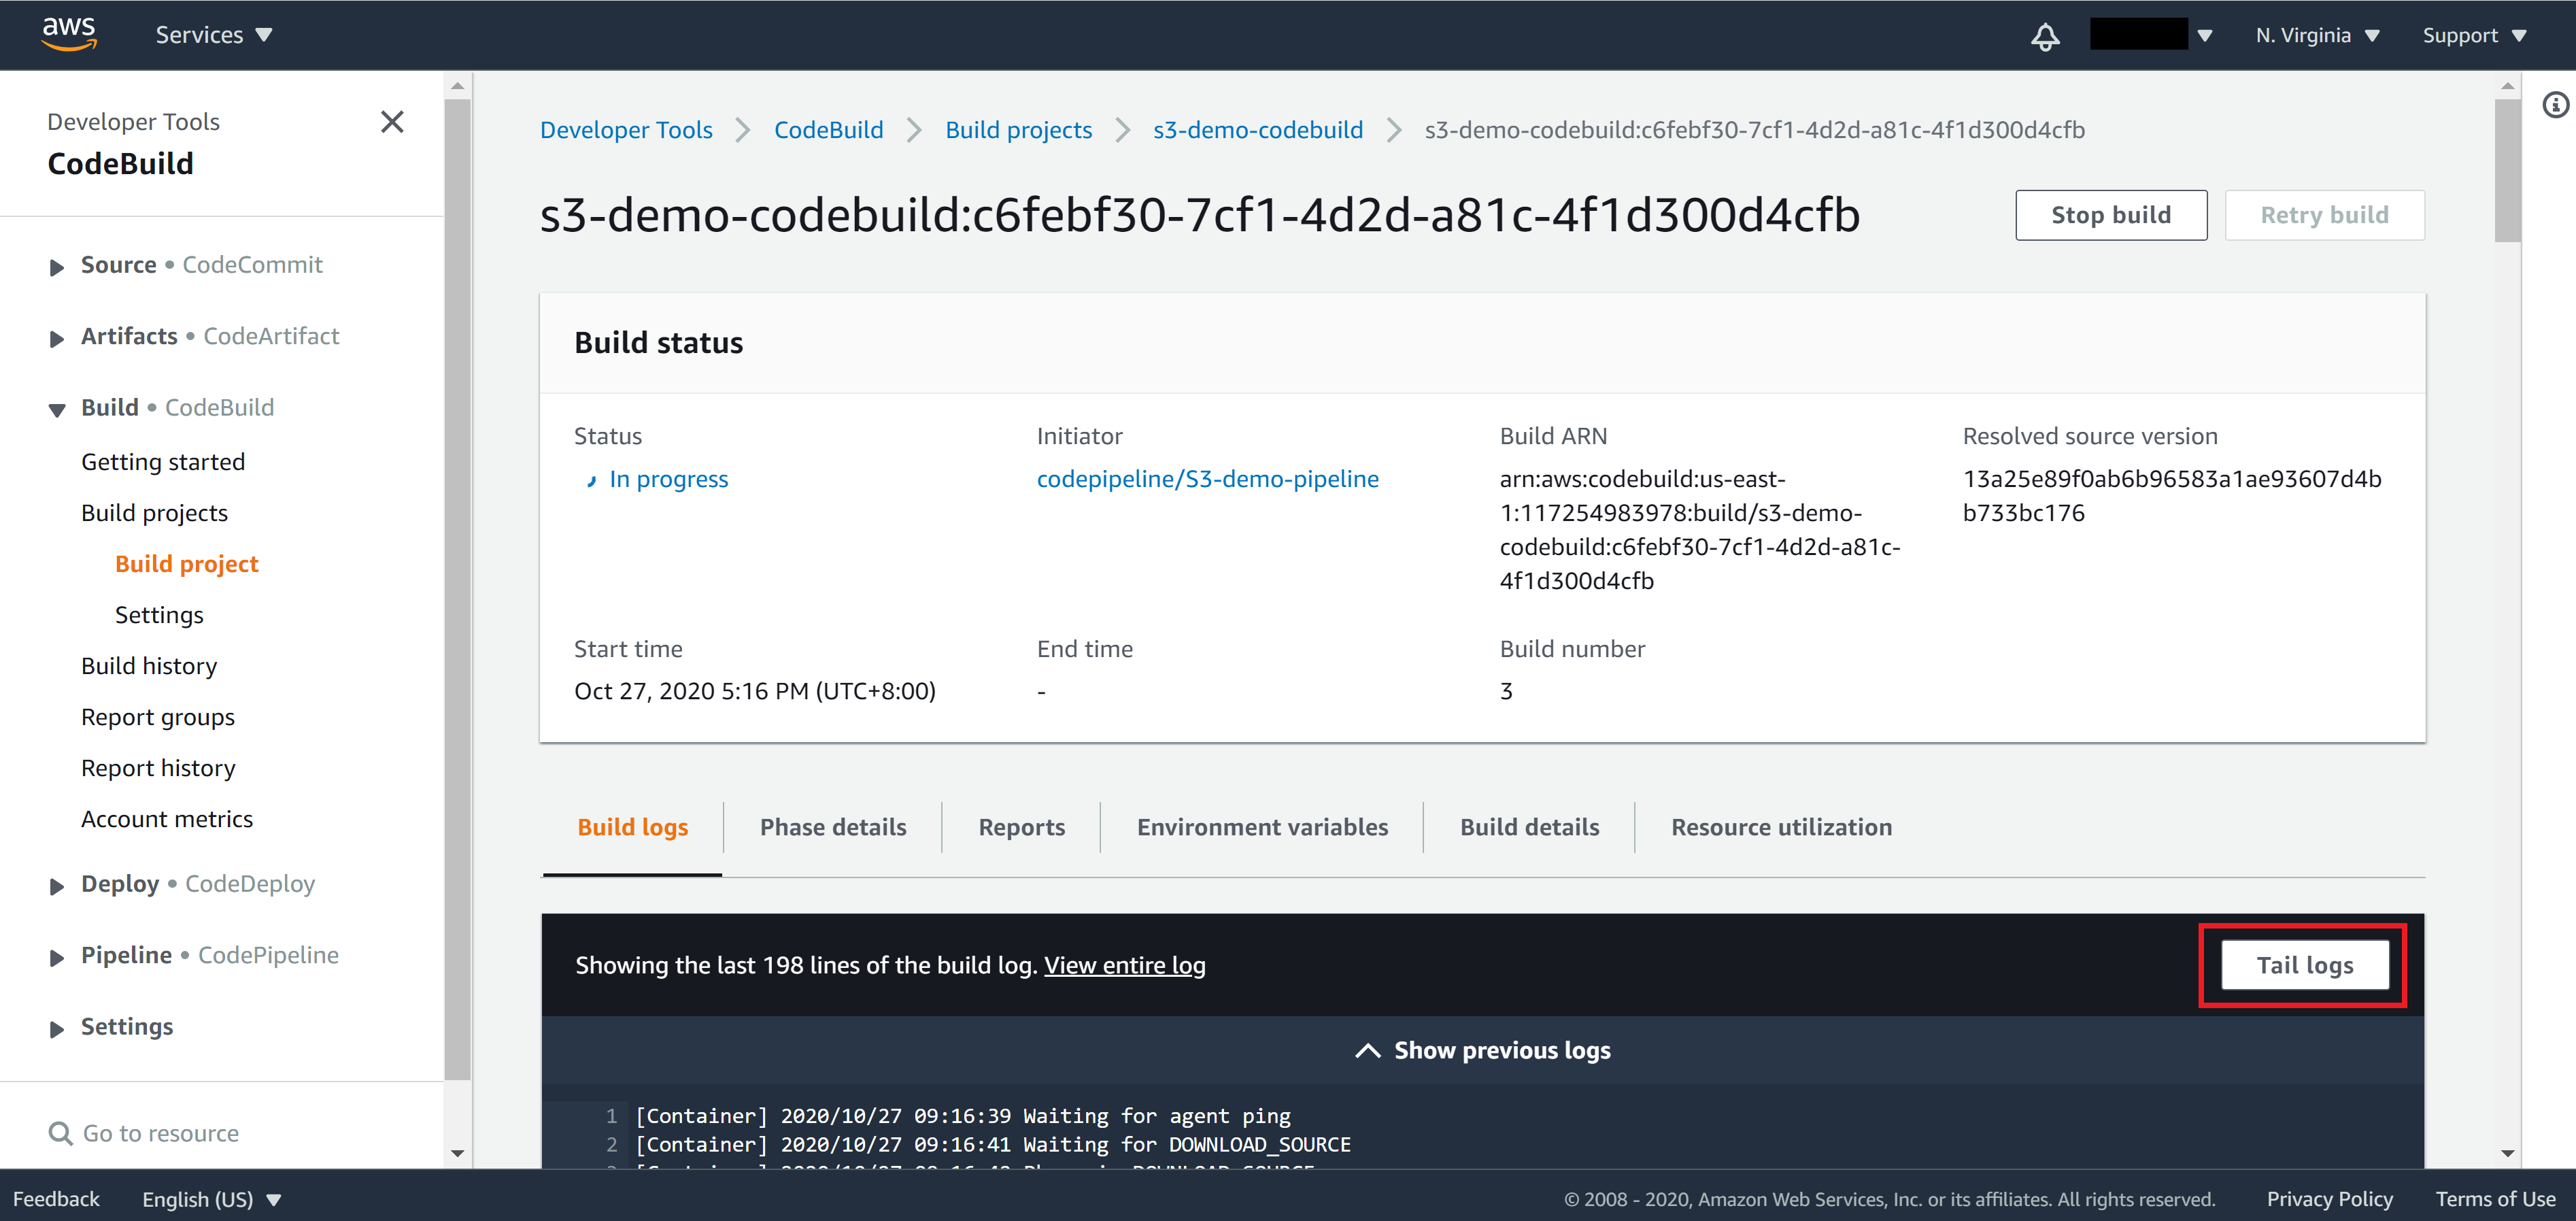
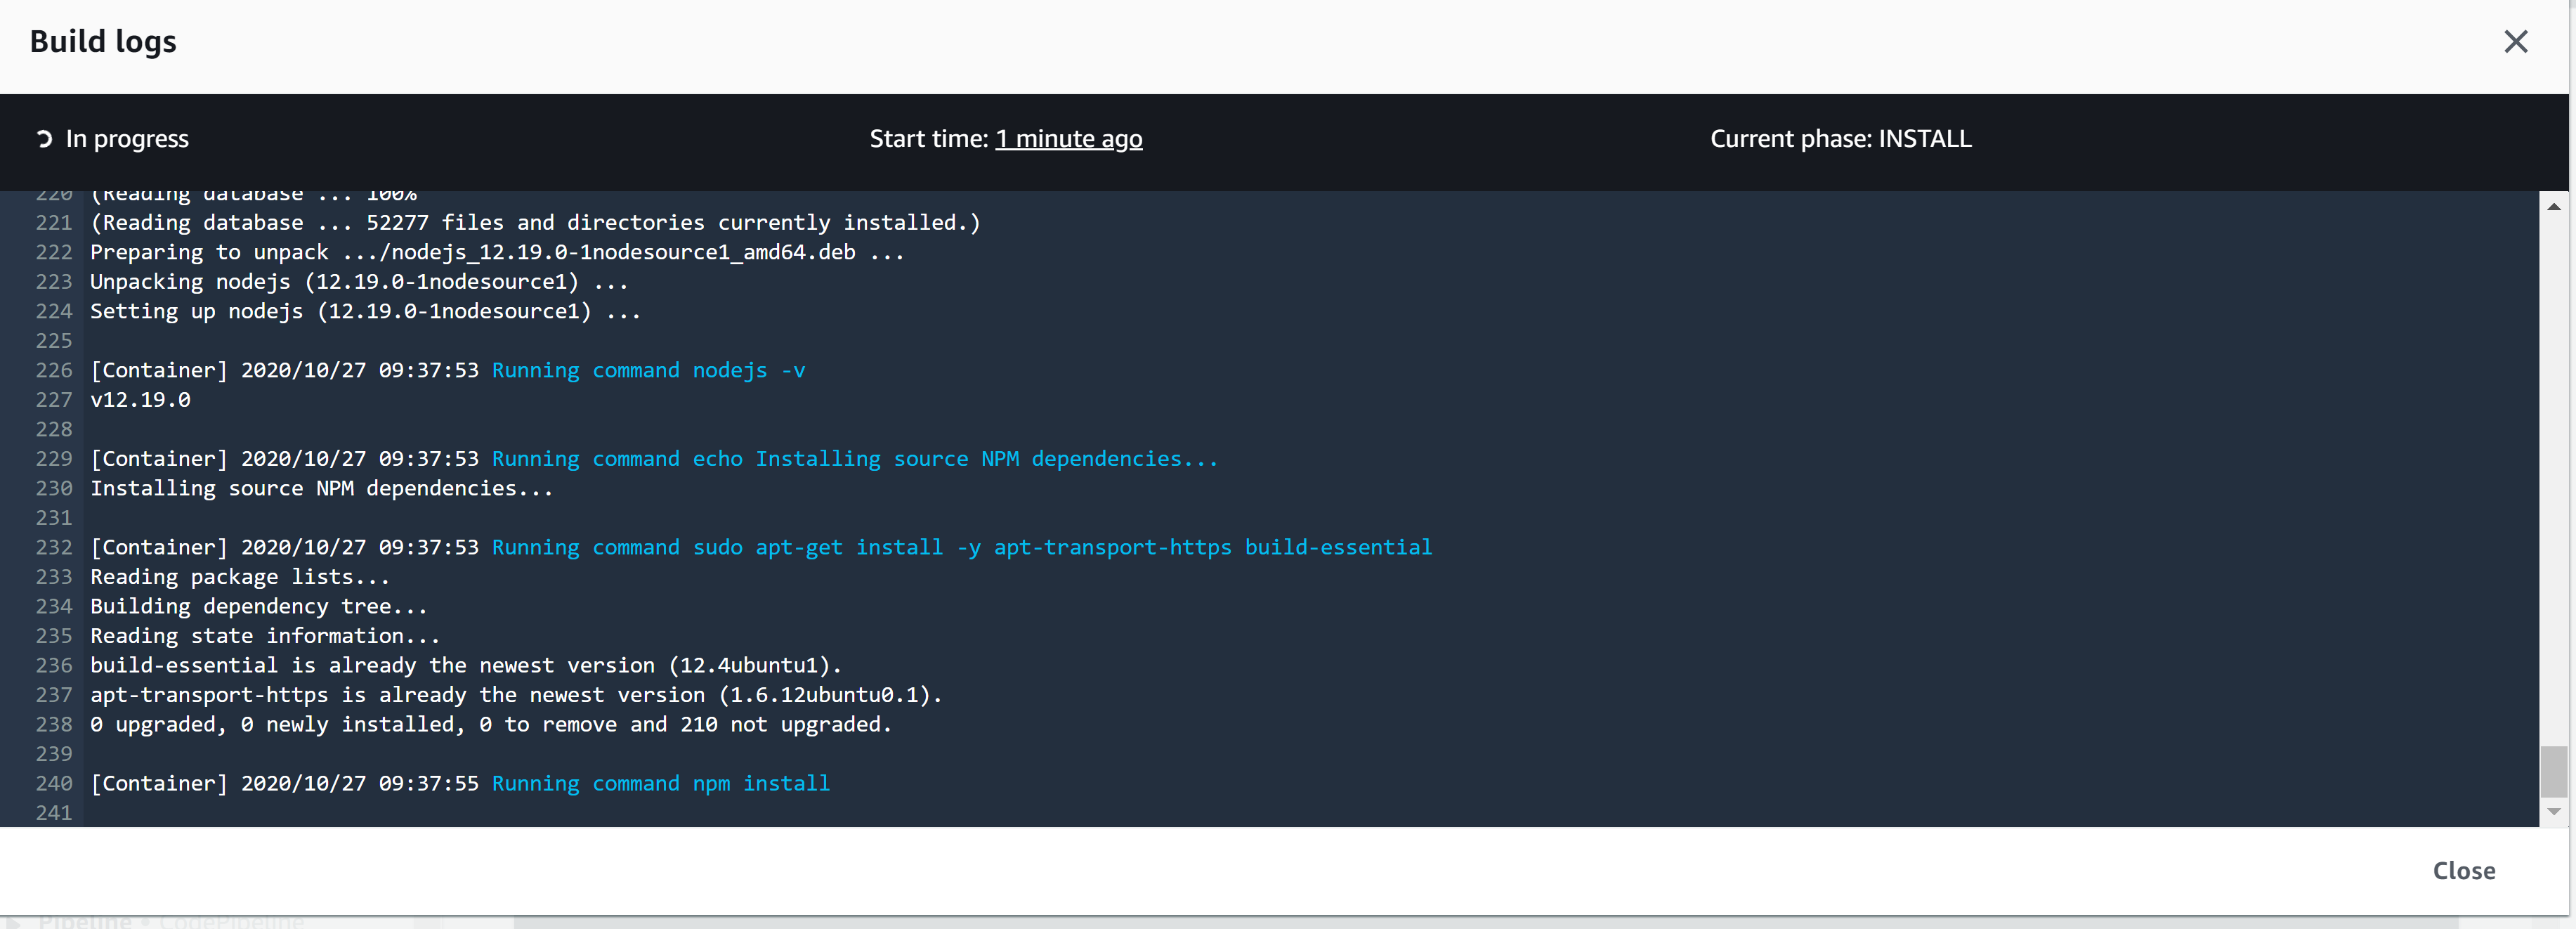
Once CodeBuild finishes the build, you will see CodePipeline finishes as well.
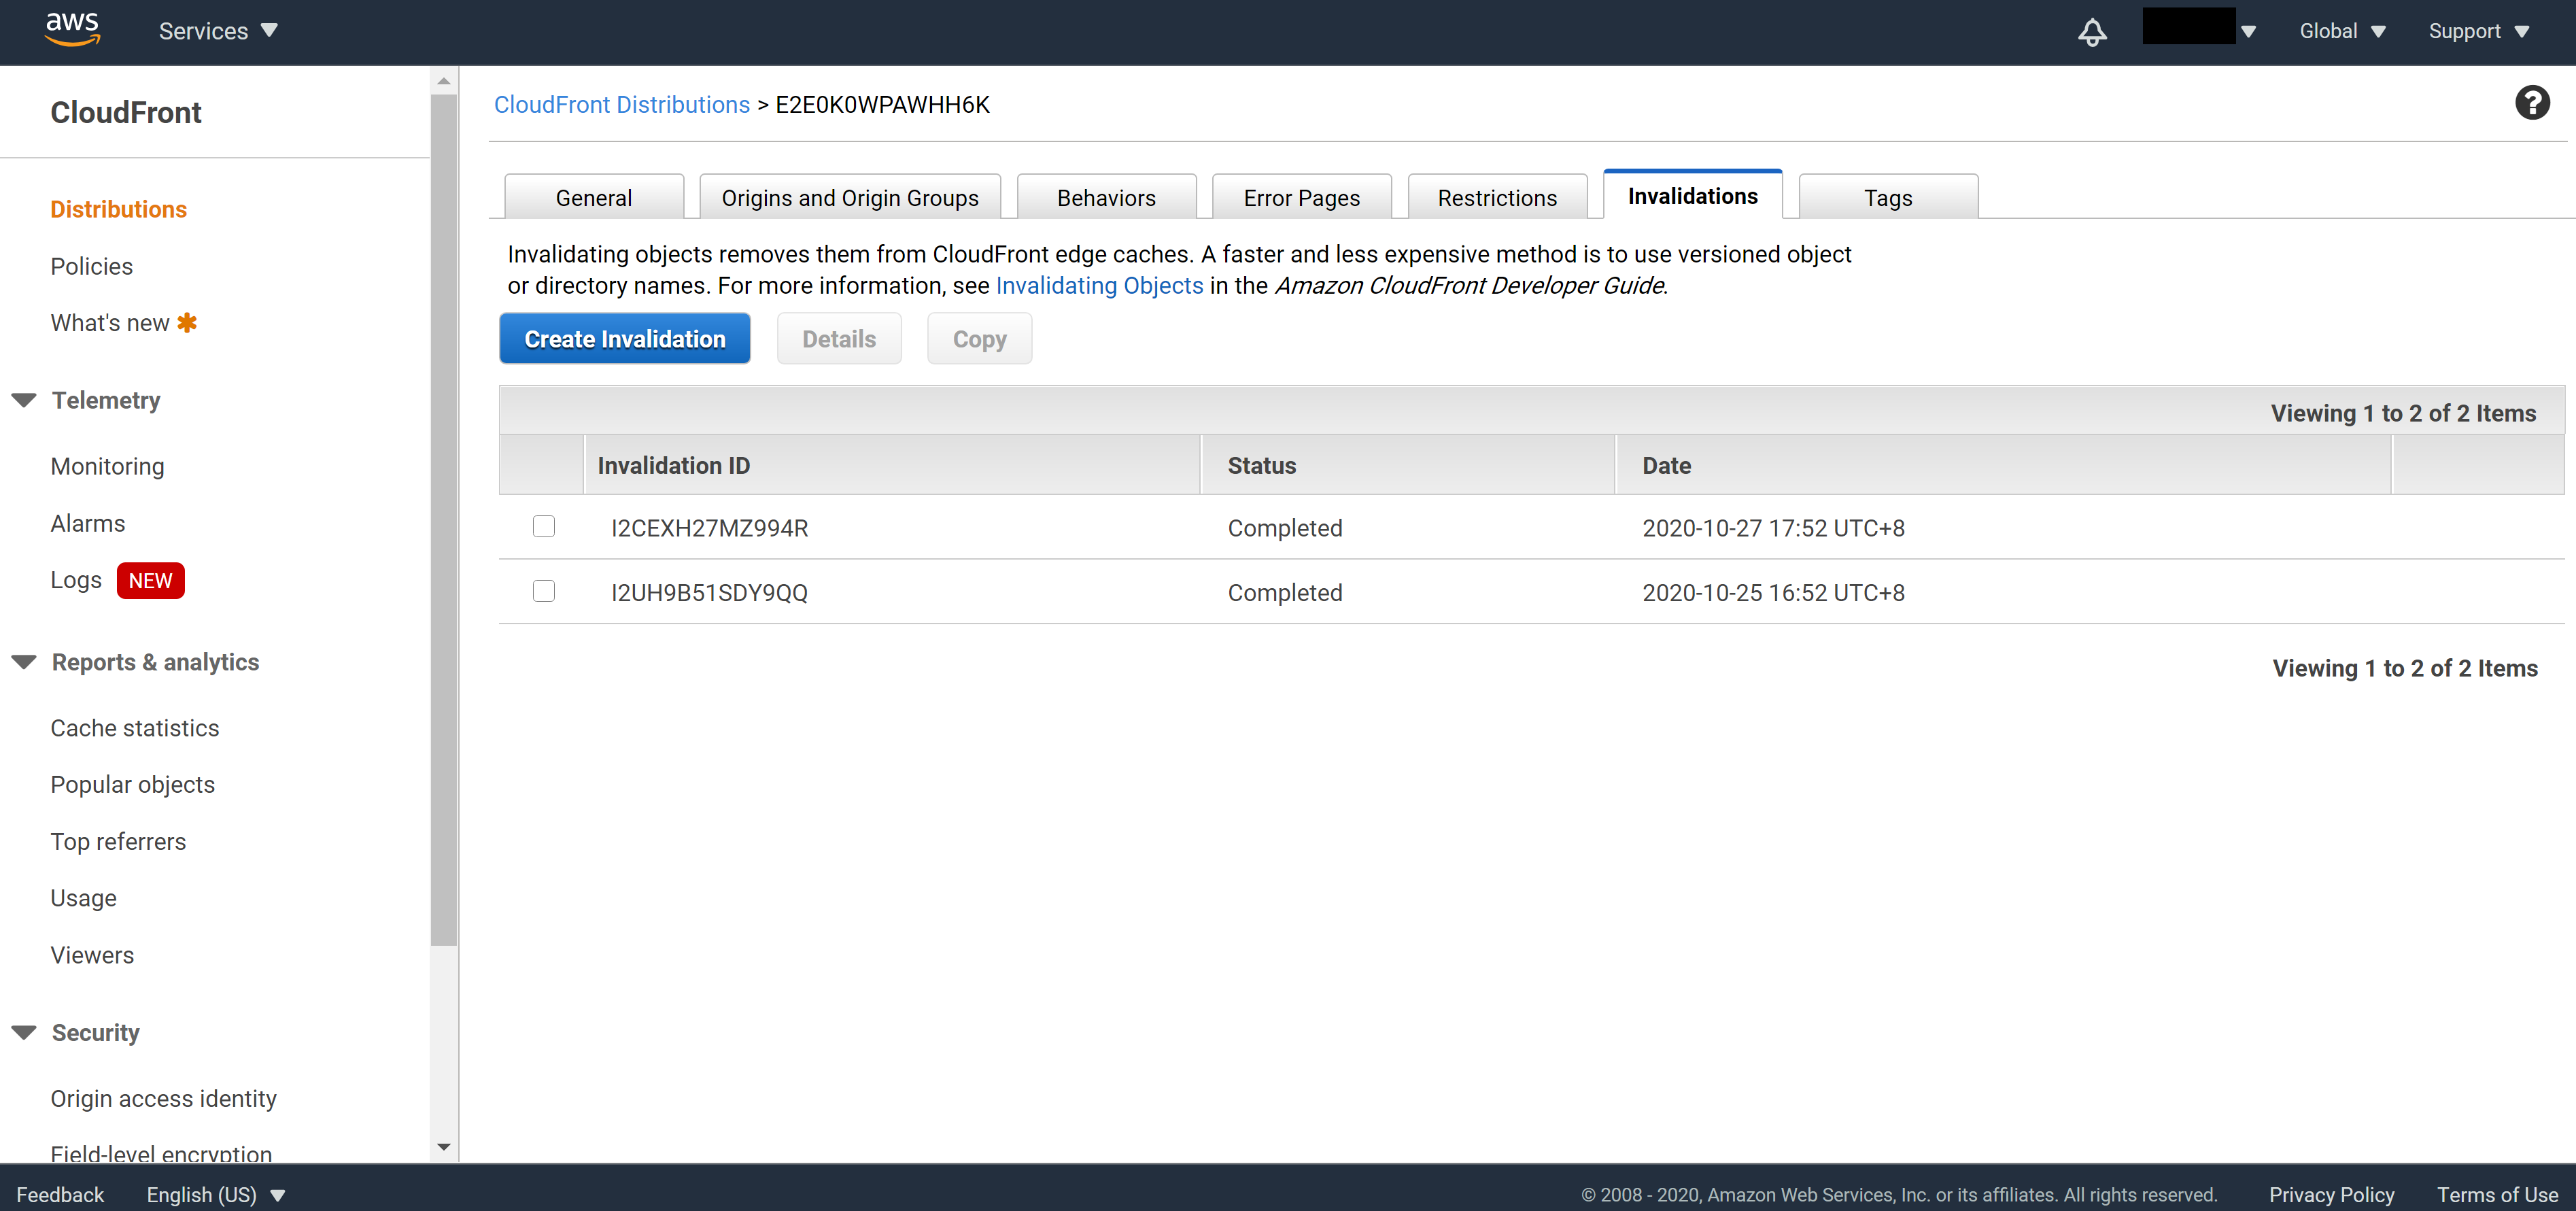
When you navigate to the CloudFront console -> Invalidations tab, you will see that CloudFront has indeed been invalidated, which means the cache of old code has been cleared.
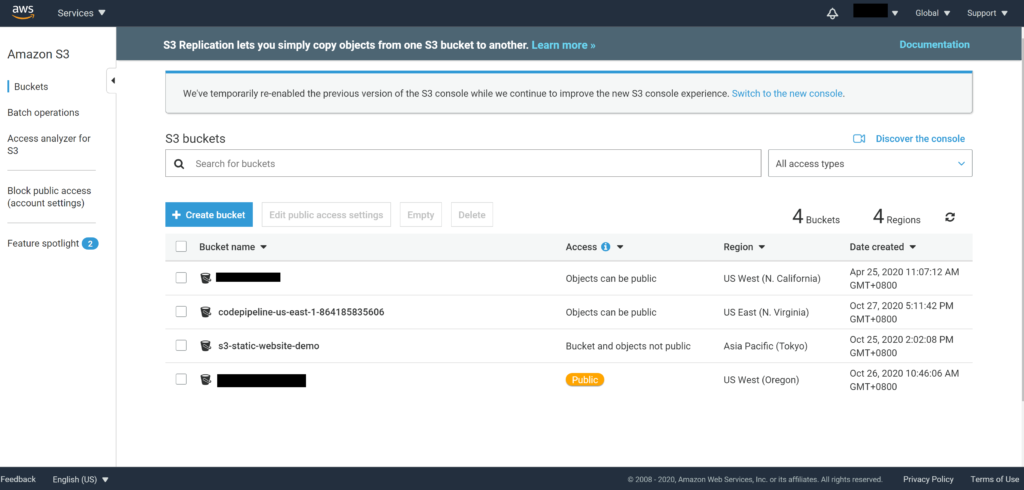
On the AWS S3 console, you will notice that CodePipeline has created a new Bucket. This Bucket will be used by CodePipeline to store build logs.
Summary
Congratulations! You have finished the Complete guide of deploying static websites to AWS series. To summarize, we have learned the difference between a static website and a dynamic website and covered how to host static websites on AWS in the first tutorial – Host static websites on AWS S3. In the second tutorial – Set up custom domain with HTTPS and add global cache, we add custom domain name and add HTTPS support to our website. And to boost up the load speed and increase security, we have added a CDN layer before our S3 Bucket. In the third tutorial – Anomaly detection – protect against DDOS attack, we take the security defense to the next level by introducing three different levels of protections you can add to your website. Finally in this tutorial – CICD support – automatically deploy to AWS, we finish the series by adding CICD support, so that future deployment can be done automatically.
I hope you enjoy the series and the tutorials bring you values! Leave a comment below if there are any topics you would like to see in the future and stay tuned. I will see you next time.
