Introduction
While both GoDaddy and AWS provide affordable and attractive domain packages, sometimes you might still need to transfer your domain to AWS in order to better integrate with other AWS services. In this tutorial we will cover all the steps and actions you need to take in order to transfer your GoDaddy domain to AWS.
Enable domain transfer on GoDaddy
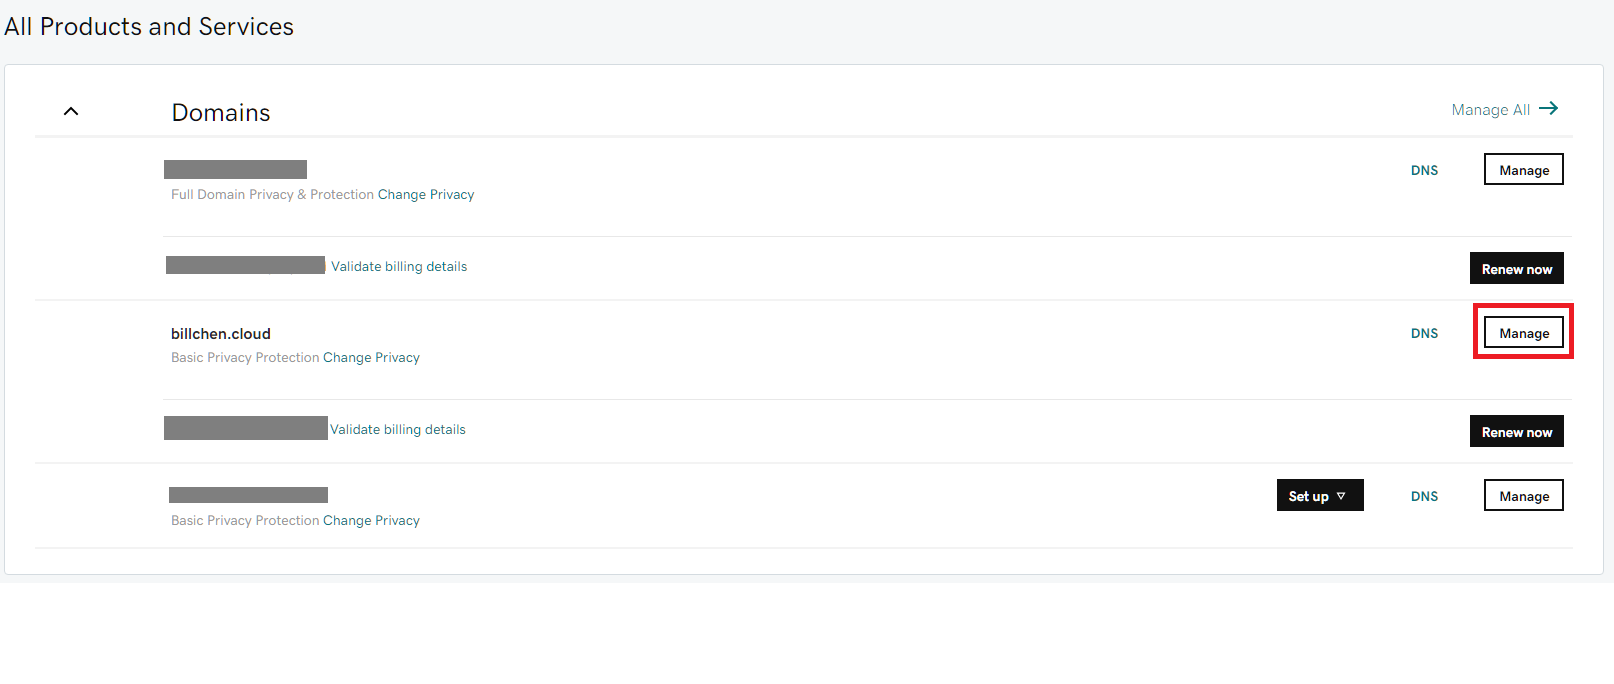
Sign in to your GoDaddy account then navigate to My Products page.

From the All Products and Services section, click on the Manage button on the domain name you wish to transfer to AWS.
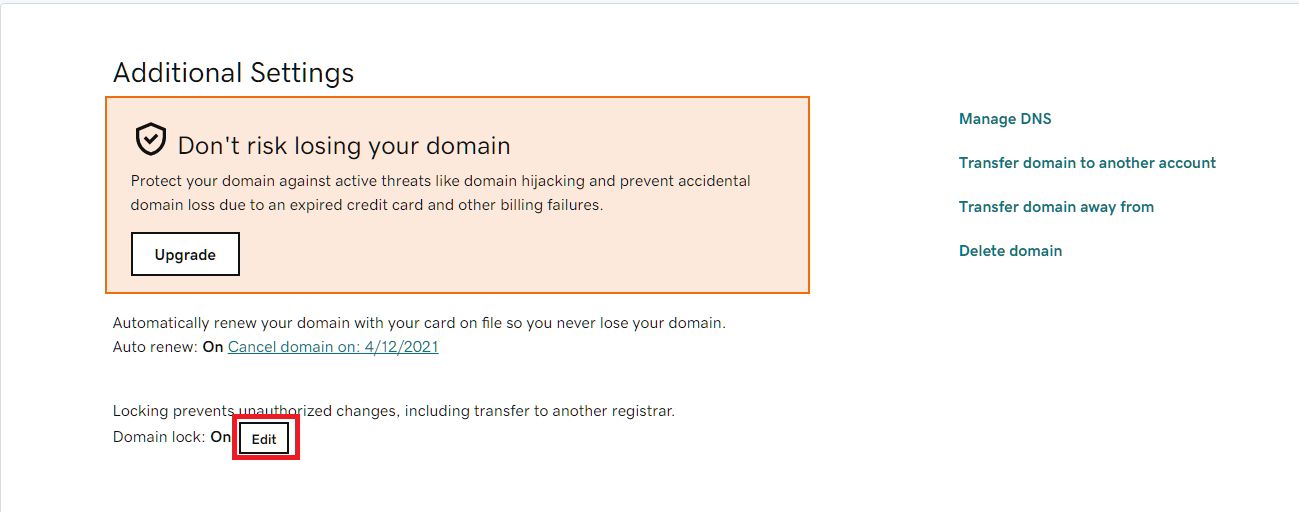
On the bottom of the page at the Additional Settings section, click on the Edit button next to Domain lock to turn it off. (This allows you to transfer your domain to outside of GoDaddy)
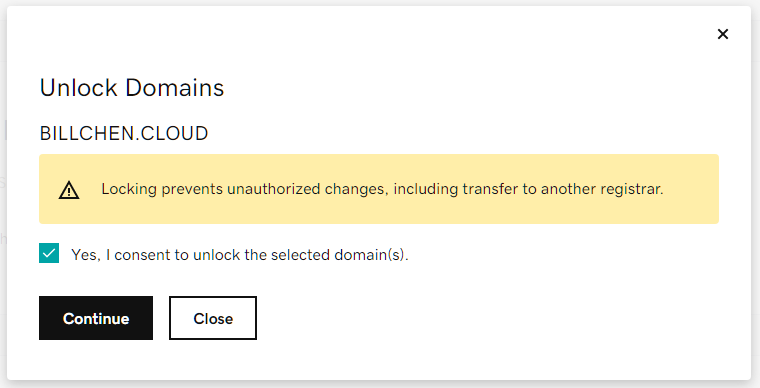
After you click on Edit and turn it off, GoDaddy will popup a dialog for confirmation. Click on Yes, I consent to unlock the selected domain(s) then click on Continue.
After you click on Continue, it will take a minute before the Domain lock status becomes Off. Wait for it to become Off before you continue.
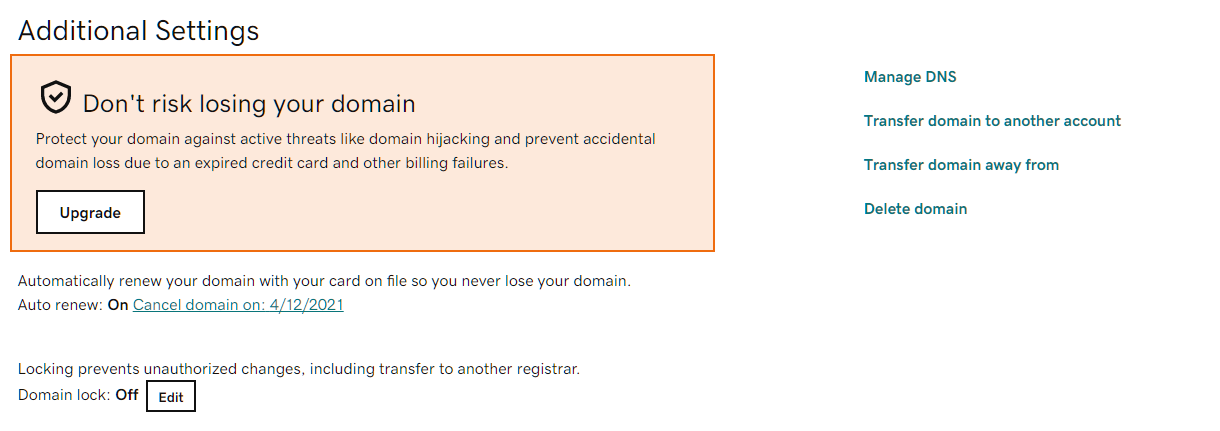
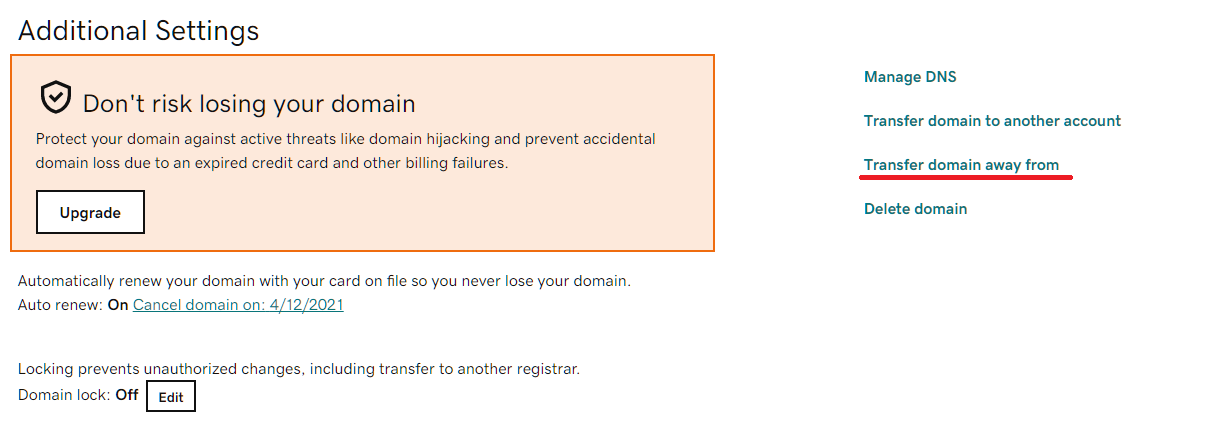
Click on the Transfer domain away from link on the right hand side.
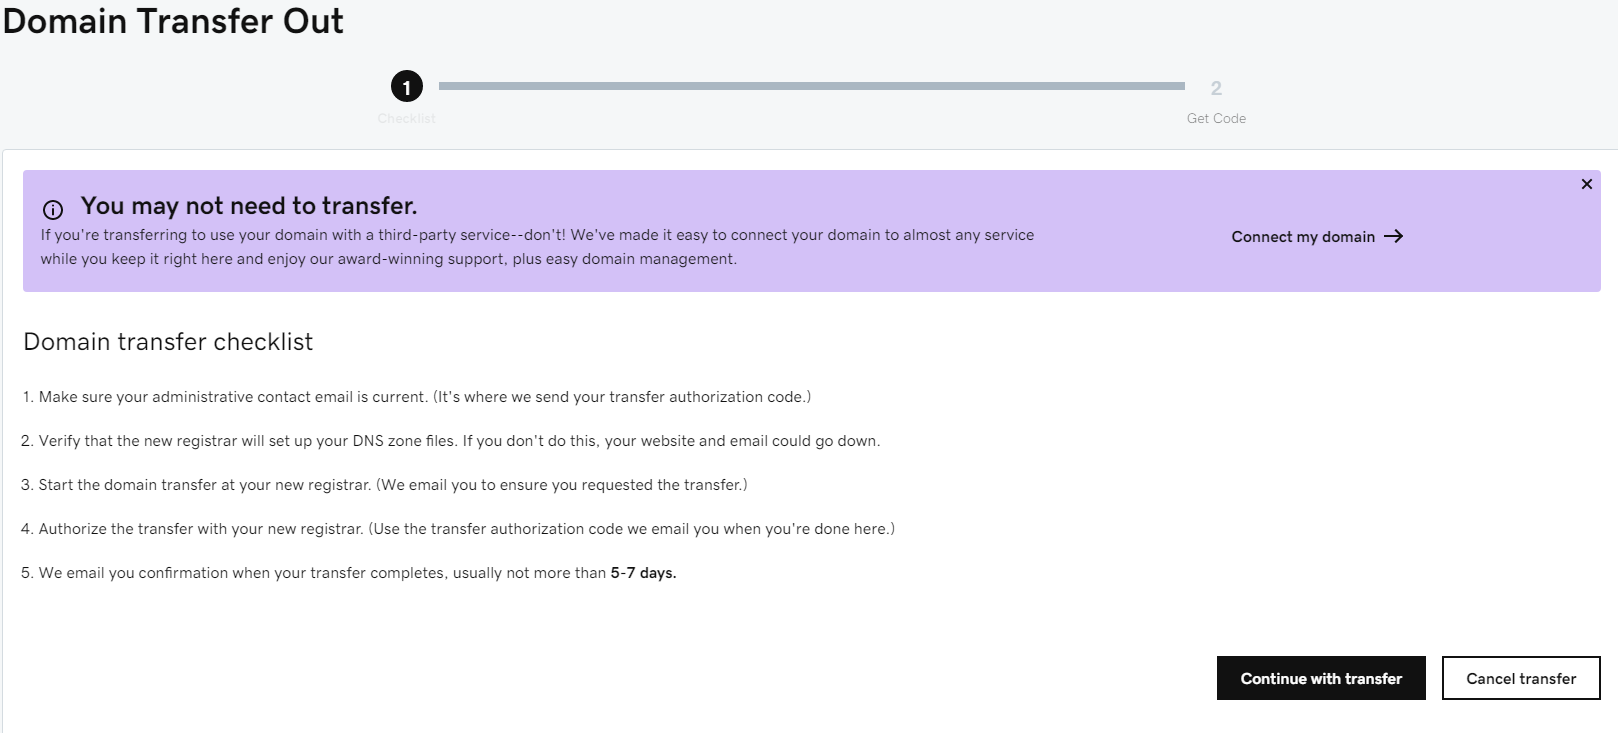
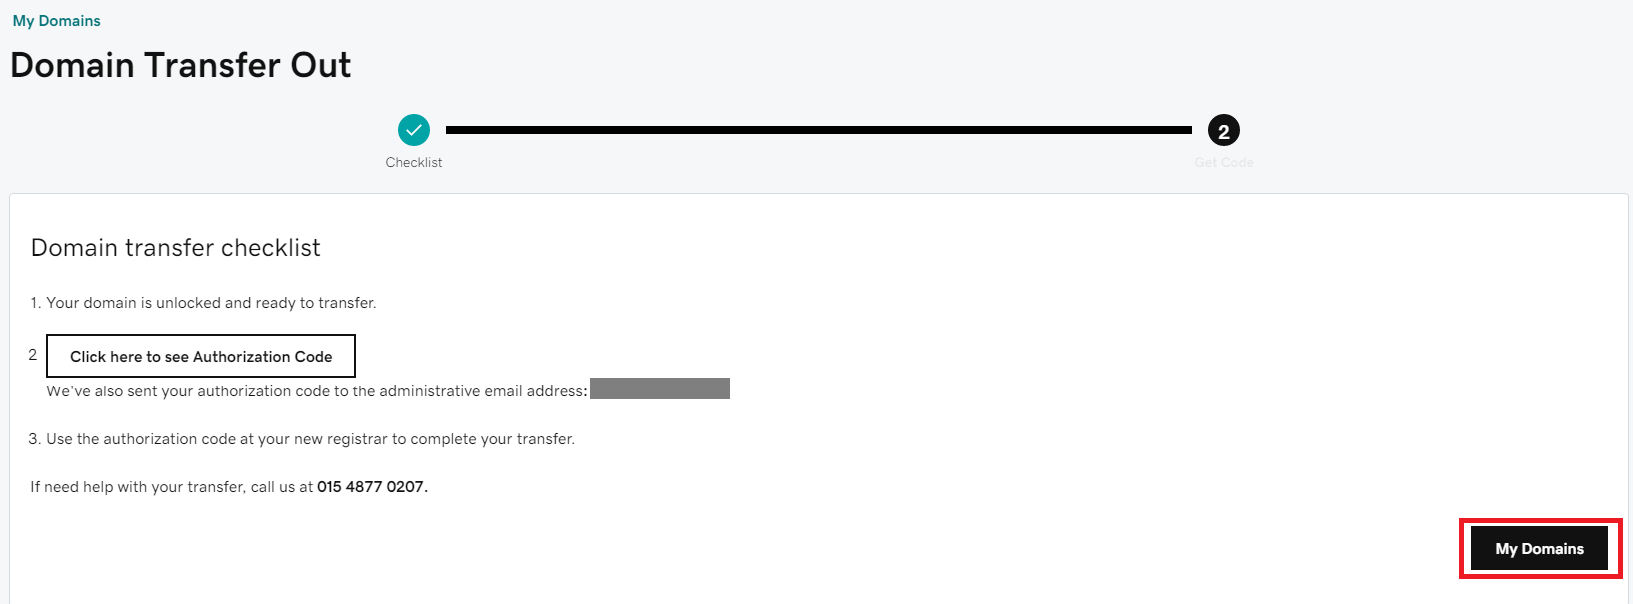
GoDaddy will bring you to a page with a checklist to verify before you continue.Click on Continue with transfer when you are ready.
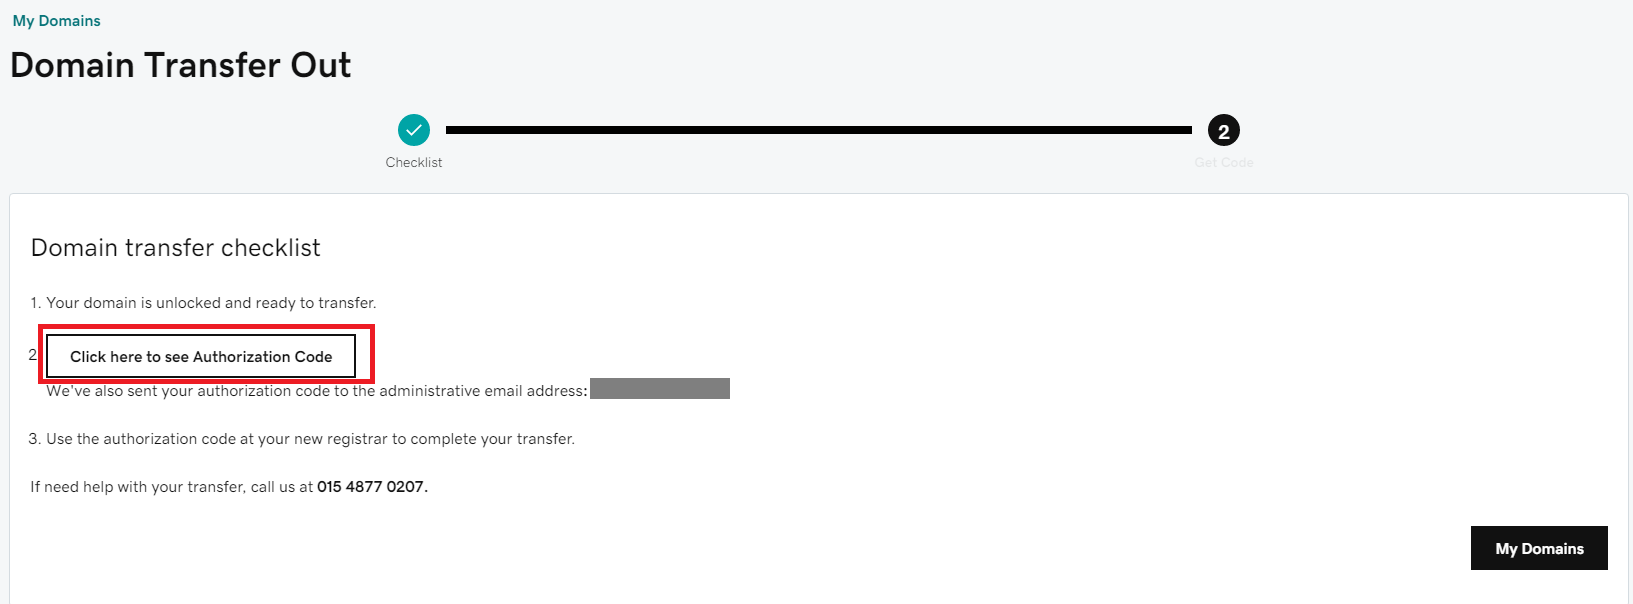
Click on the Click here to see Authorization Code button to reveal the authorization code. The same code will also be sent to your email address. Be sure to take a note of this code as we will need it later on the AWS console.
Transfer domain to AWS
Login to your AWS console and navigate to the Route53 console.Click on Registered domains from the left panel.
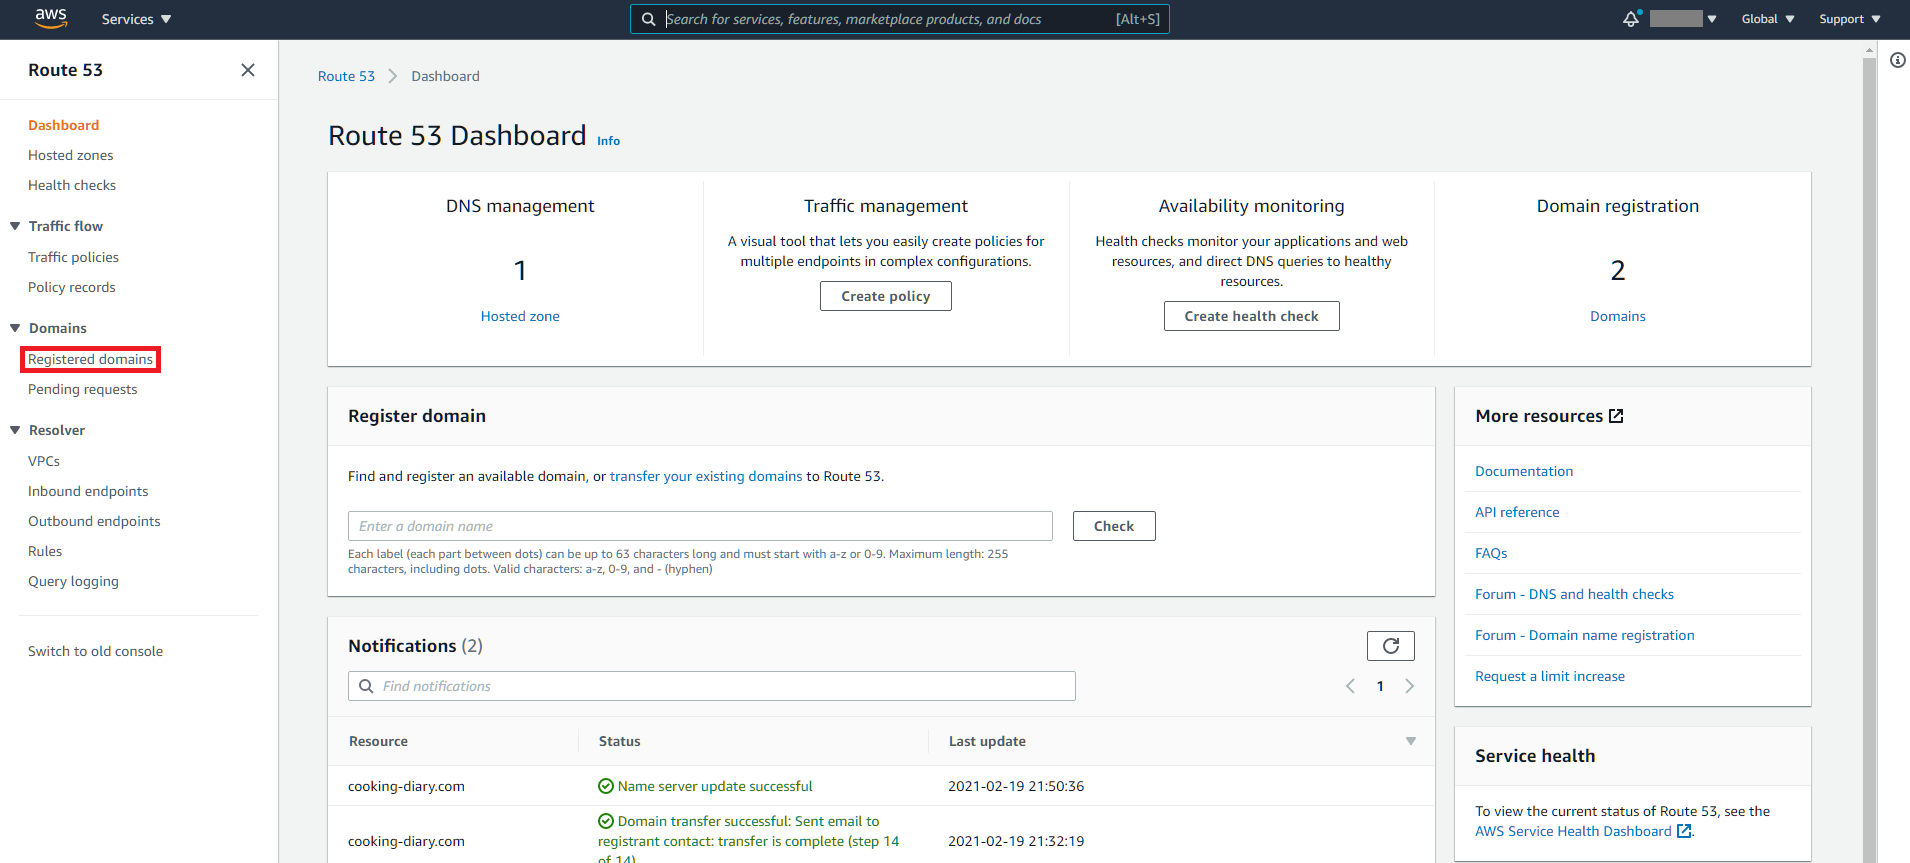
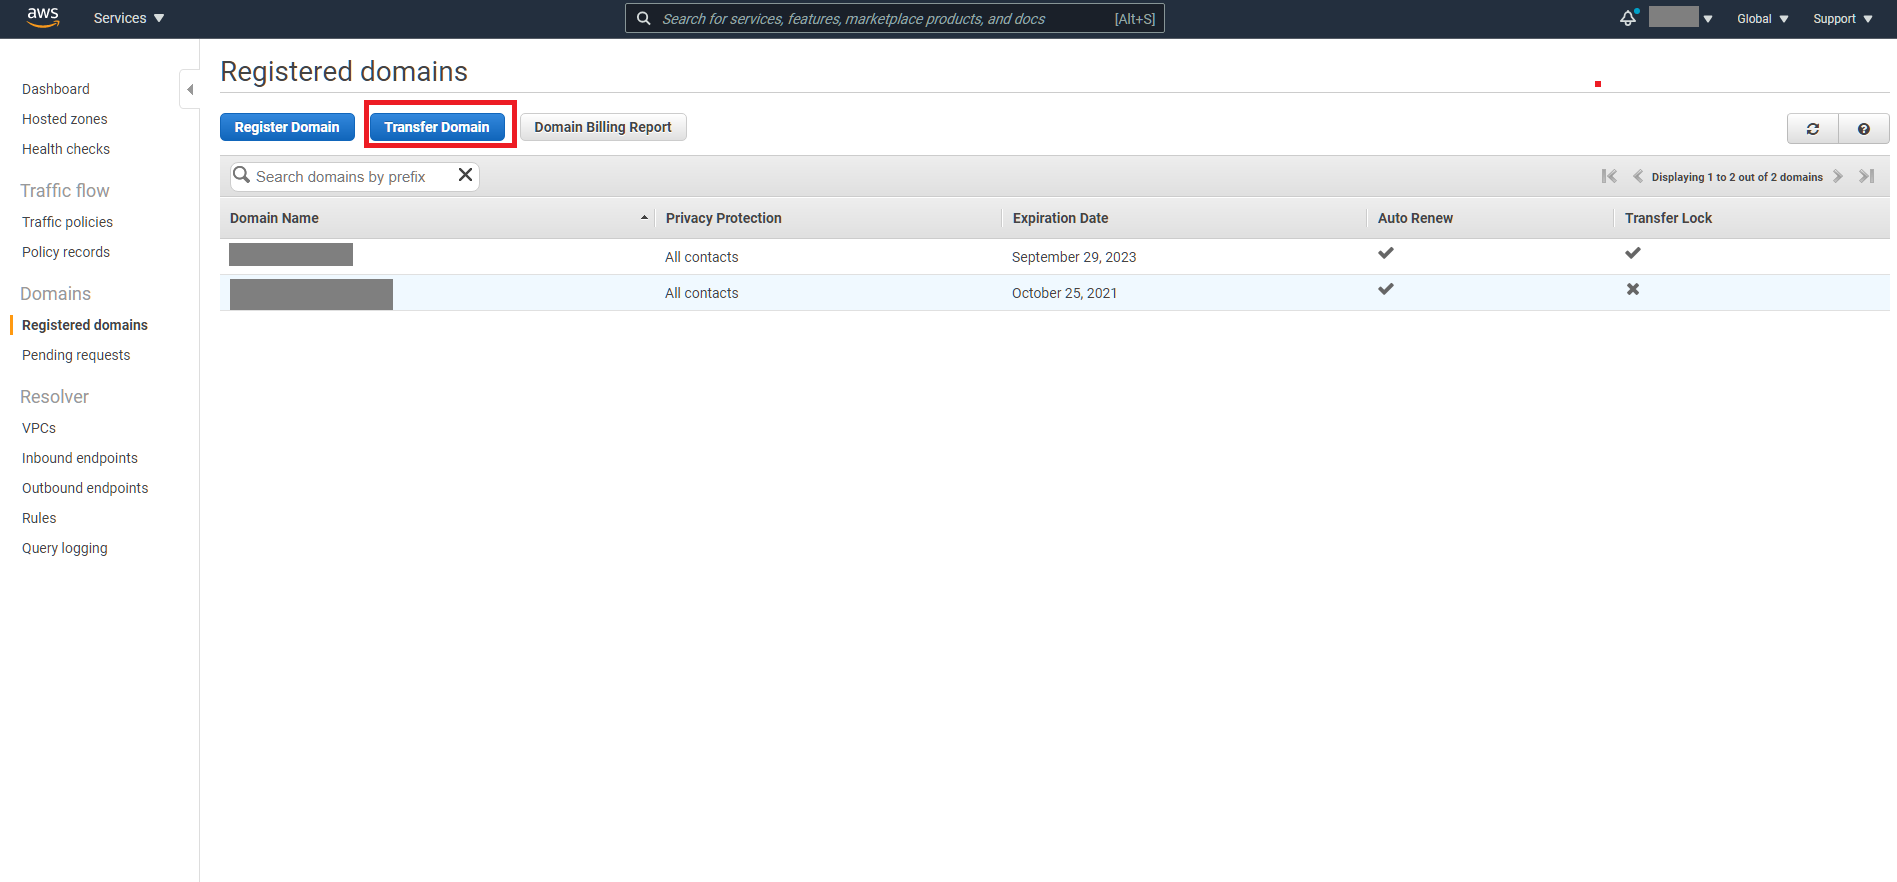
Click on the Transfer Domain button from the Registered domains page
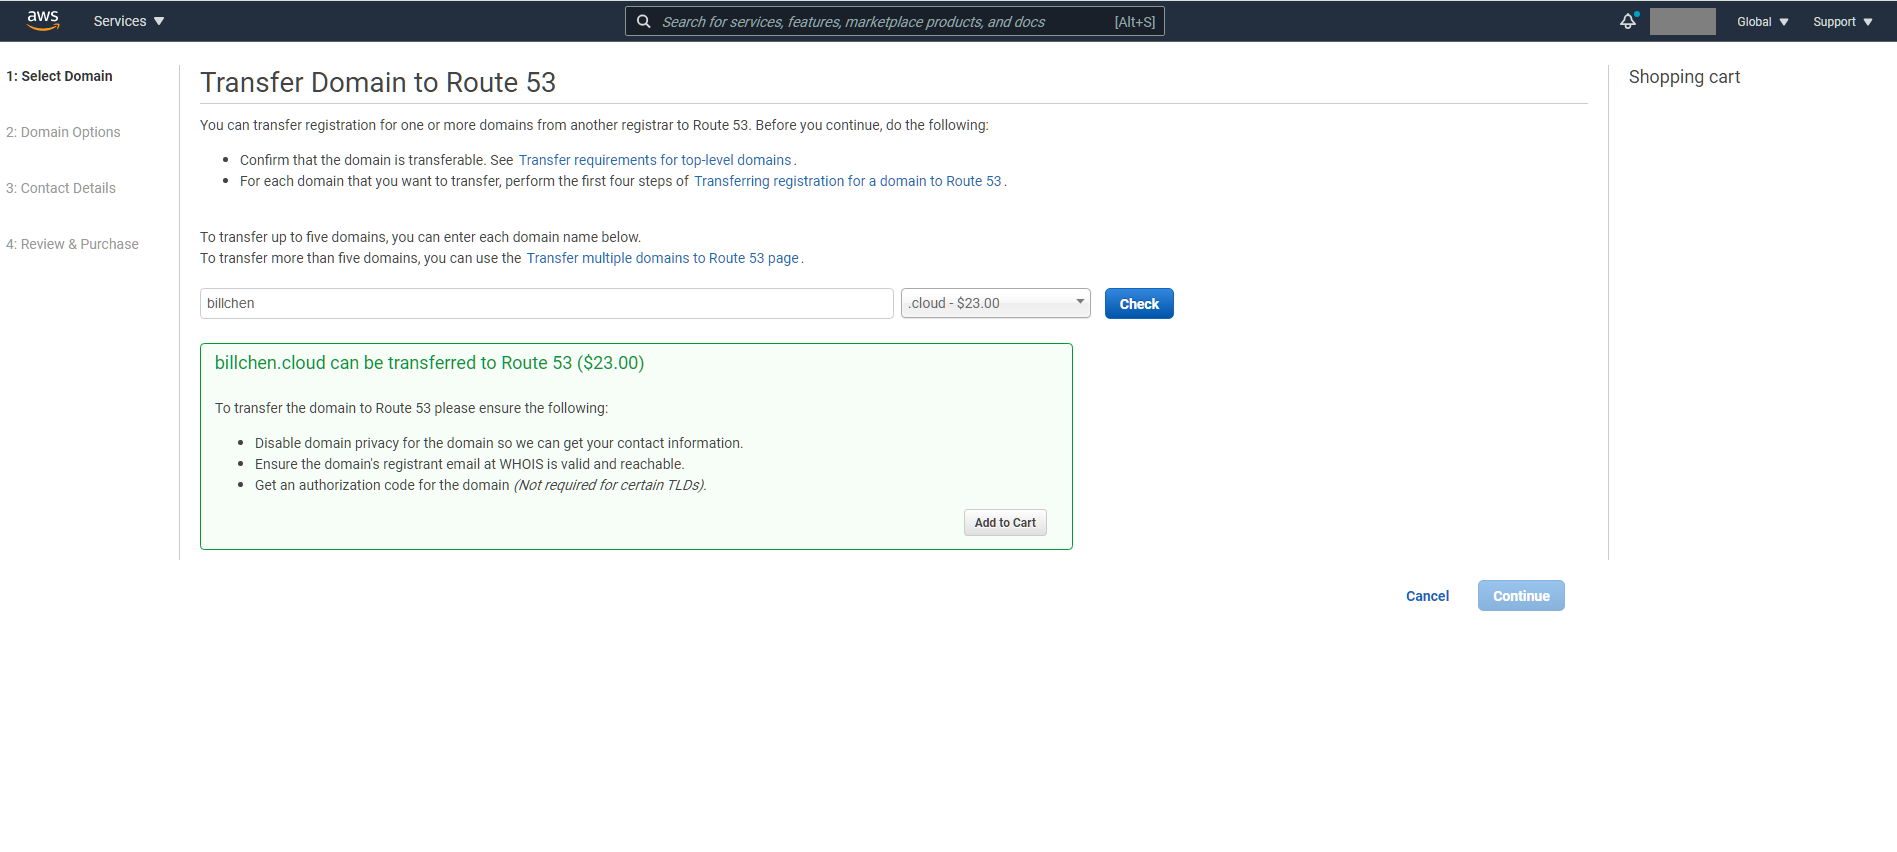
On the domain transfer page, input your domain name and click on the Check button to verify if your domain name can be transferred to AWS Route53.
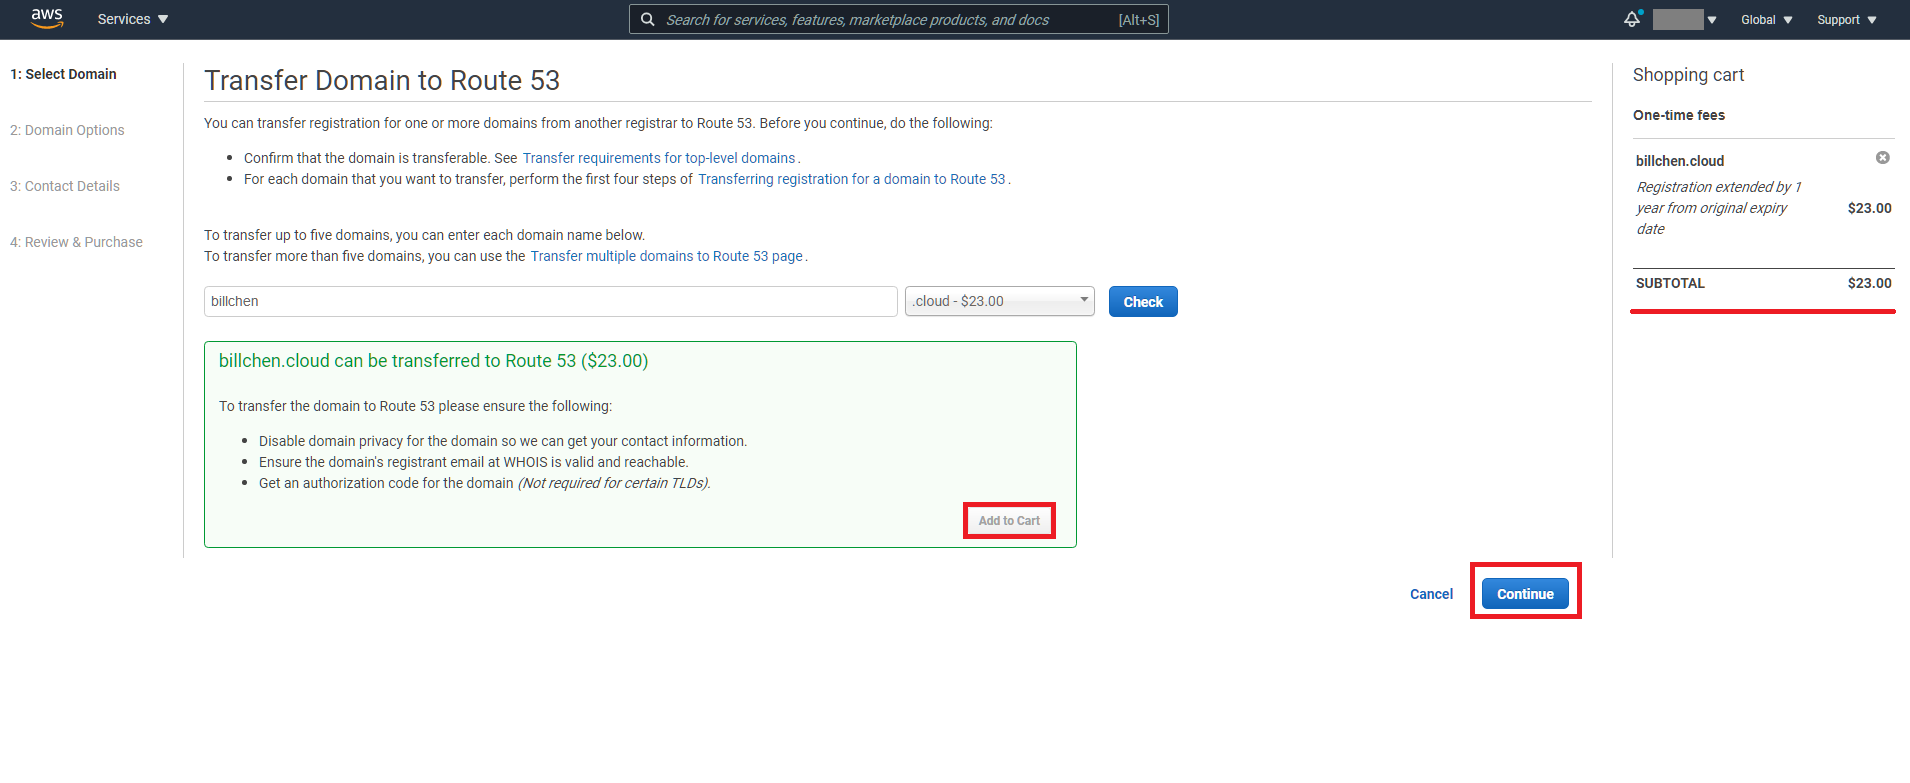
Click on the Add to Cart button.An One-time fee will appear on the right, click on the Continue button to continue the domain transfer.
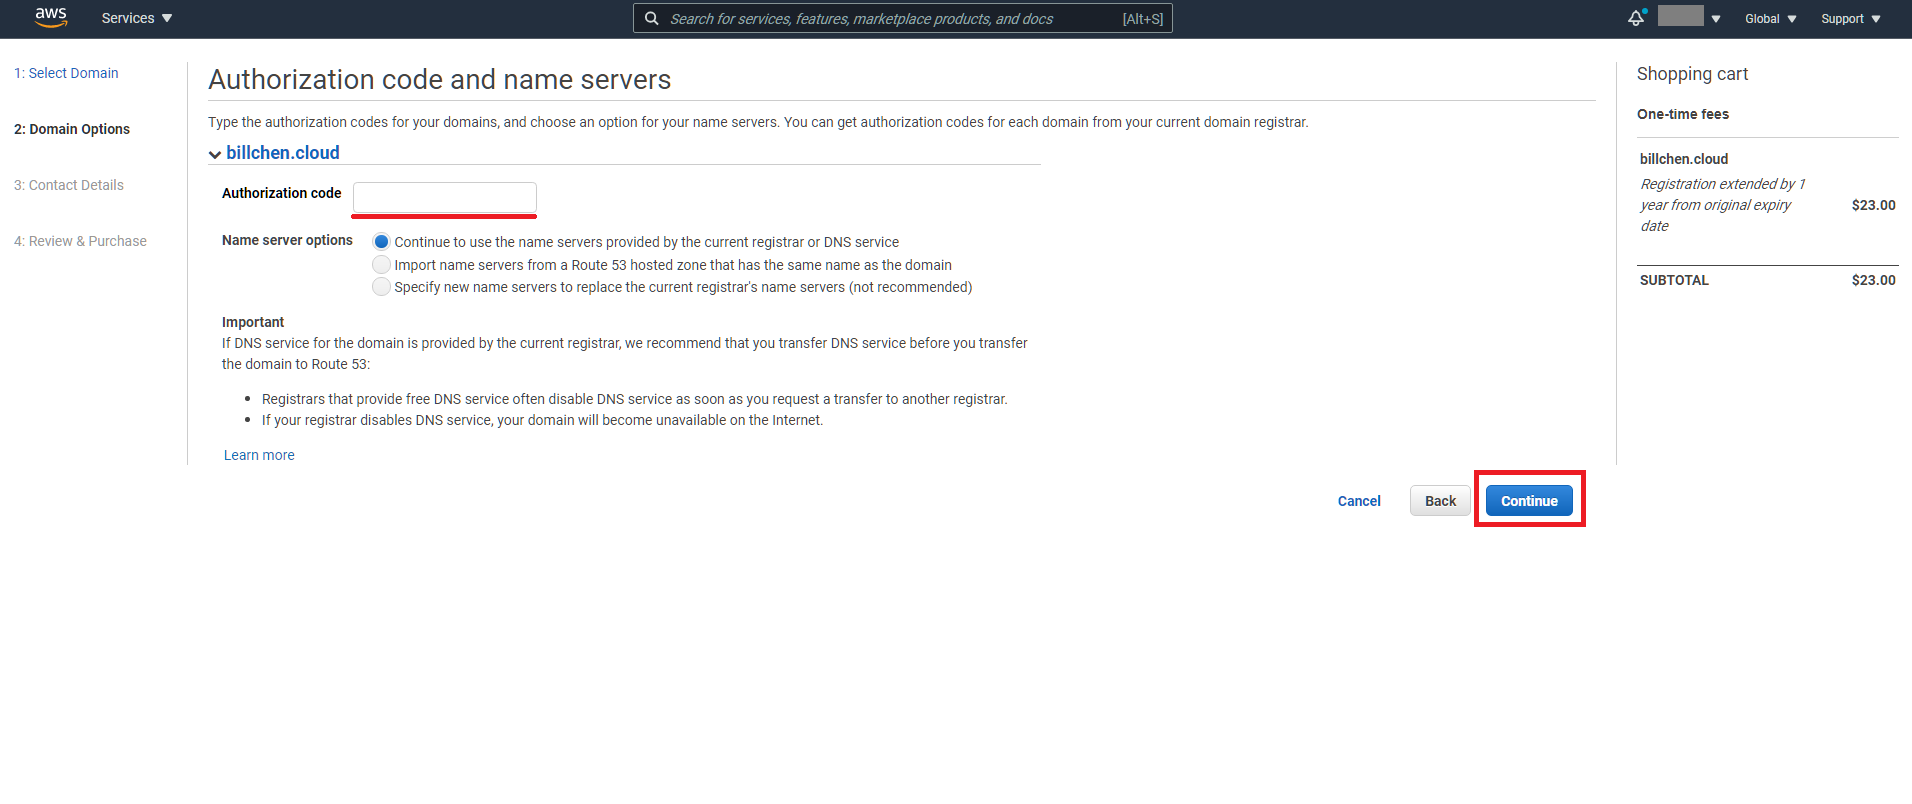
On Step 2, enter the Authorization code you acquired from GoDaddy then click on the Continue button.
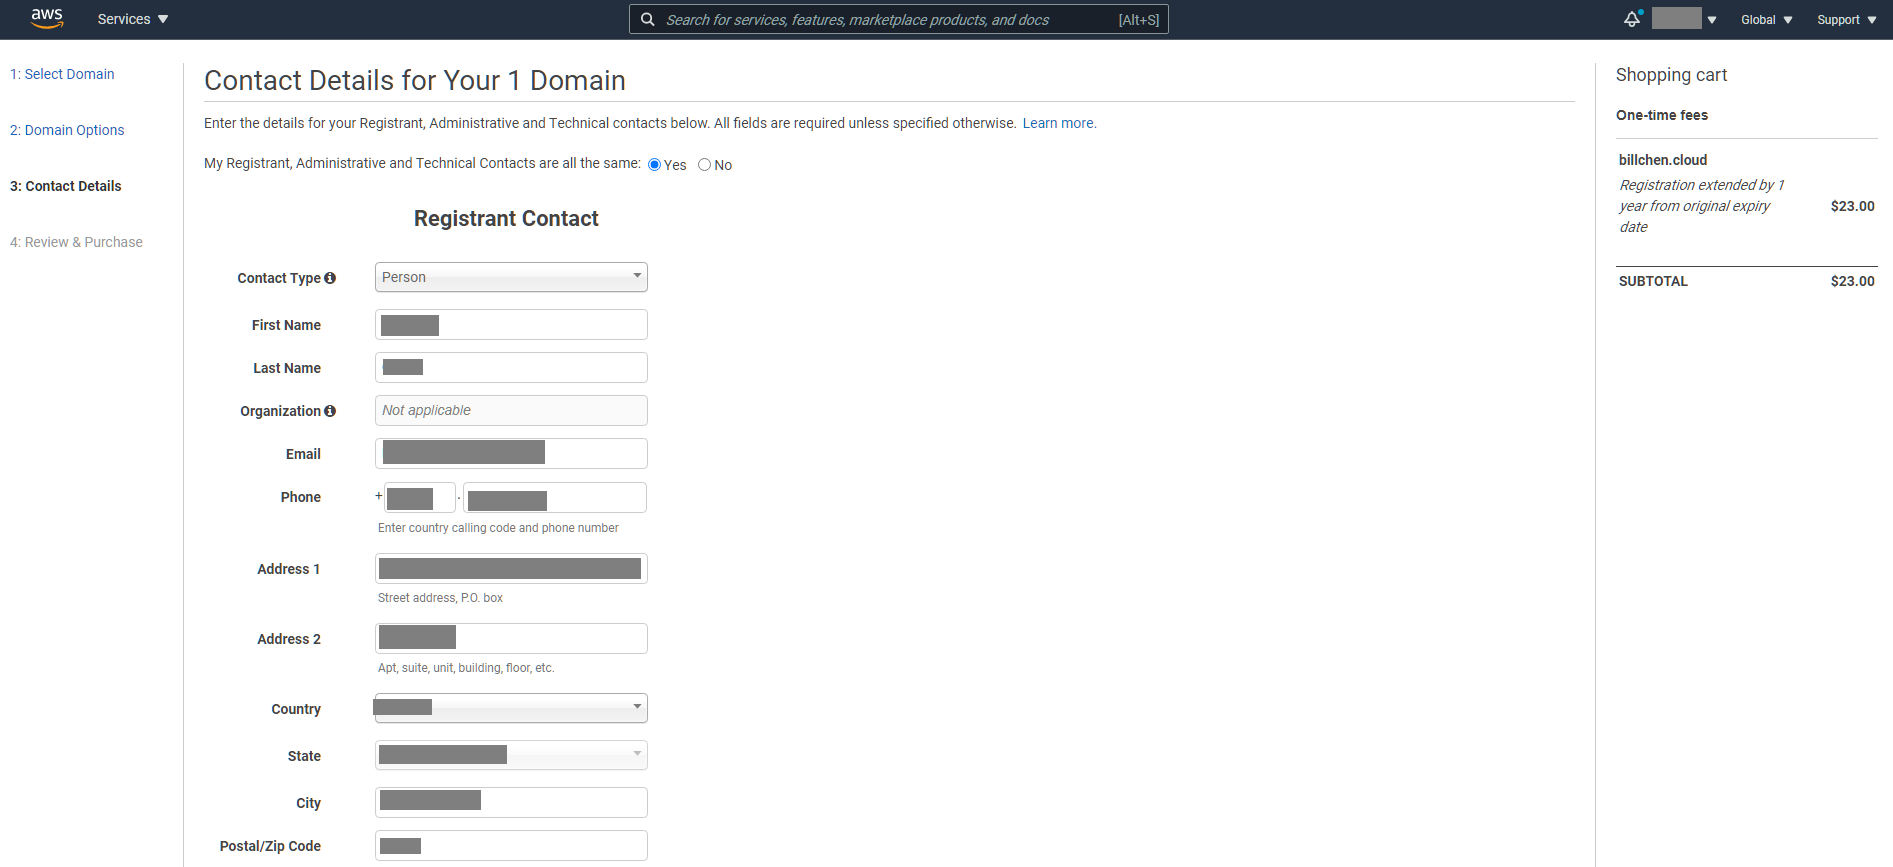
On Step 3, the relevant contact information from GoDaddy will be automatically filled in for you. Double check the information then click on the Continue button on the bottom of the page.
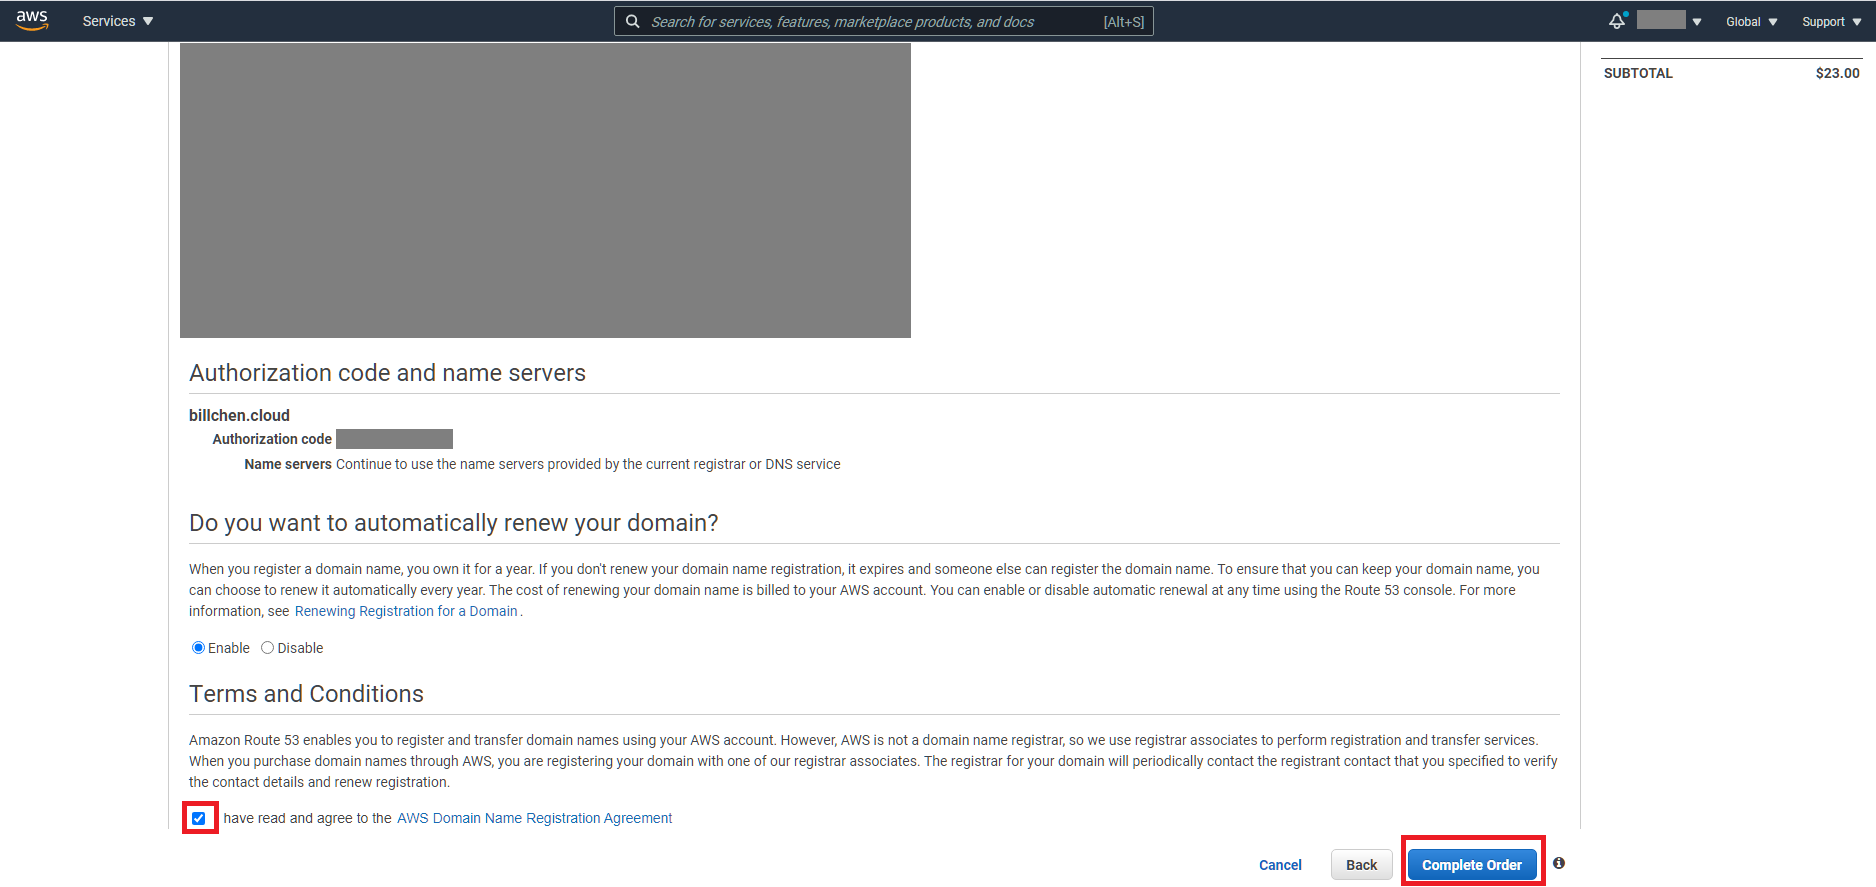
On Step 4, review the contact information again then click on the I have read and agree to the AWS Domain Name Registration Agreement checkbox then click on the Complete Order button.
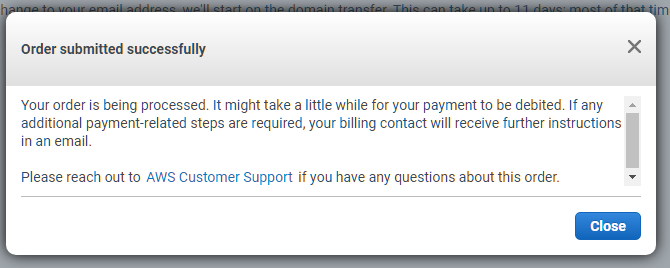
A successful message dialog will appear.
Before your domain will arrive on AWS, you must first approve domain transfer from GoDaddy.
You will receive an email from GoDaddy saying your domain transfer is ready.
Go to the My Domains using one of the following approach:
Approach 1: Click on the My Domains button from the page where you got your Authorization Code
Approach 2: Click on the Manage All link from My Products page
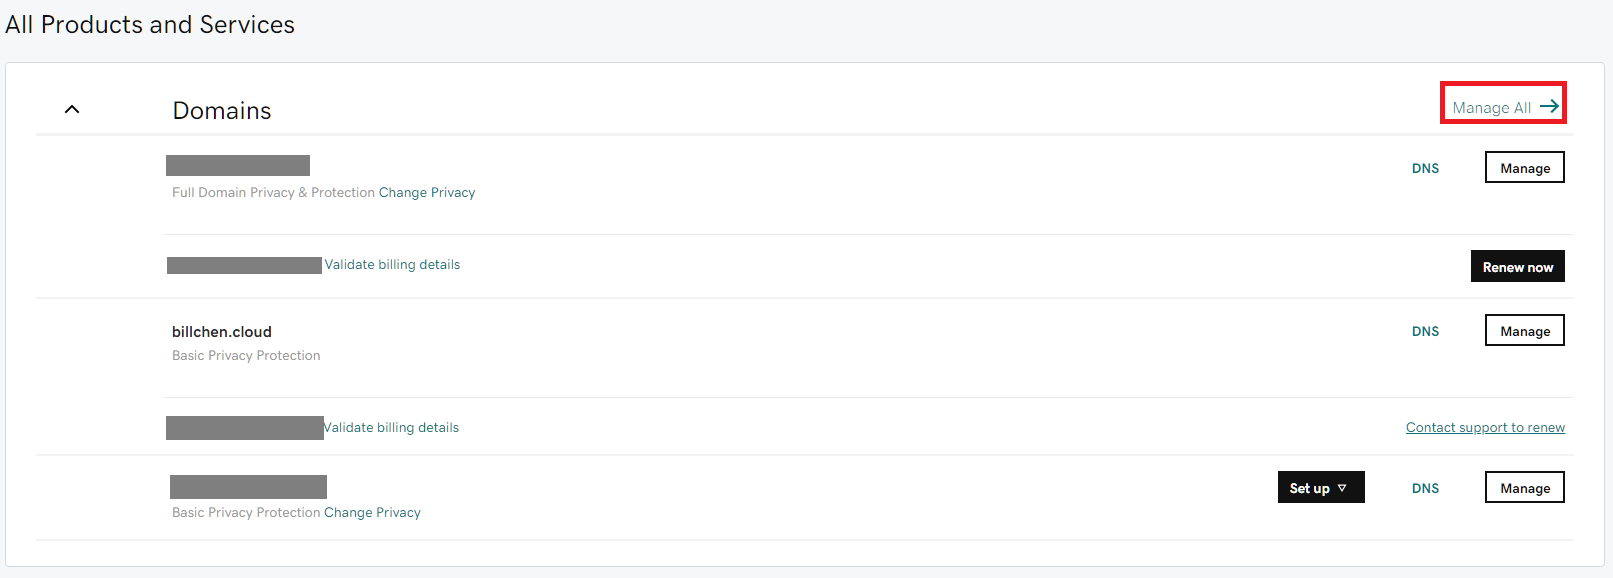
With either approach described above, you will land on the My Domains page.
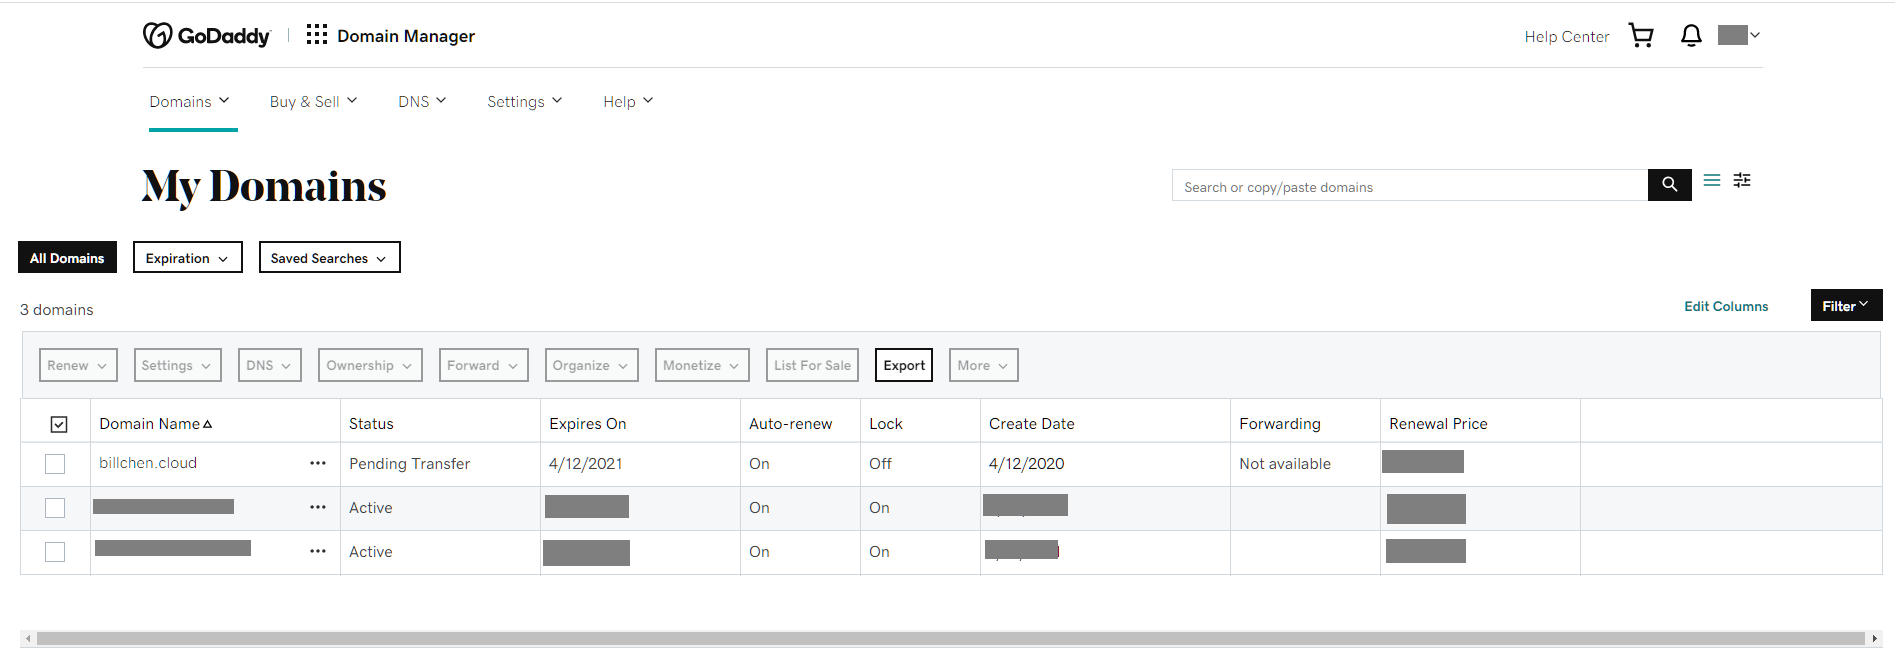
Here you may find all domains you have, and you’ll notice that the domain we wish to transfer is in the Pending Transfer status.
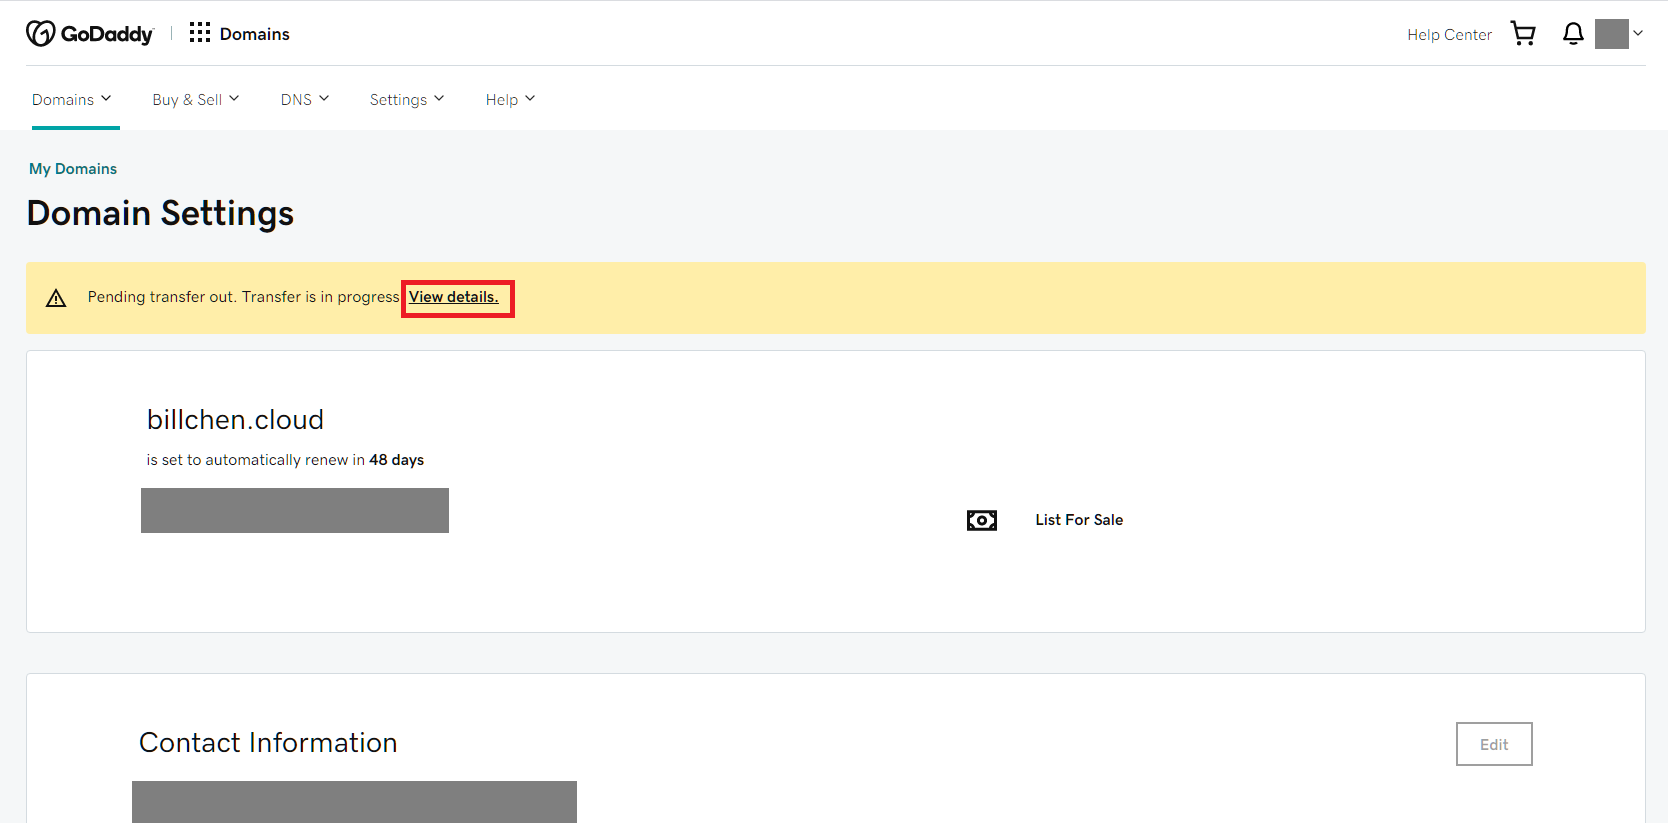
Click on the domain name to enter the domain detail page.
Click on the View details link on the domain detail page to review domain transfer.
From the Pending transfers page, select your domain and click on the Accept Transfer button.
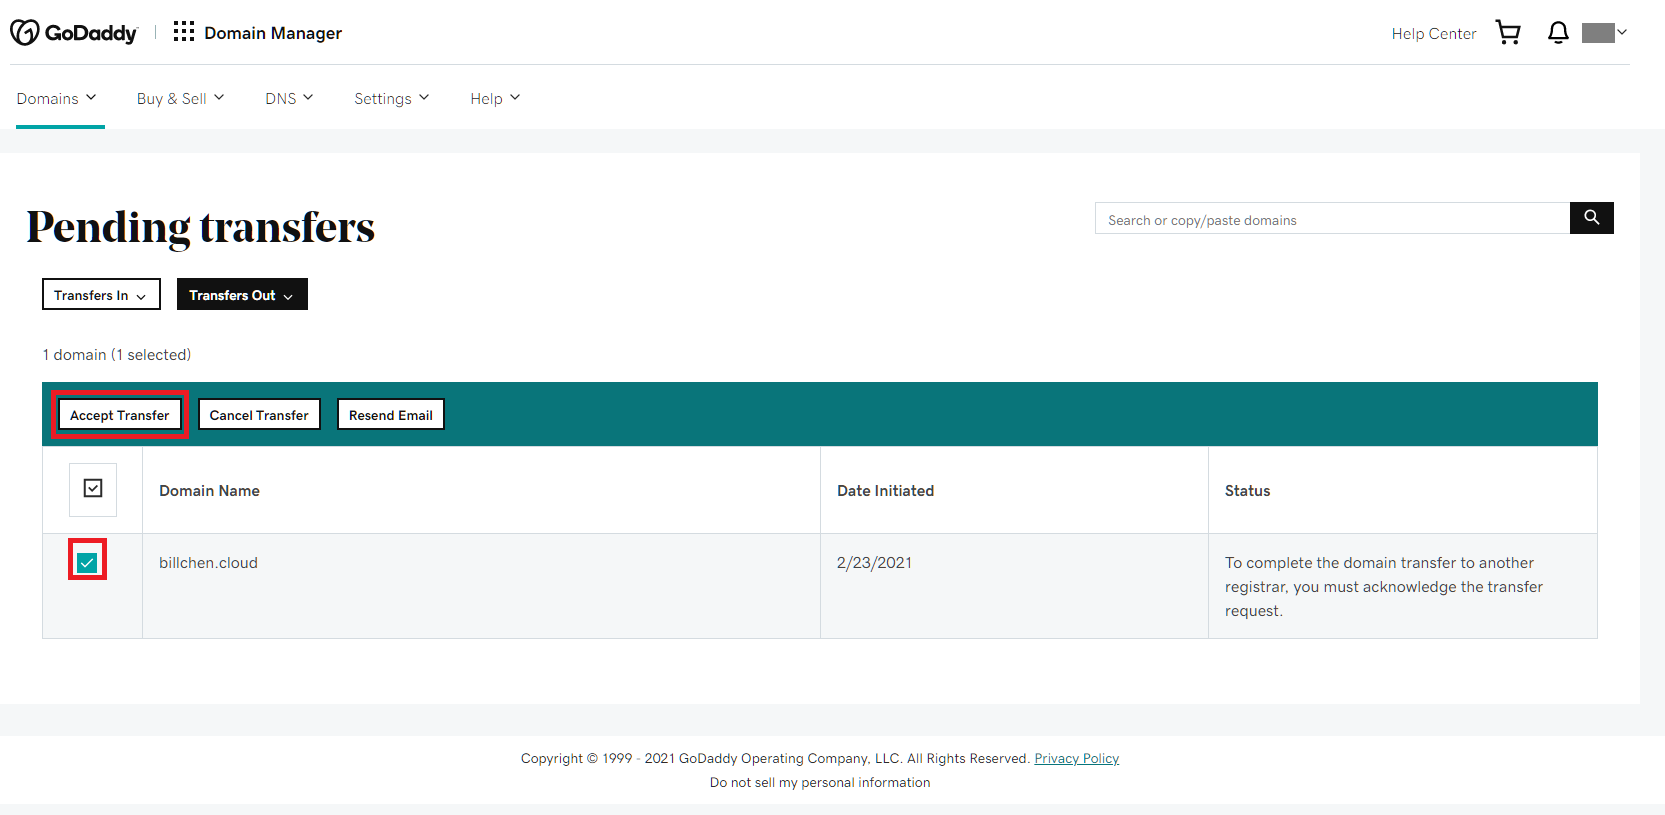
Once you click on the Accept Transfer button, you will receive two emails from GoDaddy. One saying your domain transfer is complete and the other one saying sorry to see you go.
If you go back to My Products you will no longer see your domain there.
Now return to AWS Route53 console, on the Pending requests page, you will see your domain appears there and is currently being transferred.
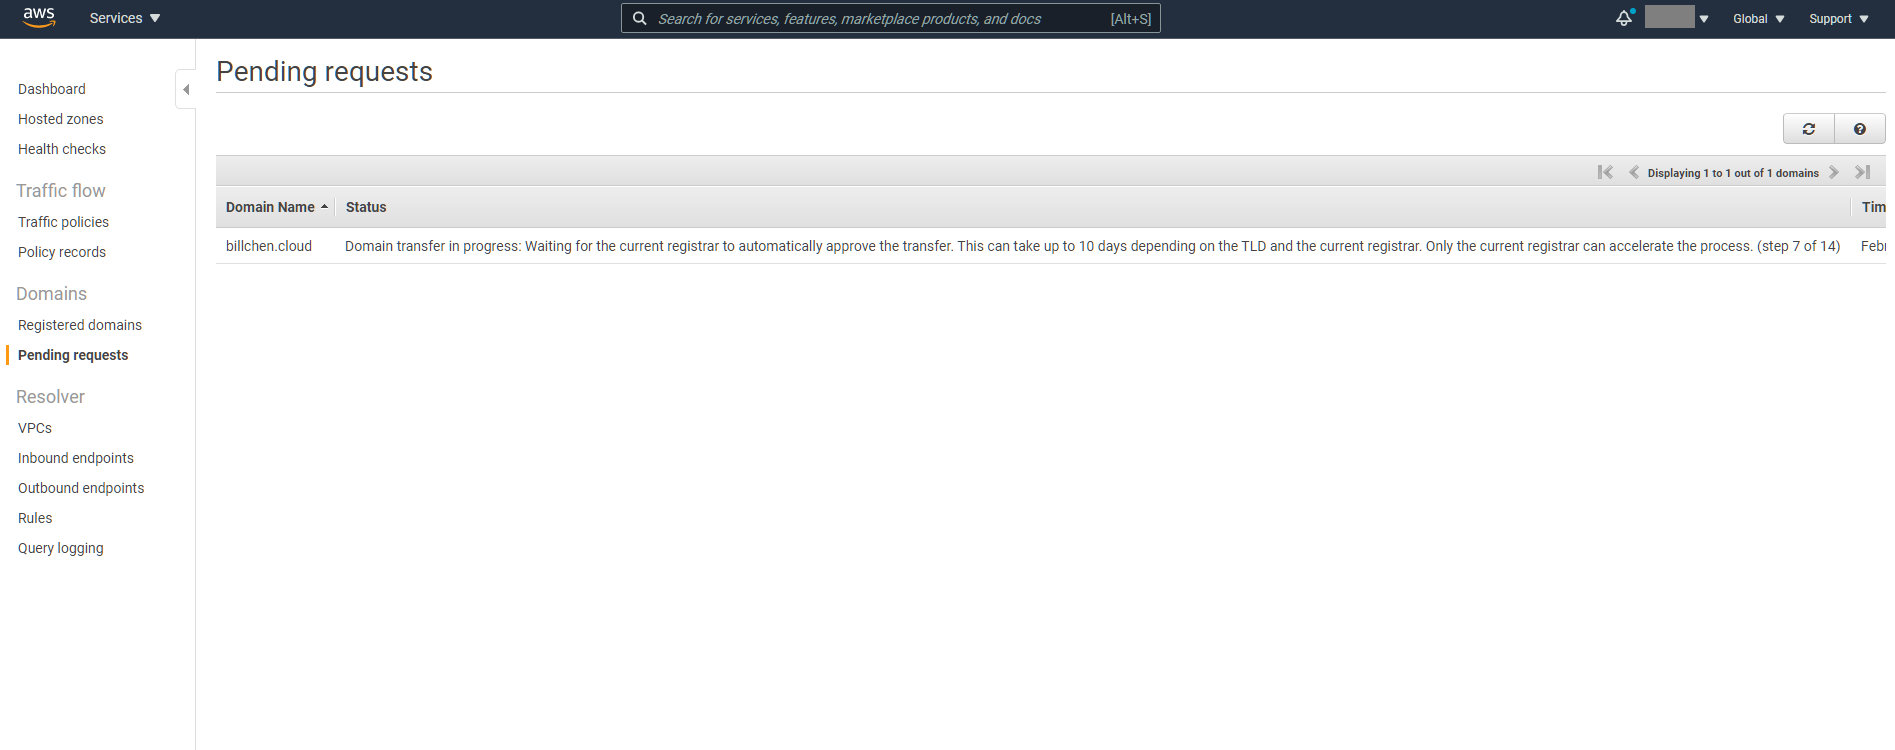
It may take a while before it’s done. When it finishes, you will receive a notification email from AWS saying the transfer job is completed.
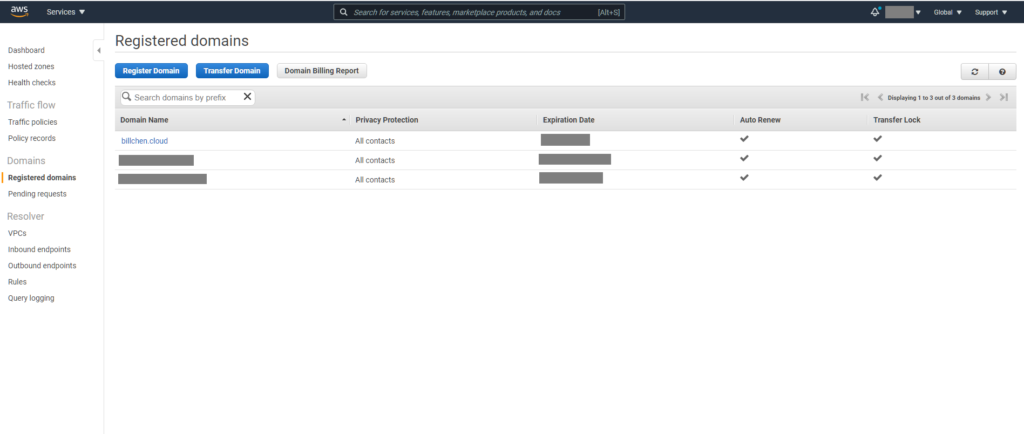
Congratulations! You have successfully transfer your domain from GoDaddy to AWS!
