
Introduction
This is the second tutorial of the In depth guide to SEO series. In the previous tutorial, Understand SEO, we explained the basic concepts of SEO. What SEO means, why it is so important, and how you can design your website following SEO standards. In this tutorial, we will cover what each HTML tag means in the world of SEO, and which tag you should choose when building your website. Even though this tutorial may seem technical, it is actually equally important for non developers if you build your website using CMS platforms like WordPress or Wix.
How your page appears on Google search result
The two most important HTML tags that you should plan carefully for Google search result is the title and meta description tag.
Title
As the name suggested, the <title> tag is used to specify the title of your webpage. It will tell the search engine what your website is about. Normally the title tag should be between 50 ~ 60 characters.
<title>Title of your website</title>Meta description
Meta description is the tag that allows you to tell the search engine a bit more about your website. Google will show about 155 ~ 160 characters on Google search result, so we recommend keeping your description at this length.
<meta name=”description” content=”Description of your website”>Consider the following example:
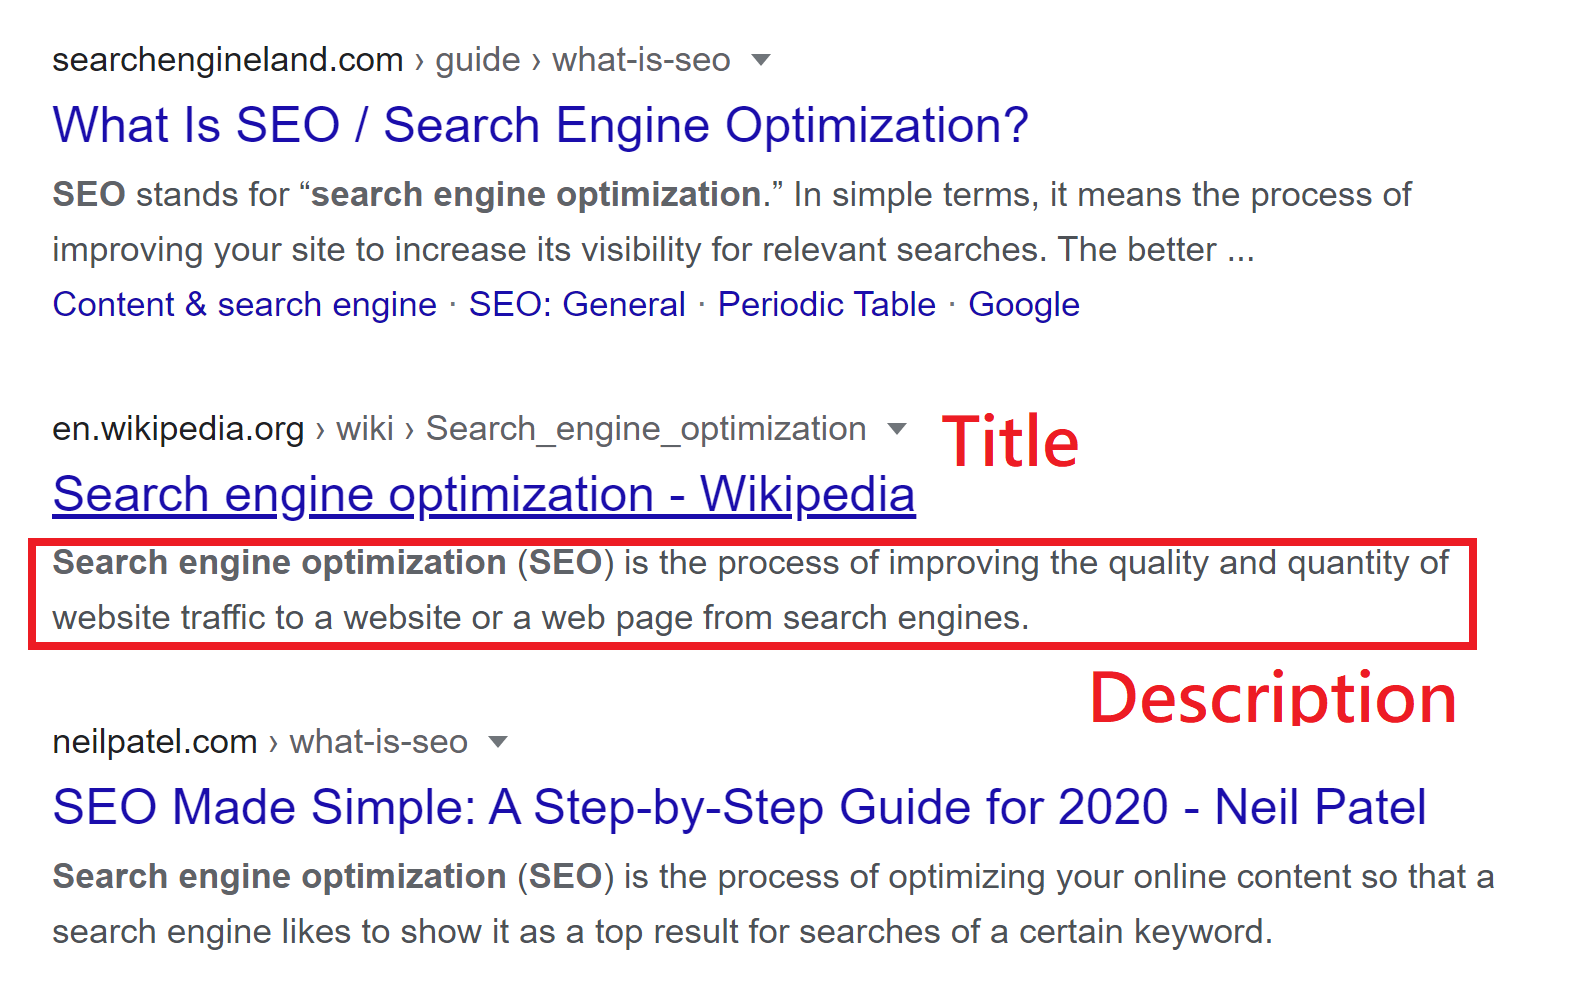
The sample title and meta tag for the image above could be the following:
<title>Search engine optimization - Wikipedia</title>

<meta name="description" content="Search engine optimization (SEO) is the process of improving the quality and quantity of website traffic to a website or a web page from search engines.">
Structural HTML page
Unlike human eyes, search engines are not able to tell where a page section starts/ends if they are created purely by CSS and spacing. In order for search engines to better understand our page structure, we need to create what is called Structural HTML Page. In this section we will cover some of the main HTML tags that can make your website more structural.
Header
Defines the header section of the page.
Nav
Defines the nav section where navigation links are placed.
Main
Define where the main content of the website will be.
H1 ~ H6
H1 ~ H6 tags are big to small titles that you can use for various purposes. (H1 being the highest importance while H6 being the lowest) H1 tag is typically reserved for page title. It can have the same value as the title tag and there should only be one H1 tag across the entire HTML page. H2 tags are normally used as section titles. H3 to H6 tags are additional title tags that you may use if you have additional subtopics within your subtopics. They are optional and won’t appear as often on a page.
Aside
Define contents that are indirectly related to the content. It is normally used for the sidebar section.
Footer
Define the footer section.
Section
Group similar contents together. It is recommended to use the <section> tag instead of the <div> tag when you need to define a new section. While the final appearance will be the same to users, they actually mean a big difference to search engines. If you use the <section> tag, search engines will understand that you are defining a new section, but the <div> tag does not provide any semantic meaning to search engines. They will simply be ignored and your contents will appear to be in the same section to search engines.
Article
Define contents that make senses to be presented independently from the rest of the page. Normally used for blog posts, news stories, or forum posts.
Ul / Ol
Define an unordered/ordered list.
Real World Example
Consider the following HTML page:
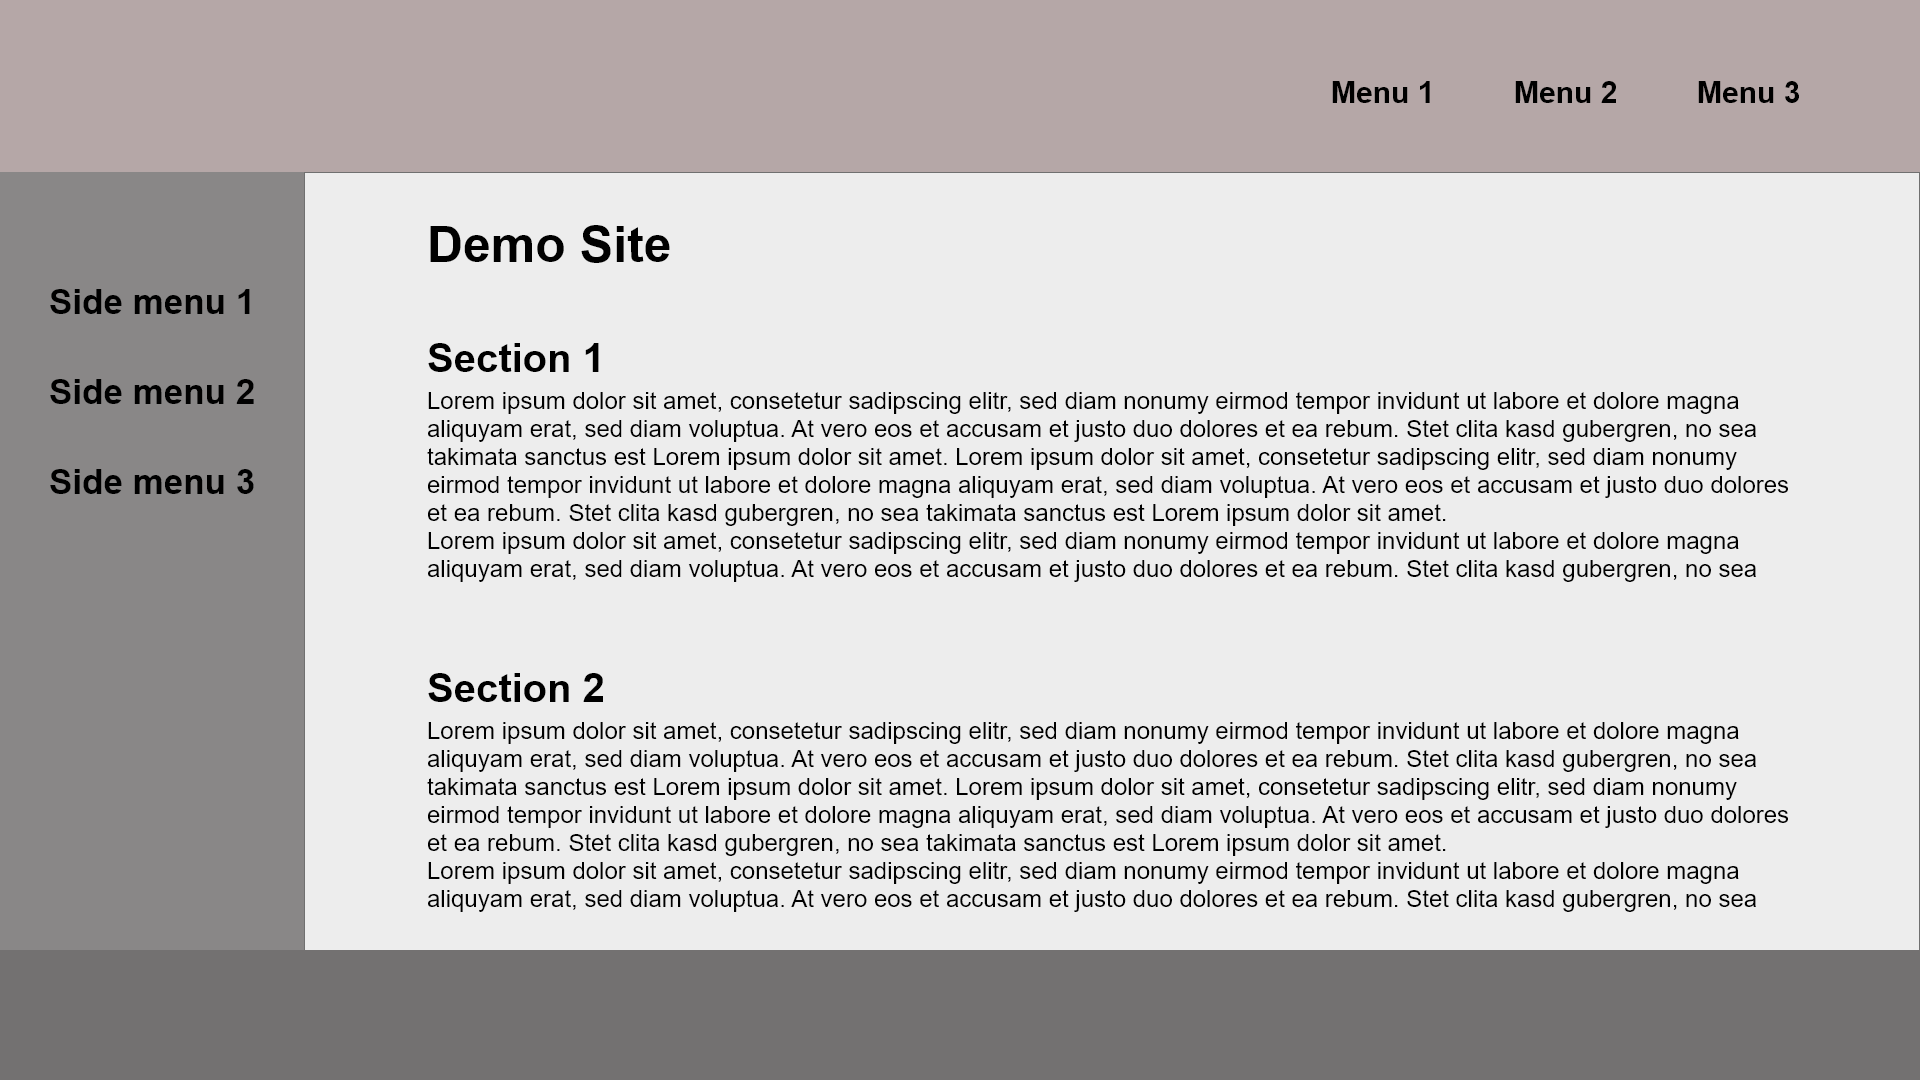
Intuitively you may come up with the following code where you use <div> tags for all sections on the page.
<body>
 <!-- Header -->
  <div class="header">
   <!-- Nav -->
   <div class="nav">
    <a class="link" href="menu1">Menu 1</a>
    <a class="link" href="menu2">Menu 2</a>
    <a class="link" href="menu3">Menu 3</a>
   </div><!-- End of Nav -->
  </div><!-- End of Header-->

  <!-- Wrapper -->
  <div class="wrapper">
    <!-- Sidebar -->
    <div class="sidebar">
      <a class="link" href="side-menu1">Side menu 1</a>
      <a class="link" href="side-menu2">Side menu 2</a>
      <a class="link" href="side-menu3">Side menu 3</a>
    </div><!-- End of Sidebar -->

    <!-- Main -->
    <div class="main">
      <span class="page-title">Demo Site</span>
      <!-- Section 1 -->
      <div class="section">
        <span class="section-title">Section 1</span>
        <p>Section 1 text</p>
      </div><!-- End of Section 1 -->

      <!-- Section 2 -->
      <div class="section">
        <span class="section-title">Section 2</span>
        <p>Section 2 text</p>
      </div><!-- End of Section 2 -->
    </div><!-- End of Main -->
  </div><!-- End of Wrapper -->
  <!-- Footer -->
  <div class="footer">

  </div><!-- End of Footer -->
</body>
But this how your page will appear to search engines
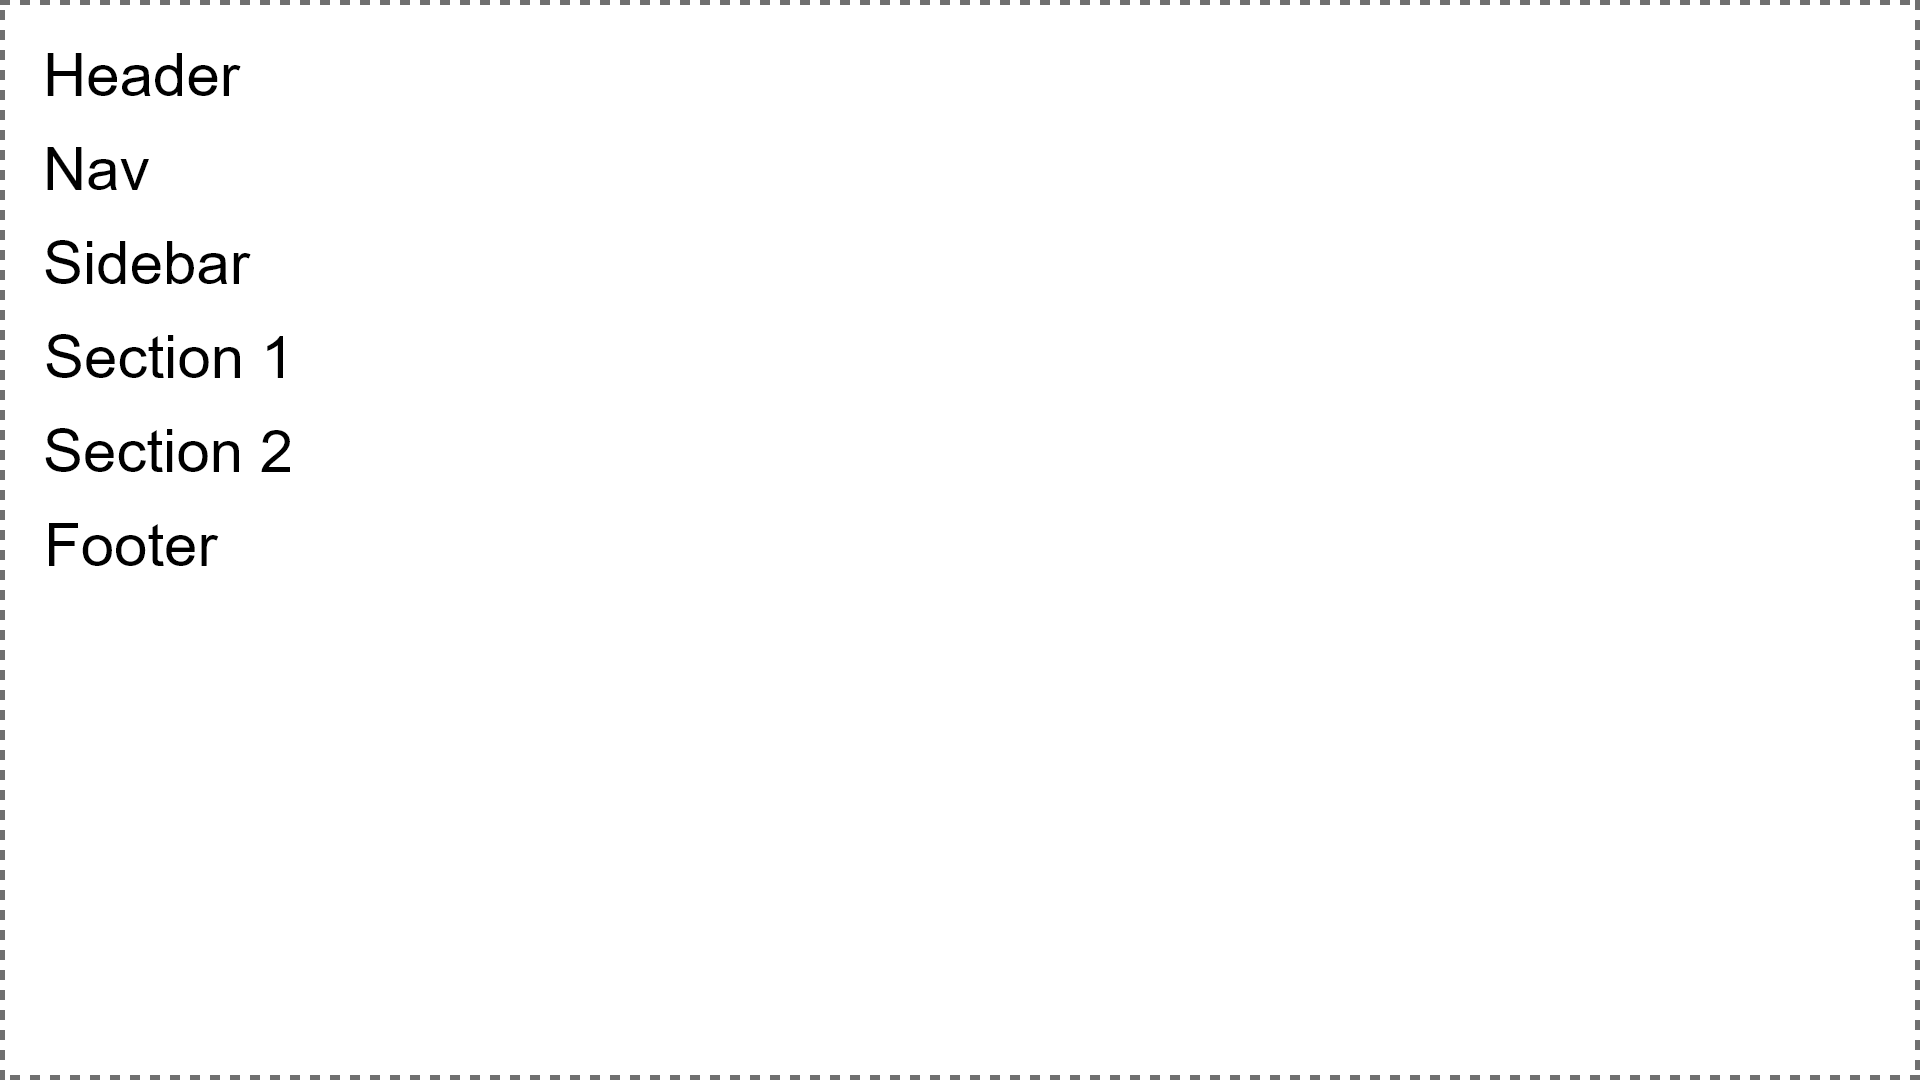
To follow the SEO standard and use structural HTML tags, your code should look like this instead:
<body>
  <header class="header">
    <nav class="nav">
      <ul class="nav-links">
        <li class="link-item">
          <a class="link" href="menu1">Menu 1</a>
        </li>
        <li class="link-item">
          <a class="link" href="menu2">Menu 2</a>
        </li>
        <li class="link-item">
          <a class="link" href="menu3">Menu 3</a>
        </li>
      </ul>
    </nav>
  </header>
  <!-- Wrapper -->
  <div class="wrapper">
    <aside class="sidebar">
      <ul class="sidebar-links">
        <li class="sidebar-item">
          <a class="link" href="menu1">Side menu 1</a>
        </li>
        <li class="sidebar-item">
          <a class="link" href="menu2">Side menu 2</a>
        </li>
        <li class="sidebar-item">
          <a class="link" href="menu3">Side menu 3</a>
        </li>
      </ul>
    </aside>
    <main class="main">
      <h1 class="page-title">Demo Site</h1>
      <section class="section">
        <h2 class="section-title">Section 1</h2>
        <p>Section 1 text</p>
      </section>
      <section class="section">
        <h2 class="section-title">Section 2</h2>
        <p>Section 2 text</p>
      </section>
    </main>
  </div><!-- End of wrapper -->
  <footer></footer>
</body>
then this will be how search engines interpret your site:
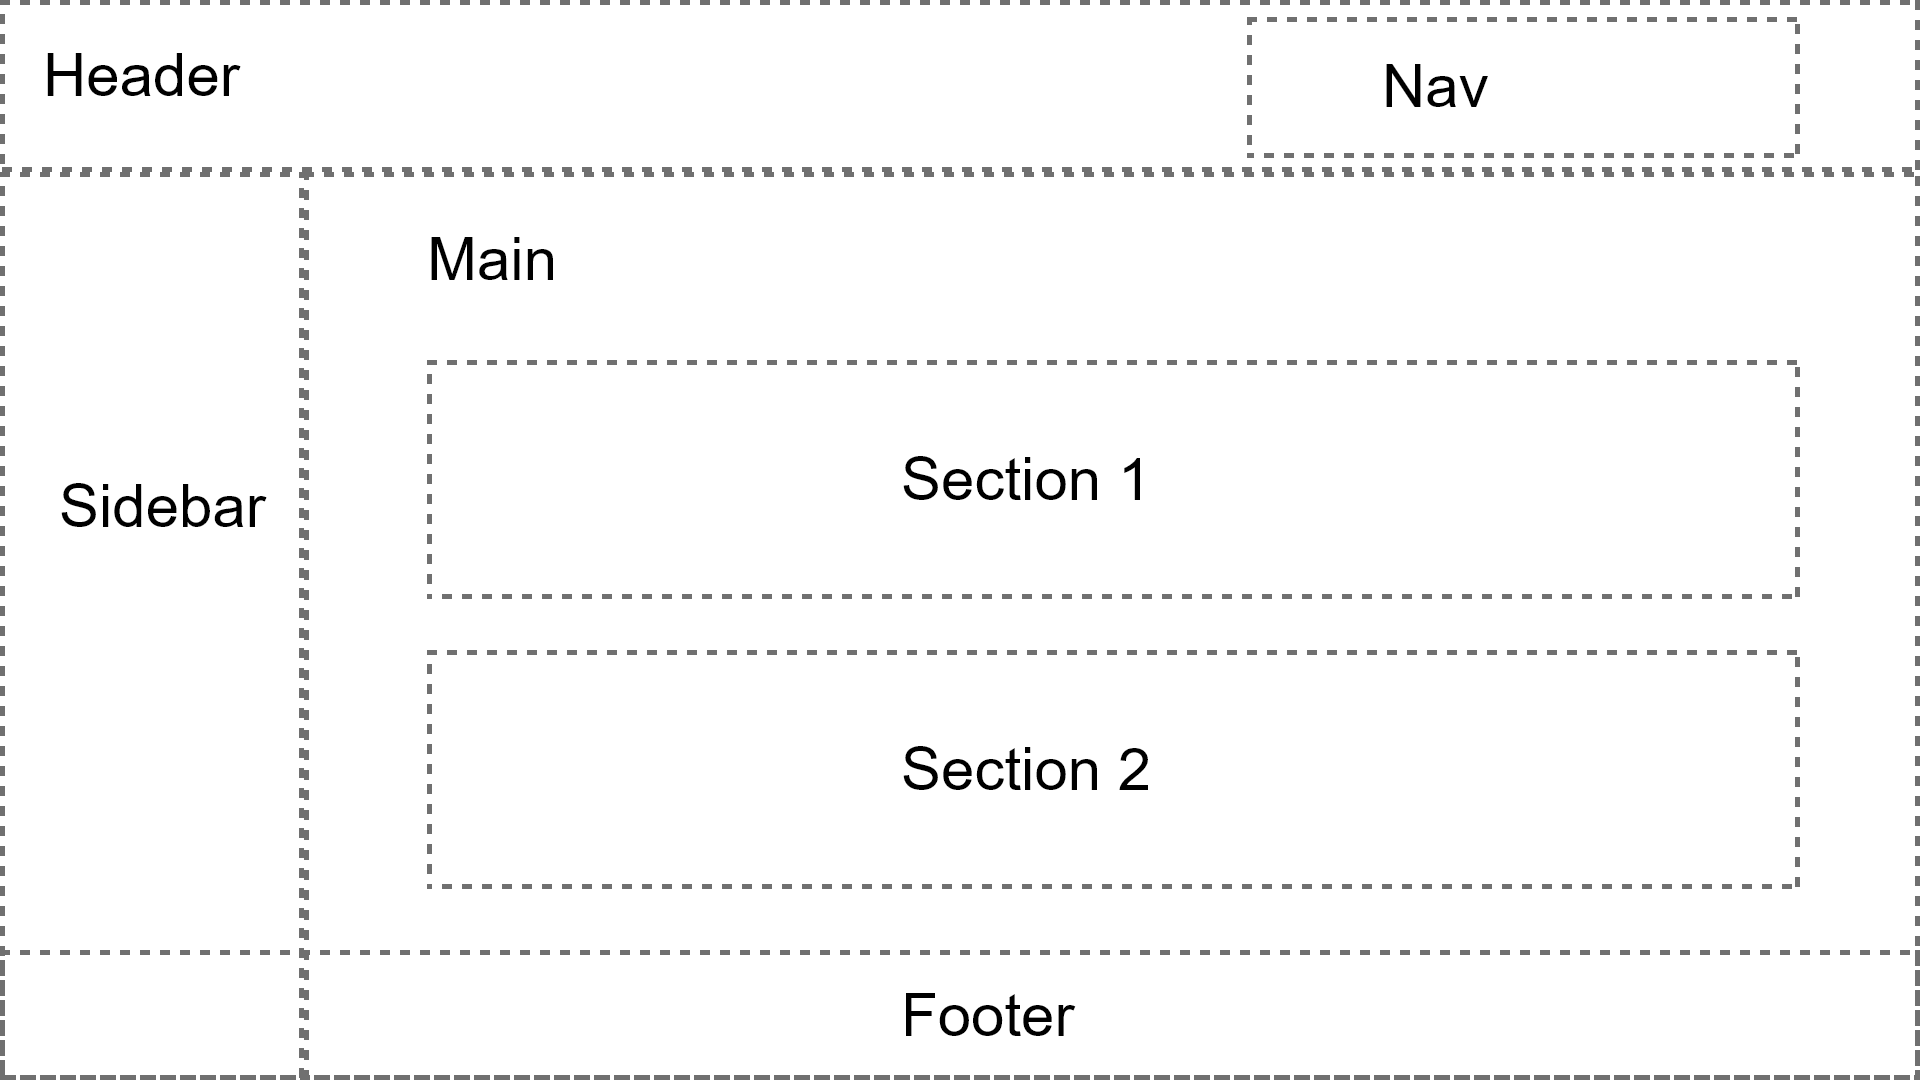
As you can see, using structural HTML tags will help search engines interpret your site and pick up what’s important correctly.
Using image correctly
A lot of the time, we need to include an image or two on our page to enrich user experience. While these images may help you enhance user experience, they may also harm your SEO ranking if you have been using them the wrong way. In this section, we will discuss a couple rules that you should always follow in order to make the most out of your SEO.
Always add the alt attribute
The <image> tag has an attribute called alt which allows you to provide a description text of the image. Normally the alt text will not be shown to users, it will only appear if your image cannot be loaded. Perhaps due to this reason, a lot of developers sometimes forget to add this attribute. However, this attribute could actually provide great values to your SEO ranking due to the fact that search engines cannot interpret your image. The alt attribute becomes the only way for search engines to identify what your image is about.
Consider the following example

The image on the left consists of the alt attribute. With this attribute, the image will no longer appear as a black placeholder to search engines, and more importantly it will start to appear in the google image search result.
Its HTML tag may look like this:
<image src="apple.jpg" alt="Image of Apple">The image on the right does not have the alt attribute, so search engines will replace it with a black placeholder and it will not appear in the Google image search result.
Its HTML tag may look like this:
<image src="apple.jpg">Background image vs the image tag
In some scenarios, we may want to display an image on our page by using the CSS property: background-image. While end users will not be able to tell a difference, when you use background-image instead of the actual image tag, search engines will not know you have an image on your page because they need the alt attribute in order to tell what is in your image. Therefore it is always recommended to use the image tag instead of background-image when possible.
example of using background-image:
<div style="background-image: url('apple.jpg')"></div>example of using image tag
<image src="apple.jpg" alt="Image of Apple">Avoid text on image
Similarly, if you need to show a text (slogan, production description, etc…) above your image, use an actual HTML tag such as <span> or <p> and use CSS to position the text where you want on the image instead of trying to embed the text directly in the image. The reason being that search engines will not try to analyze what is in your image, and of course you would want search engines to pick up the text when they are interpreting your website.
Additional meta tags
There are tons of meta tags and each comes with different meanings and purposes. Apart from the description meta tag that you should always add to your HTML, there are some other meta tags that could bring values to your SEO ranking as well.
Meta tags for Facebook
When people share the link of your website to Facebook, Facebook will read its reserved meta tags on your page. Adding these tags to your page will help Facebook prepare the preview image and text of your website, which could in the end attract more people to click the link shared to Facebook.
| Tags | Description |
| og:url | The canonical URL for your page. This should be the undecorated URL, without session variables, user identifying parameters, or counters. Likes and Shares for this URL will aggregate at this URL. For example, mobile domain URLs should point to the desktop version of the URL as the canonical URL to aggregate Likes and Shares across different versions of the page. |
| og:title | The title of your article without any branding such as your site name. |
| og:description | A brief description of the content, usually between 2 and 4 sentences. This will displayed below the title of the post on Facebook. |
| og:image | The URL of the image that appears when someone shares the content to Facebook. See below for more info, and check out our best practices guide to learn how to specify a high quality preview image. |
| fb:app_id | In order to use Facebook Insights you must add the app ID to your page. Insights lets you view analytics for traffic to your site from Facebook. Find the app ID in your App Dashboard. |
For example
<meta property="og:url" content="http://www.nytimes.com/2015/02/19/arts/international/when-great-minds-dont-think-alike.html" />
<meta property="og:type" content="article" />
<meta property="og:title" content="When Great Minds Don’t Think Alike" />
<meta property="og:description" content="How much does culture influence creative thinking?" />
<meta property="og:image" content="http://static01.nyt.com/images/2015/02/19/arts/international/19iht-btnumbers19A/19iht-btnumbers19A-facebookJumbo-v2.jpg" />
Meta tags for Twitter
Similarly, Twitter also has its own meta tags that you may add to your site in order to increase traffic from Twitter to your website.
| Tags | Description |
| twitter:title | Title of content (max 70 characters) |
| twitter:description | Description of content (maximum 200 characters) |
| twitter:image | URL of image to use in the card. Images must be less than 5MB in size. JPG, PNG, WEBP and GIF formats are supported. Only the first frame of an animated GIF will be used. SVG is not supported. |
| twitter:card | The card type |
User Accessibility
In the past, user accessibility has not been brought to people’s attention. However, in recent years Google strives to deliver the best websites that are user friendly and accessible in organic search results. While this is a big topic and may exceed the scope of this tutorial, there are some small and simple things you may start doing. For example adding an attribute called aria-label to your anchor tags or buttons. The aria-label attribute allows people with disabilities to access your site with ease.
To learn more about user accessibility, you may visit the complete guide provided by Google. https://www.google.com/accessibility/
Summary
We have covered a lot in this tutorial. In this next tutorial of In depth guide to SEO, we will switch our role to be a non technical website builder, and show you how you may apply what we learned in this tutorial to your website using WordPress.