
Introduction
In modern websites, animations are becoming more and more important. It distinguishes professional websites from good websites as it makes websites come alive and create great user experience. In this tutorial we will go over the necessary steps you need to take in order to make the following UI animation in Adobe XD.

Background
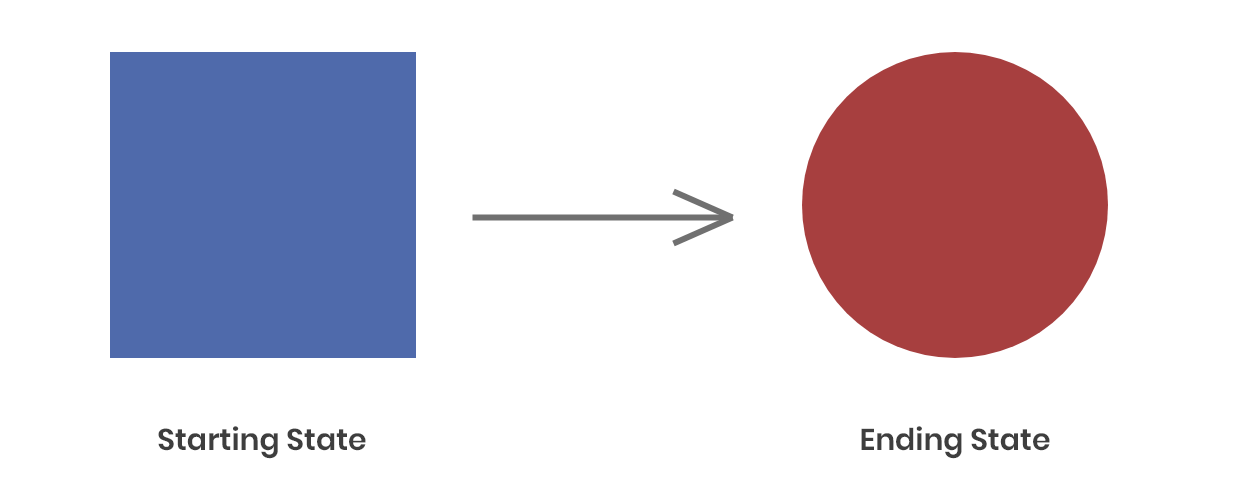
Before we can start implementing our design, let’s first try to understand the concept behind animation. Any complex animations can be broken down to a Starting State and an Ending State. In these two states, some properties (such as position, color, size, etc) can be different and an animation is just the process of changing from one state to another. To make complex animations, we will just need to add more states.
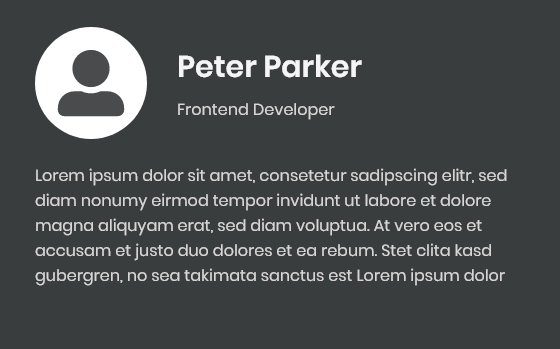
For this tutorial, we will animate the following business card. When users click on the business card, we want to animate it from the starting state to its ending state.

Animations Break Down
If we break down the animation step by step, we need to achieve the following:
- The user avatar, name, and job title should shrink in size and move to the top left corner
- After a brief delay, the detail description should slide in from the bottom
Looking through the break downs immediately we learned that there should be an intermediate state between the starting and the ending state. The intermediate state allows us to create a stop point at the end of animation one. Then for animation two, we will animate from the intermediate state to the ending state.
States preparations
For the animation to work, we need to prepare the following states:
Starting state:
- Initial state of user avatar, name, and job title
Intermediate state:
- User avatar, name, and job title shrink in size and move to the top left corner
- Should prepare detail description at the bottom of the business card, but be invisible
Ending state:
- Detail description becomes visible and move up to the ending position
Since we already have Starting State and Ending State, we just need to create the intermediate state.
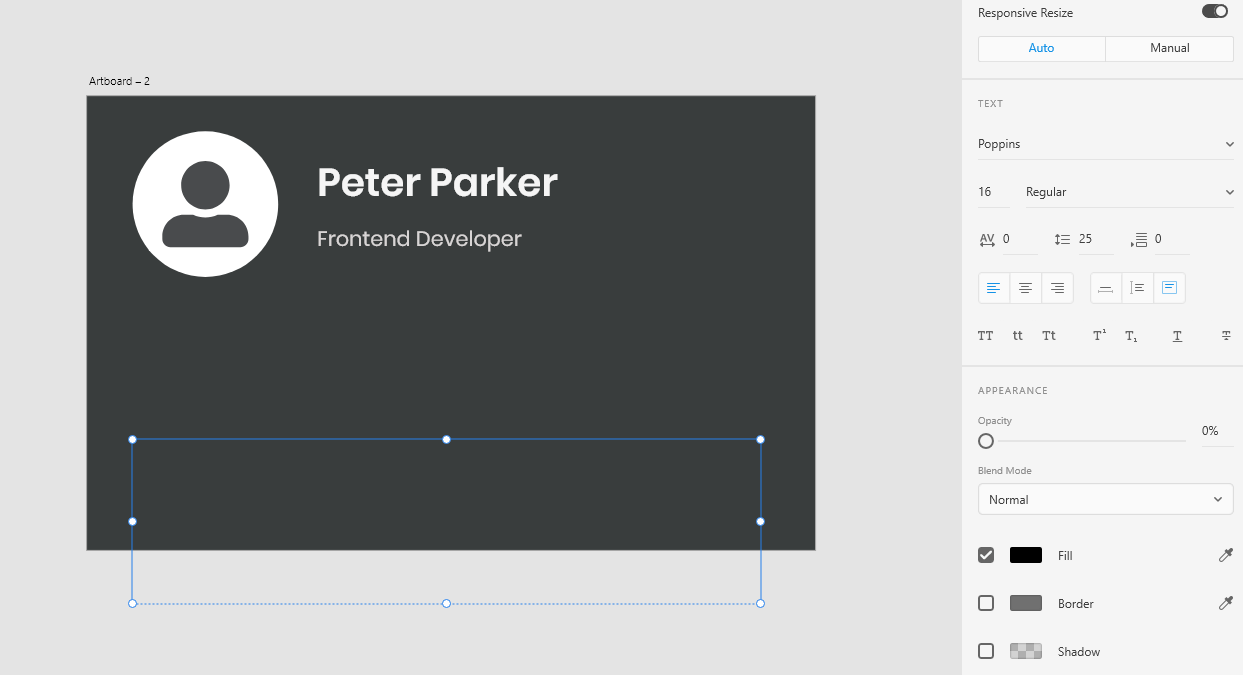
Notice how we place the detail description a little bit outside of the business card and make it invisible by setting the opacity to zero.
Animate the States
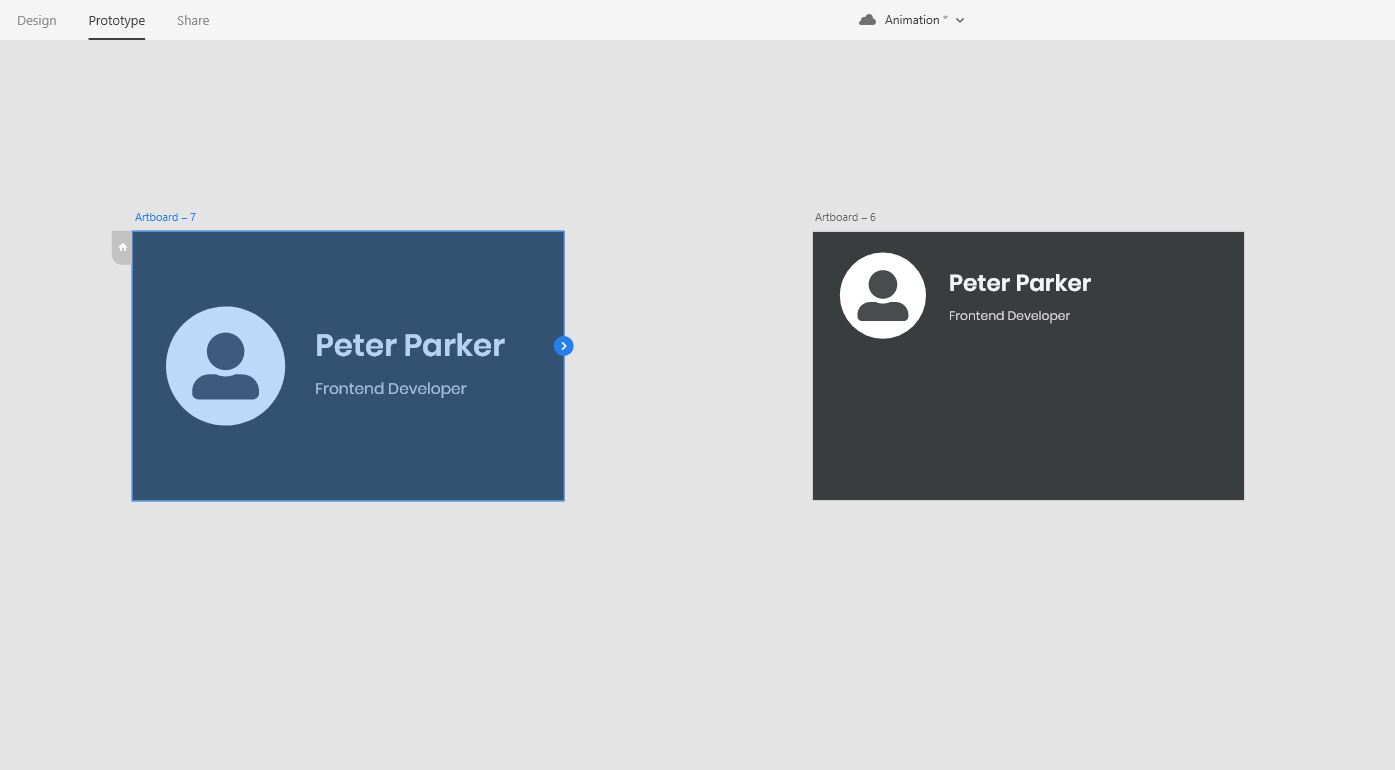
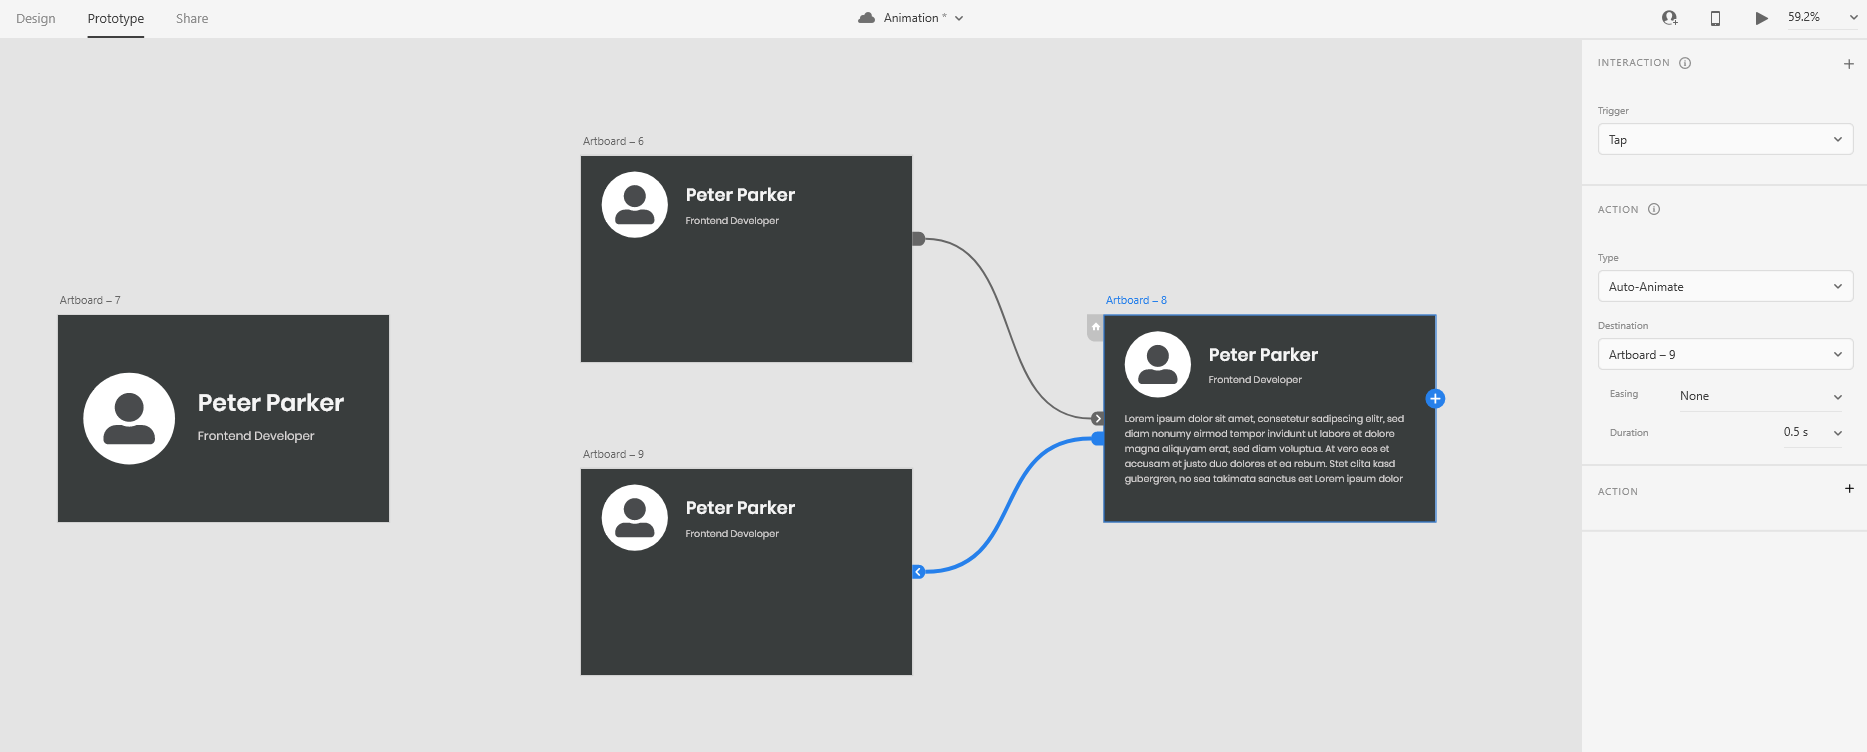
On Adobe XD, switch to the Prototype tab and select the Starting State artboard. When you select an artboard, an arrow will appear. Drag the arrow to connect with the Intermediate State artboard.
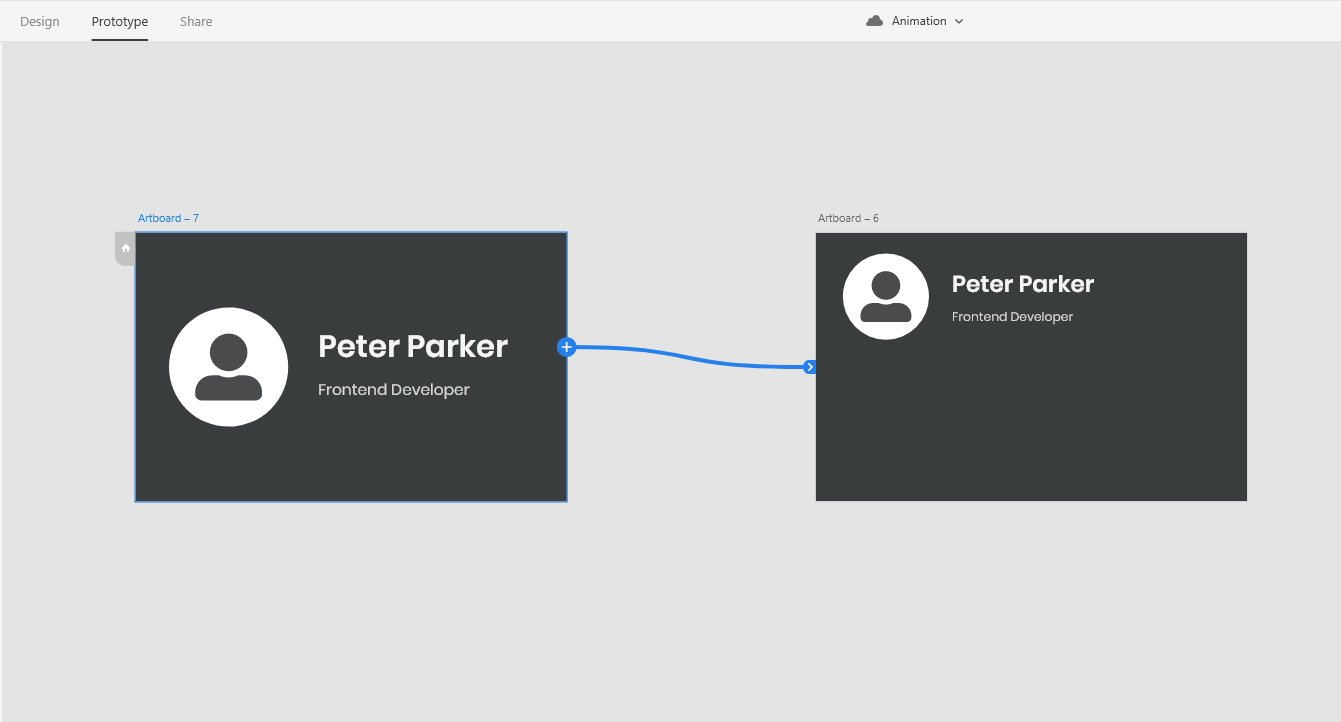
From the panel on the right, configure the following settings:
- Trigger: Tap
- Type: Auto-Animate
- Easing: None
- Duration: 0.5 s
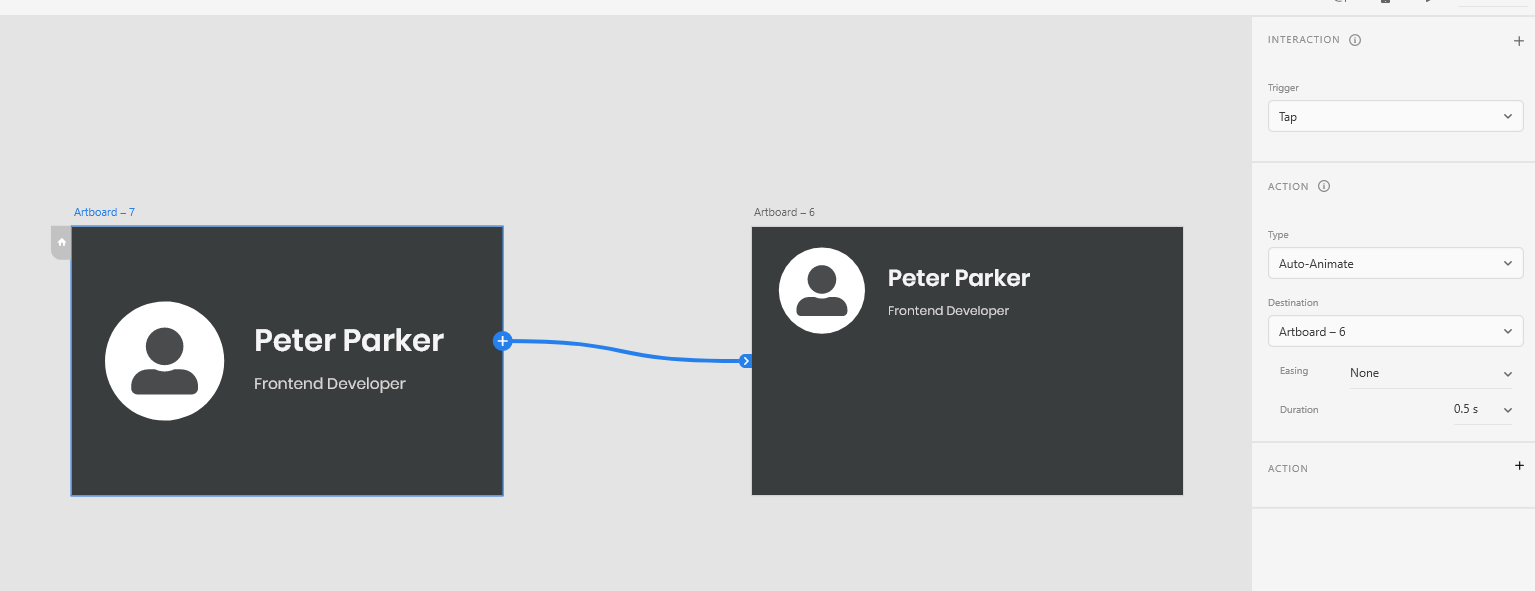
Trigger defies how the animation will start. The animation will start when users click on the Starting State of the business card, so we set the Trigger to “Tap”. The duration defines how long it will take to change from the Starting State to the Intermediate State.

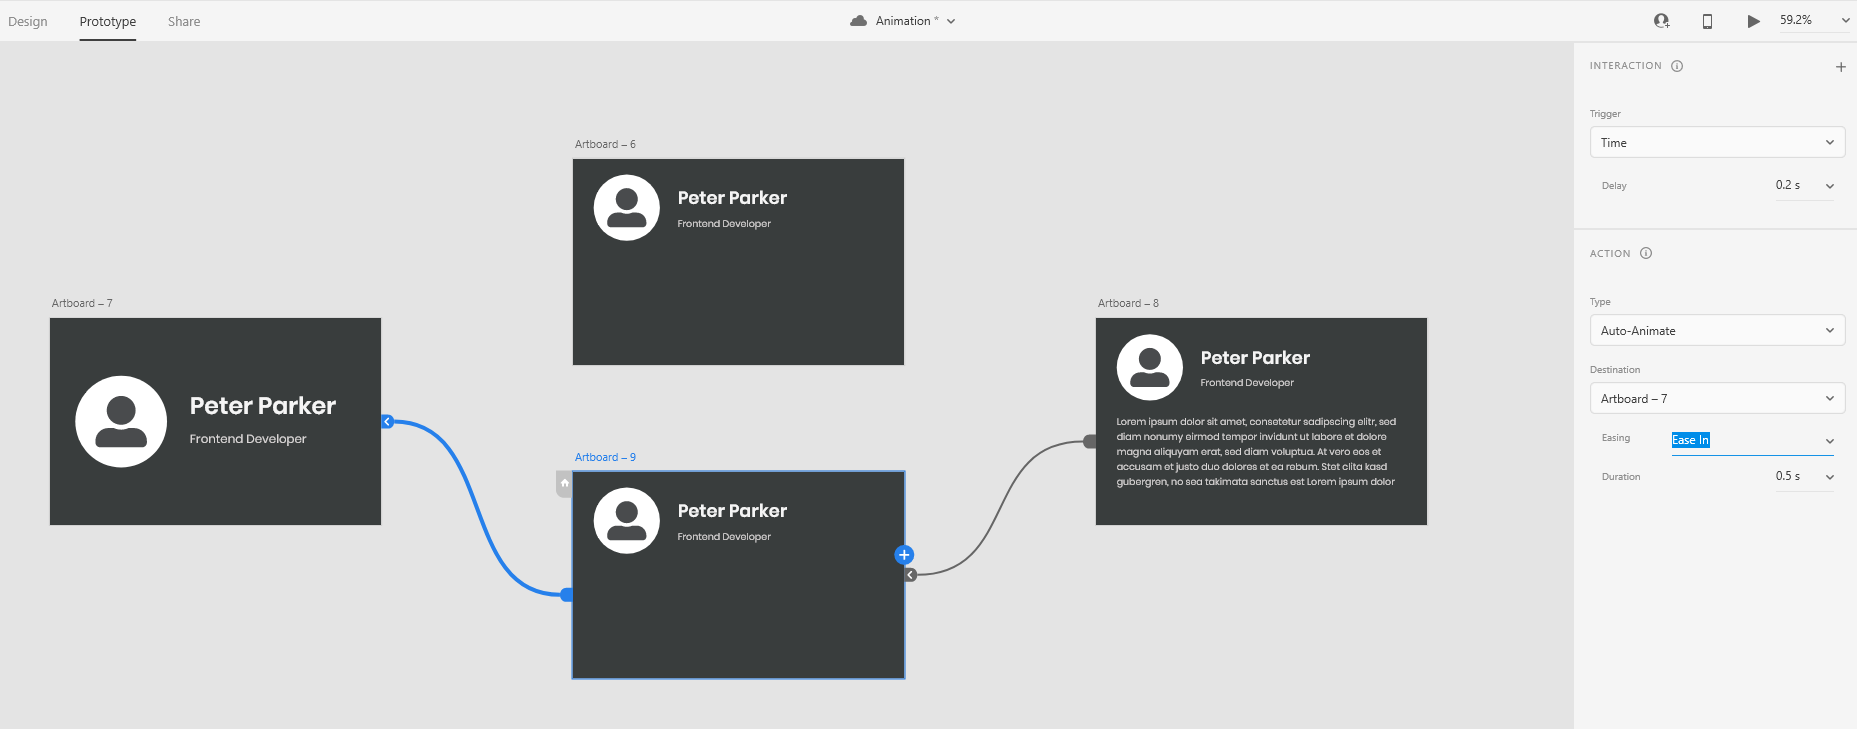
Next we want to animate from the Intermediate State to the Ending State. We can select the Intermediate State artboard and connect it with the Ending State artboard.
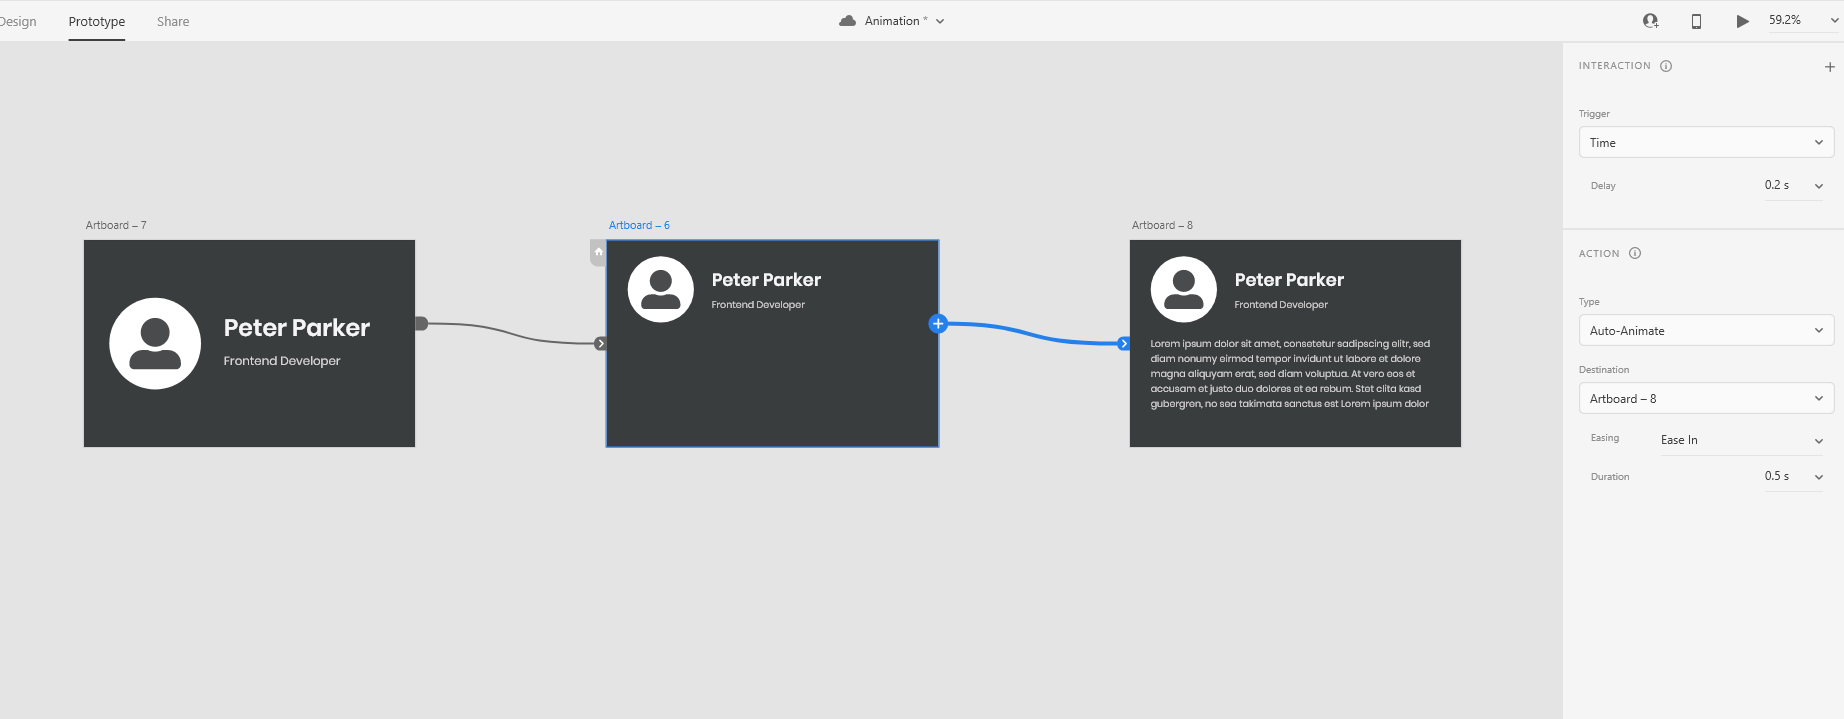
Apply the following settings:
- Trigger: Time, Delay: 0.2s
- Type: Auto-Animate
- Easing: Ease In
- Duration: 0.5 s
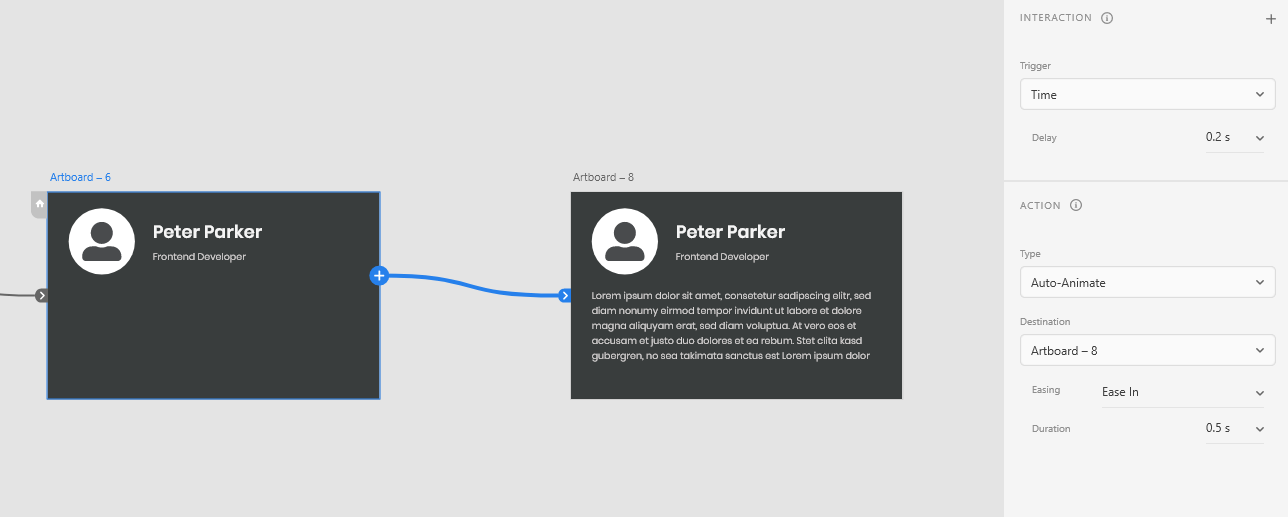
Notice this time we set the Trigger to be Time and add a delay of 0.2 s. With this setting, when users click on the business card and animate it from the Starting State to Intermediate State, it will automatically continue animate to the Ending State after a 0.2 s delay.

The Reverse Animation
Now the animation for the normal order (Starting to Ending State) is finished, let’s create the animation for the reverse order (Ending to Starting State). Similar to the normal order animation, we want to trigger the animation when users click on the Ending State, and of course we want the detail description to hide away first before we enlarge the avatar, name and job title. Therefore we will add a second Intermediate State for the reverse order animation.
Add a new arrow from the Ending State to the Second Intermediate State.
For the Interaction settings, we can apply the same settings as from the Starting State to Ending State.
Interaction Settings
- Trigger: Tap
- Type: Auto-Animate
- Easing: None
- Duration: 0.5 s
Next, link the Second Intermediate State back to the Starting State.
We can apply the same Interaction settings as from the First Intermediate State to Ending State.
- Trigger: Time, Delay: 0.2s
- Type: Auto-Animate
- Easing: Ease In
- Duration: 0.5 s
Final Result

Conclusion
In this tutorial we have learned the concept behind animations and how to implement them in Adobe XD. In the next tutorial, we will make the animation come alive by actually implementing it in CSS.